Getting Started
In this chapter we are going to learn how to create our first application using PWCT
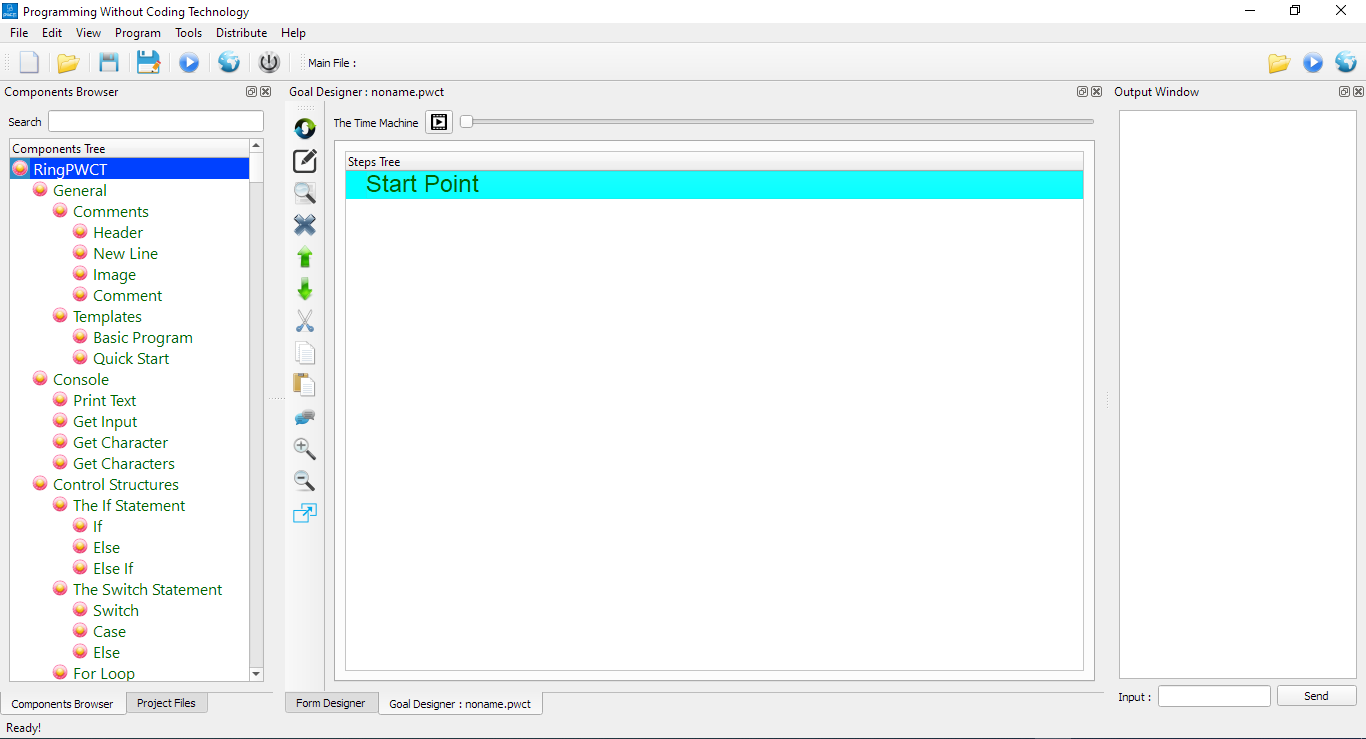
The Main Window
When we run PWCT, The Main Window contains the next dockable windows
Components Browser
Project Files
Form Designer
Output Window
Goal Designer
Components Browser
1 - Using the Components Browser, We can select a component to use
2 - Each component could provide an Interaction Page (Data-Entry Window)
3 - The Component lead the steps generation process in the Steps Tree (Inside the Goal Designer)
4 - The Component also generate the Textual source code in the background
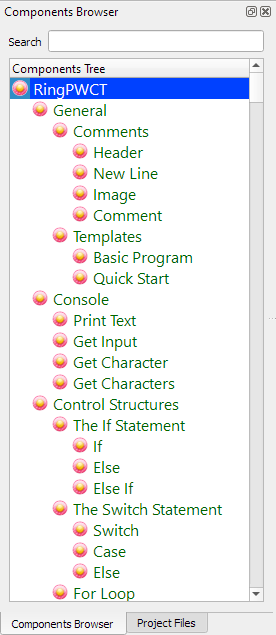
5 - We can search in the Components Tree by typing the Component name or some letters in the name
For example, by typing the letter ‘p’ we can find the (Print Text) component
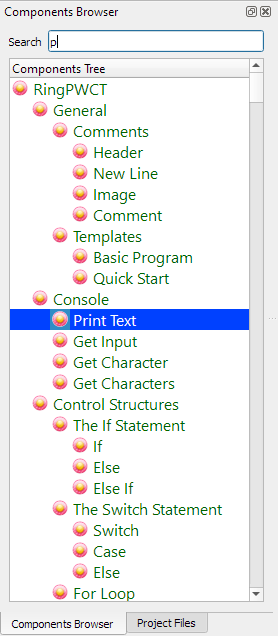
6 - To use the component after selecting it, Press (Enter) or (Double Click) using the Mouse
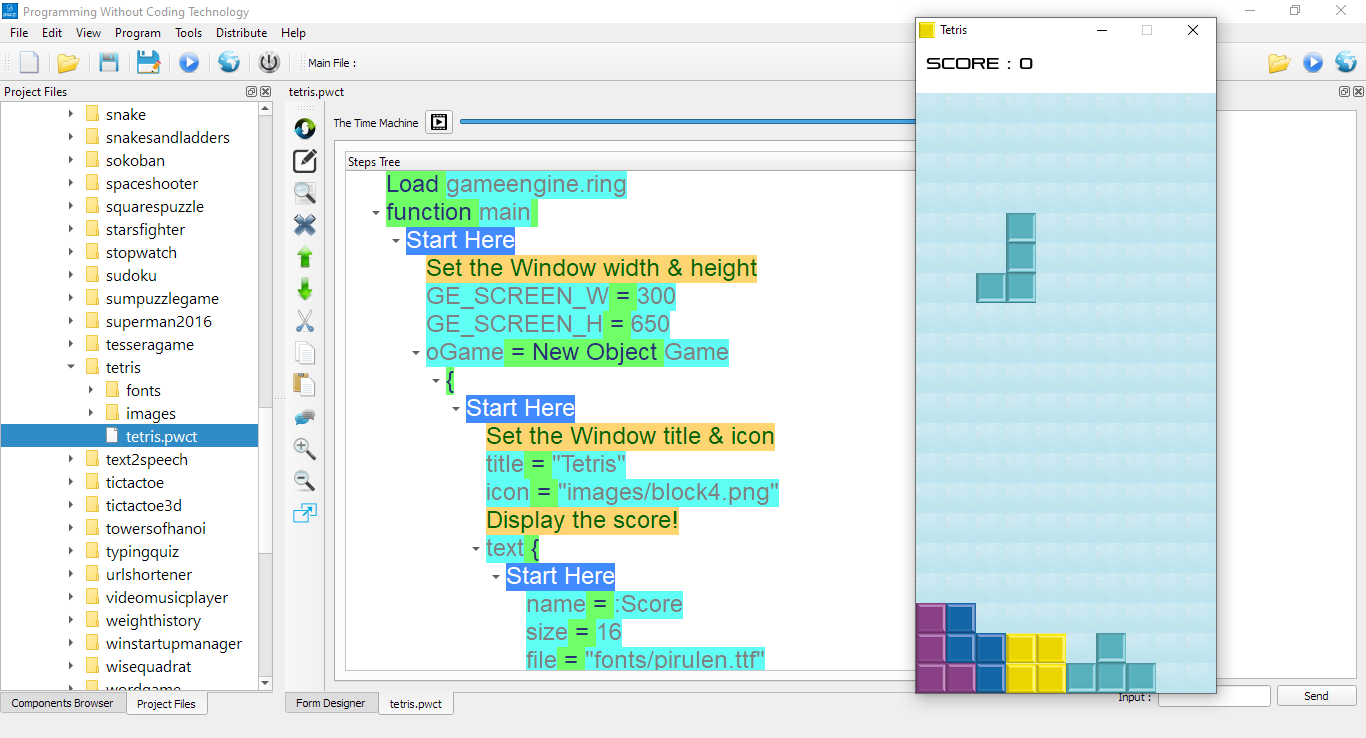
Project Files
Using the Project Files window, We can open visual source files quickly!

For example, We can open the file (tetris.pwct) which contains the Tetris game!
To run this game we can click on the Run button in the Main Toolbar (Ctrl+F5)
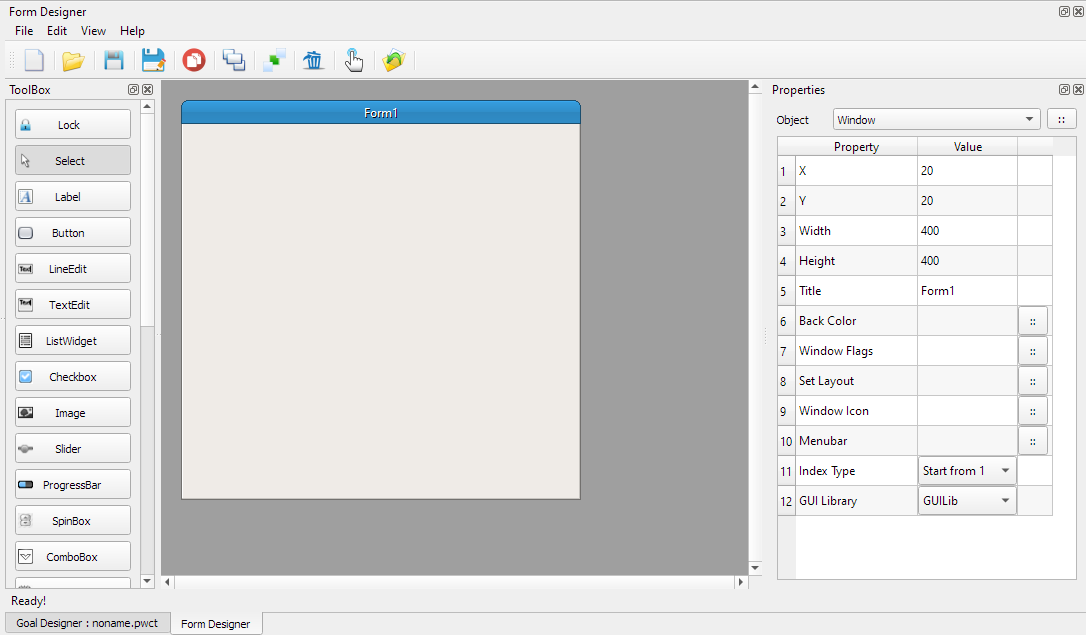
Form Designer
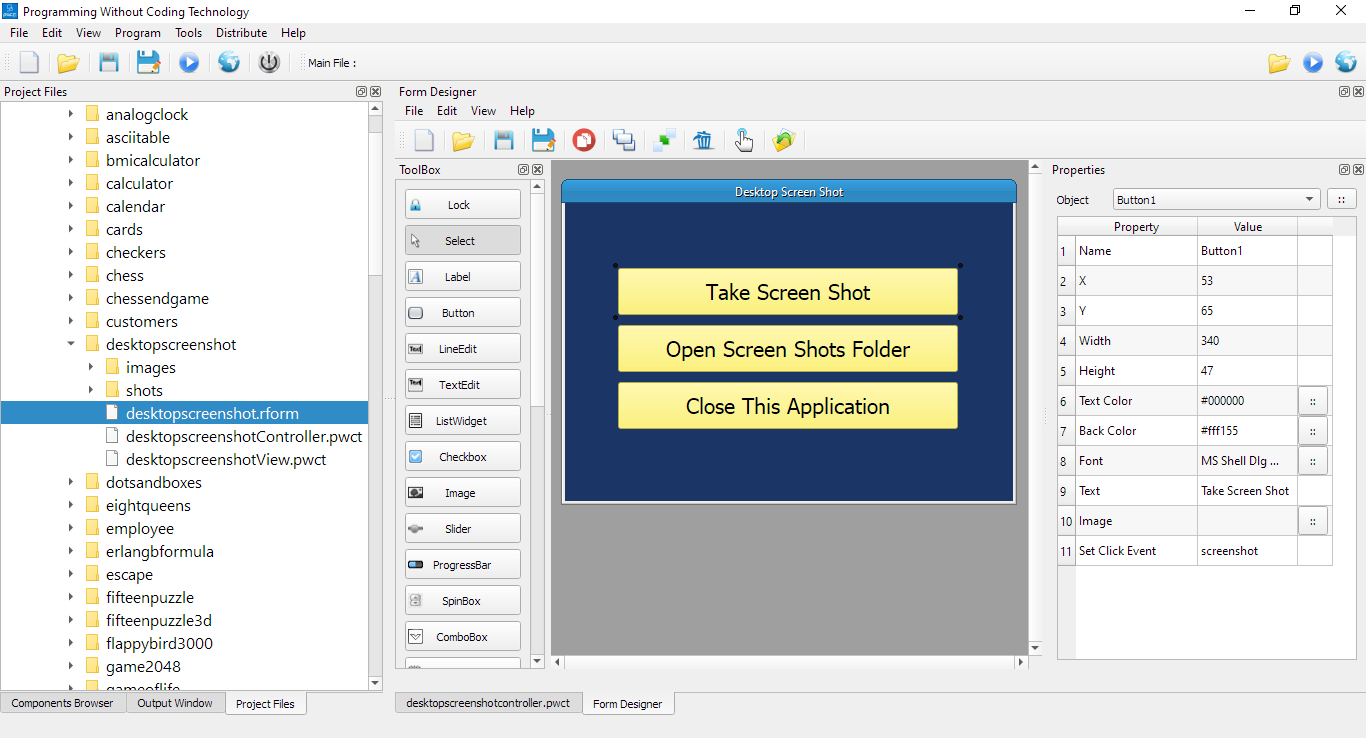
Using the Form Designer, We can design the application forms (User Interface)
For example, The User Interface of the Desktop Screen Shot application is designed using the Form Designer
Output Window
Using the Output Window, We can see the programs output!
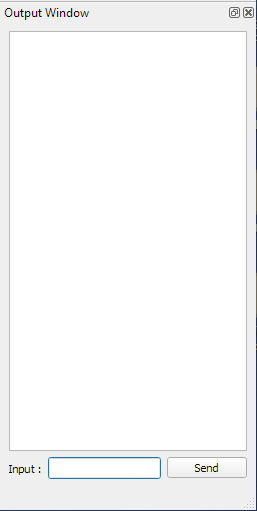
Also we can provide the required input for console applications
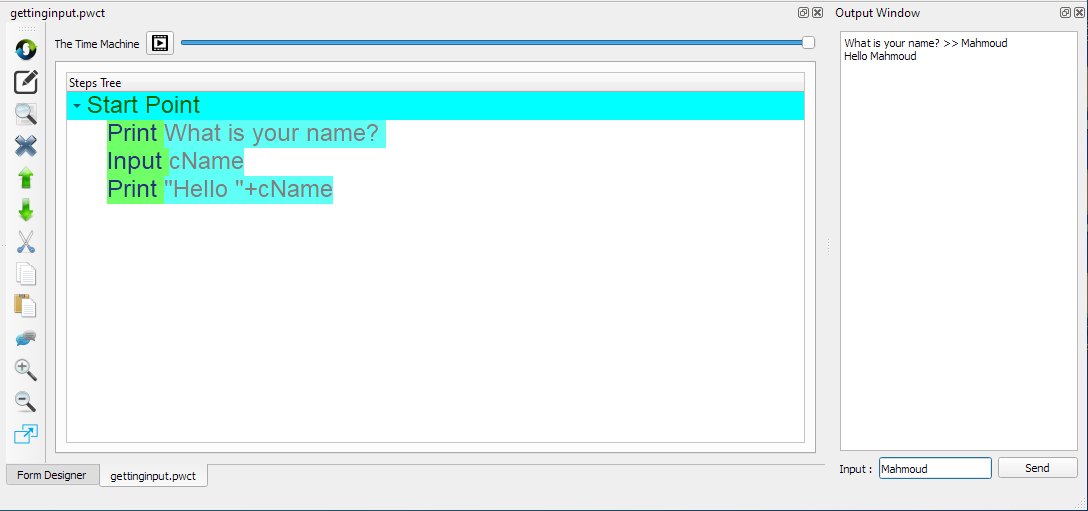
For example, The next console application ask about the User Name!
We can type the name in the Textbox then press (Enter) or click on the (Send) button
Goal Designer
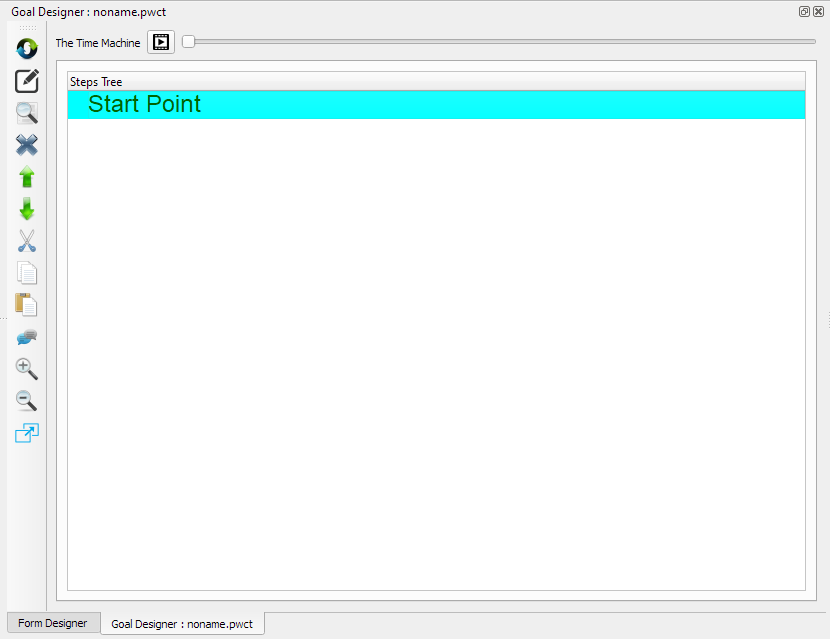
1 - Contains the Steps Tree that represent the logic behind our program
2 - Contains buttons that we can use to control the steps tree
3 - Contains the Time Machine
3.1 - Support running the program in the past
3.2 - Support playing the program as movie
Hello World Program
In this section we will learn how to create the (Hello, World!) program
Section Contents:
How to create the program using the Mouse
The Steps Summary
How to create the program using the Keyboard Shortcuts
Hello World Program (Using the Mouse)
From the Components Browser, Select the (Print Text) component
Then double click using the Mouse

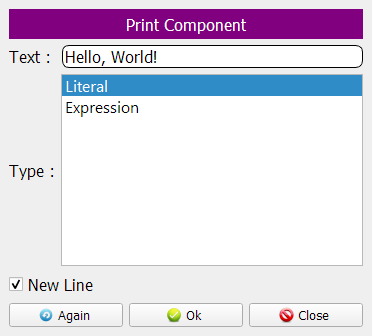
After selecting the component, an interaction page will appears in the Goal Designer
Using this Interaction Page we can determine the text that will be printed on the screen
Type: Hello, World!
Then click the (Ok) button
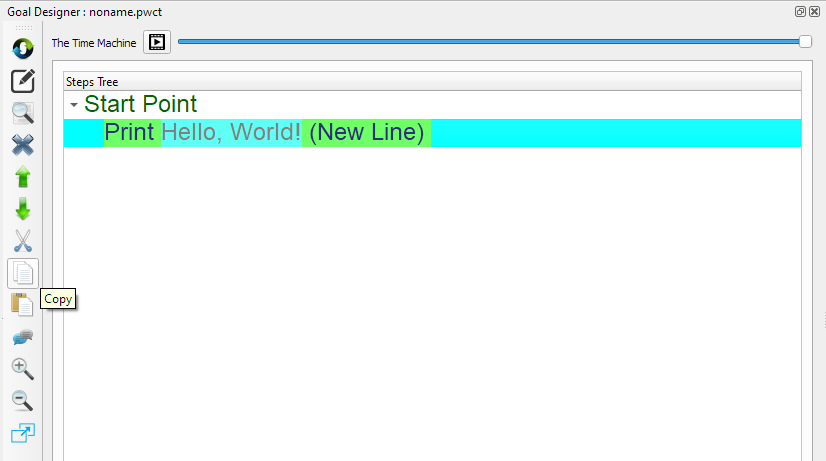
This will generate the next step in the Goal Designer Window

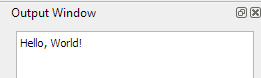
Now we can run the program and see the program output
To run the program click on the (Run) button from the Main Toolbar

The next output will appears in the Output Window
Hello World Program (Steps Summary)
Select (Print Text) from the Components Browser
Enter (Hello, World!) then click (Ok) in the Interaction Page
Click (Run) from the Main Toolbar

Hello World Program (Using the Keyboard)
Inside the Goal Designer window press the letter ‘p’
The Search Textbox will be active, and the pressed letter will be written there
This will select the (Print Text) component
Press (Enter) to use the (Print Text) Component
Write (Hello, World!) then press CTRL+W (Similar to clicking on the OK button)
Press CTRL+F5 to run the program!
Tip
Pressing any letter inside the Goal Designer will move us to the Components Browser
Using the Goal Designer
In this section we will learn about using the Goal Designer
Section contents:
Copy & Paste the Steps
Modify the Steps
Using the Time Machine
Moving Steps Up & Down
Cut & Paste Steps
Inserting Steps
Comment/Uncomment Steps
Deleting Steps
Search and Replace
Using the Again Button
Copy & Paste the Steps
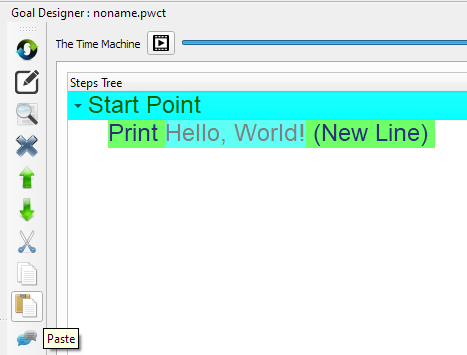
Select the step (Print Hello, World!) then click on the (Copy) button or press Ctrl+C
Now select the Start Point then click on the (Paste) button or press Ctrl+V
We can do the paste operation many times
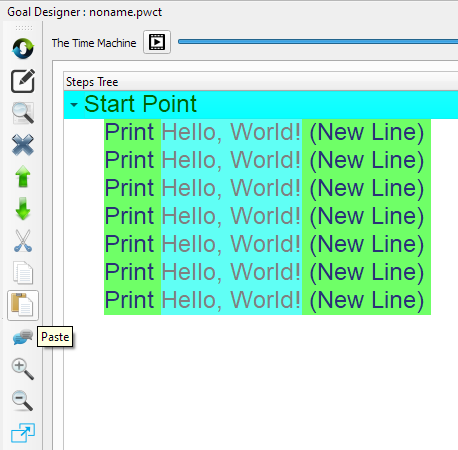
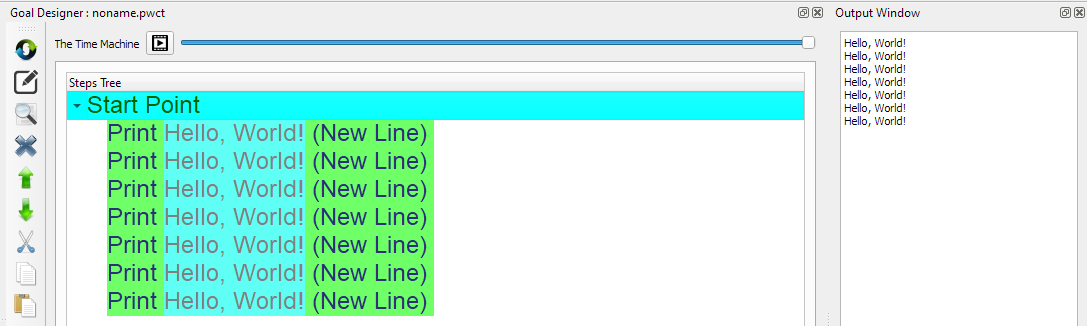
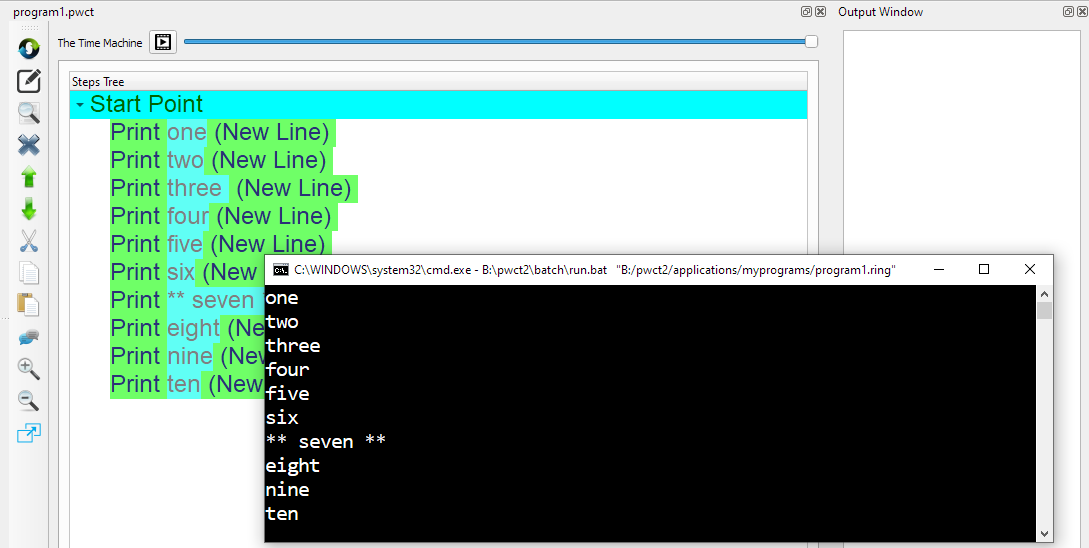
Now when we run the program using Ctrl+F5 we can see the (Hello, World!) message printed seven times
Sure it’s not the right way to program something like this because it’s better to use a For-Loop
Modify the Steps
To modify a step, We can click on the (Modify) button or press Ctrl+E or double click on the step.
Select the first step, Then press Ctrl+E
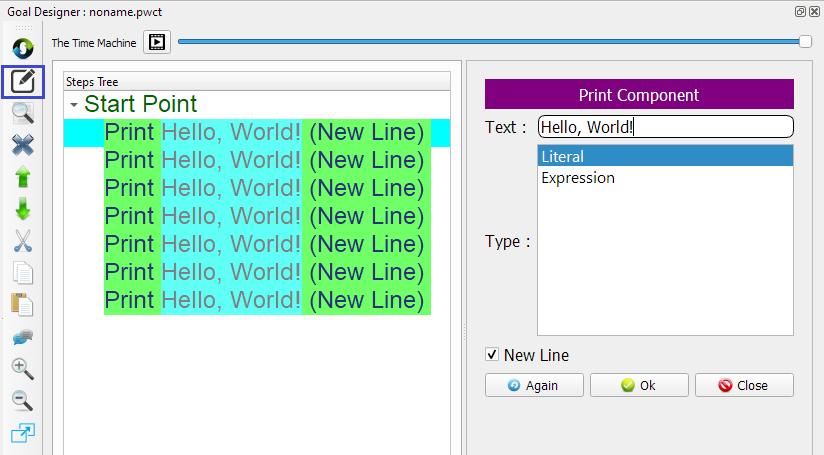
Change the Text from (Hello, World!) to (one) then press Ctrl+W

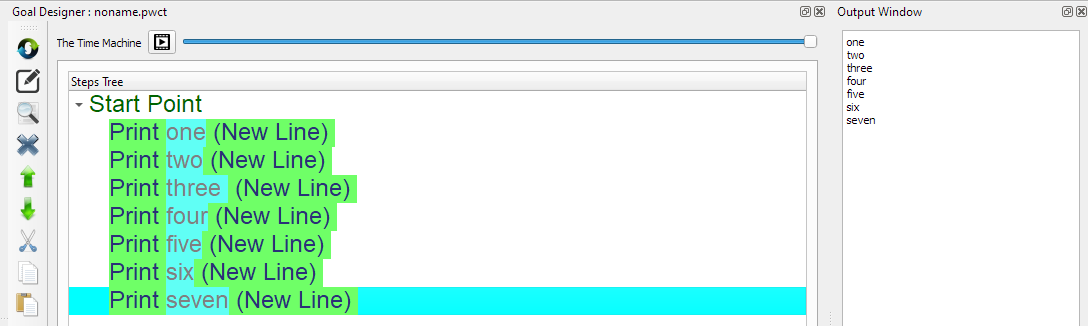
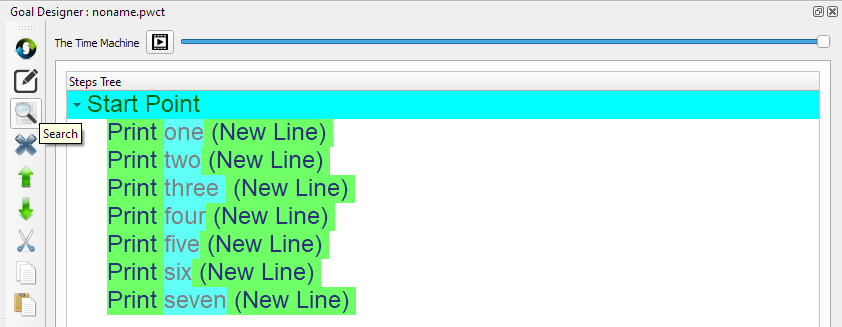
Change all of the steps to print the numbers from (one) to (seven)
Then run the program using Ctrl+F5
Using the Time Machine
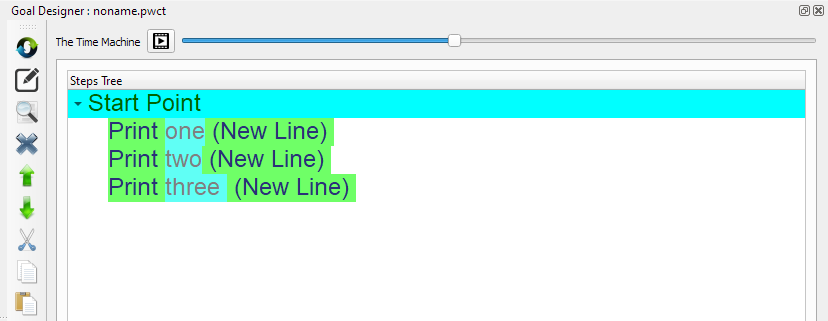
Inside the Goal Designer and using The Time Machine Slider we can move backward along the Time Dimension
For example, At this point in the past we have three steps only
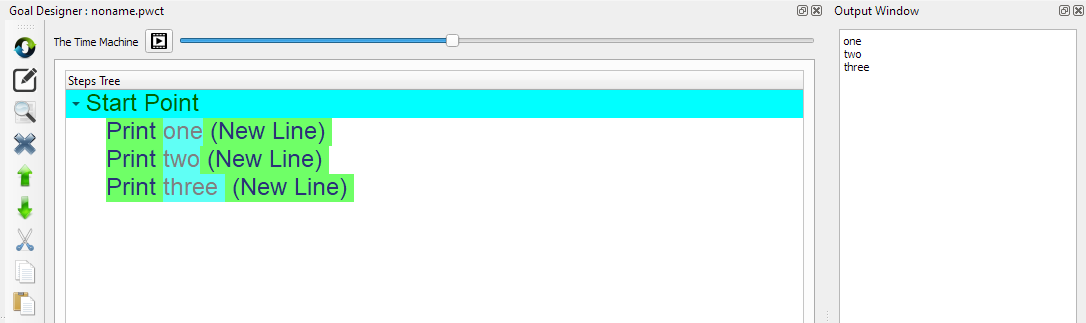
We can run the program in the past using Ctrl+F5
This will print (one two three) - Each word in separate line
We can move forward and go to the present where we have all of the seven steps
Also we can click on the (Play) button to play the program as movie
This will create the program step-by-step to learn how to generate each step
This will display the selected component in the Components Browser and the Interaction Pages too!

For example, at this point in the past, Nothing exist!

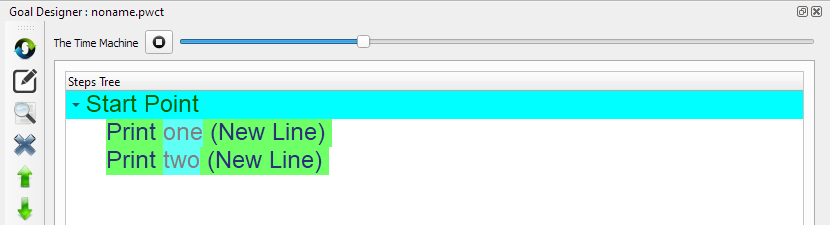
While at this point we have two steps
Moving Steps Up & Down
We can change the order of the steps inside the Steps Tree using the Up & Down buttons
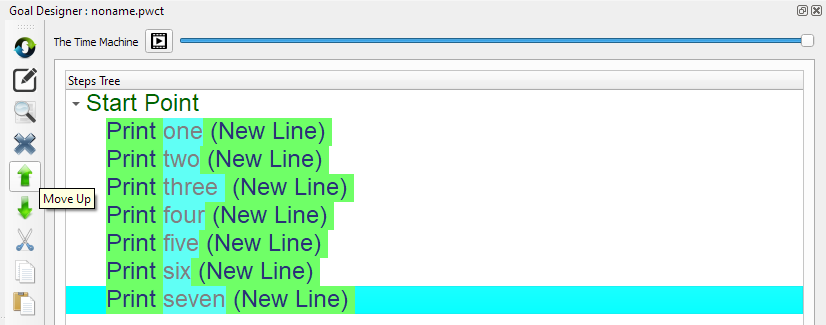
For Example, Select the step (Print seven) then click on the Up button or press Ctrl+U
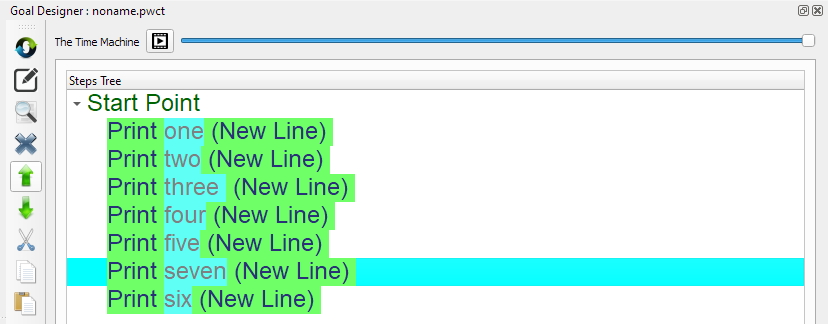
Now we see the (Print seven) comes before (Print six)
Click on the Up button many times until the (Print seven) step becomes the first step
Then run the program using Ctrl+F5

Cut & Paste Steps
Select the (Print seven) step then click on the (Cut) button or press Ctrl+X
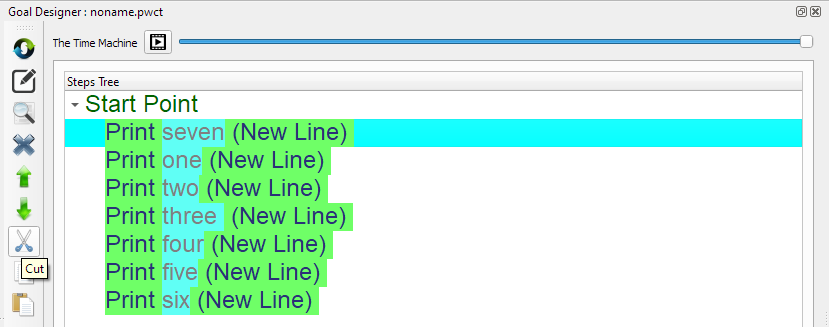
Select the (Start Point) then click on the (Paste) button or press Ctrl+V

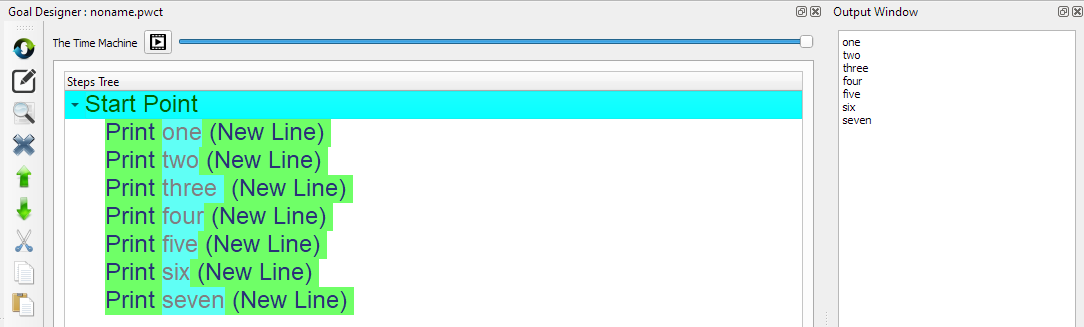
This will paste the (Print seven) step after the (Print six) step
Run the program using Ctrl+F5
Inserting Steps
To insert a new step after the (Print three) step
At first select the (Print three) step then start a new interaction process
Start using the (Print Text) component
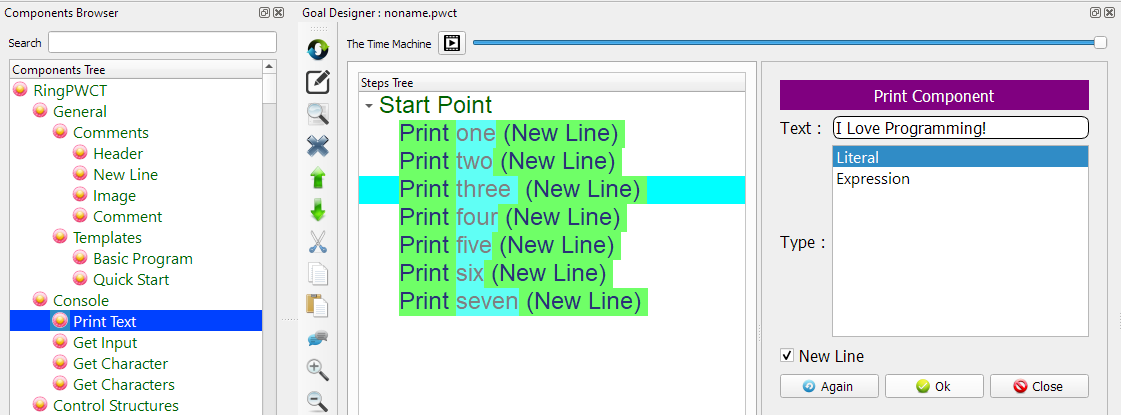
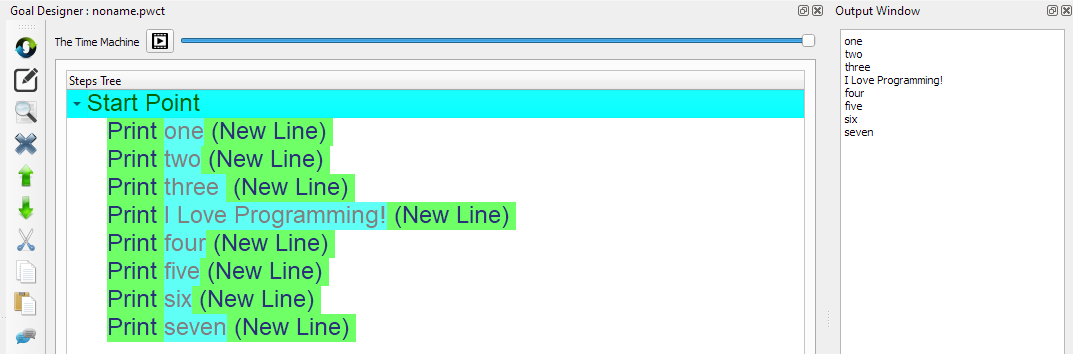
The new generated step will be added directly after the (Print three) step
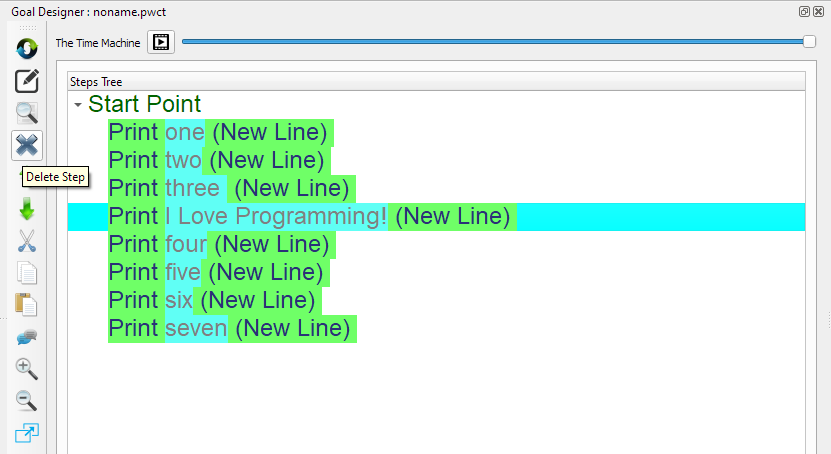
Deleting Steps
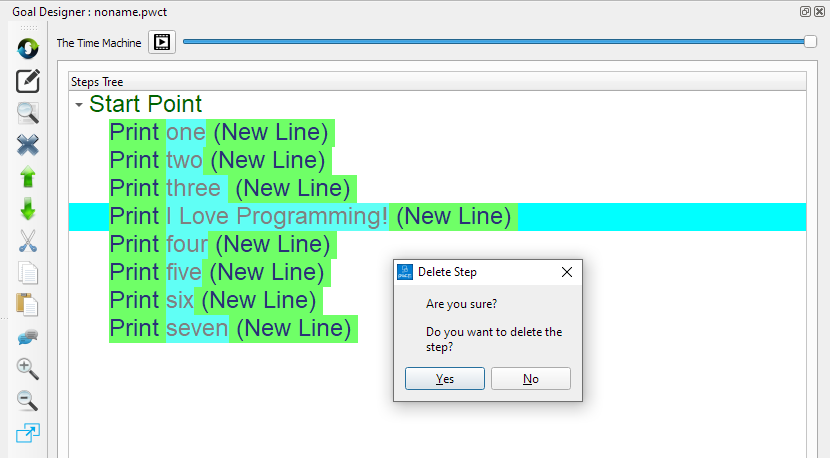
To delete a step, select it then click on the (Delete) button
Click (Yes) or press (Enter) to delete the step
Search and Replace
To find a step, click the (Search) button or press Ctrl+F
For example, In the Search window type the letter “o” then click (Search) or press Enter
Once we select a step from the Results Listbox, this step will be the active step in the Steps Tree

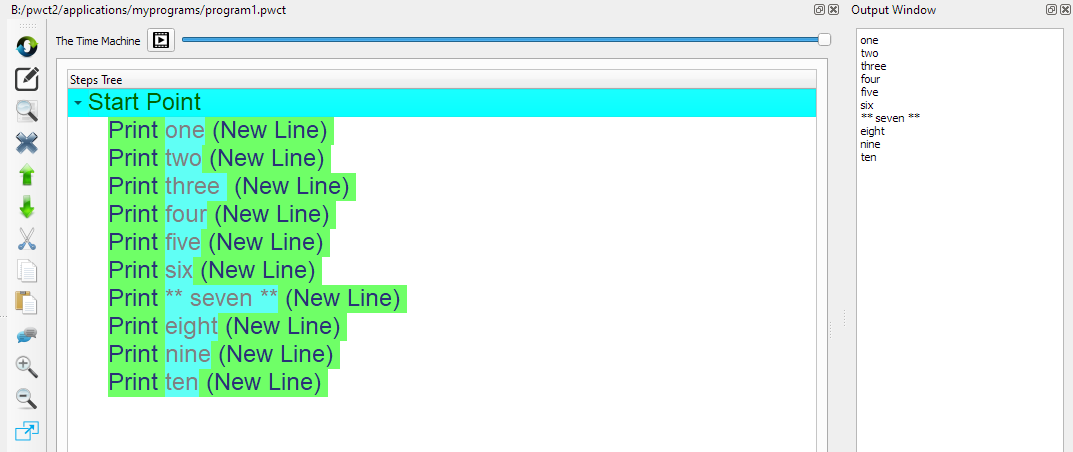
We can replace the text with another text
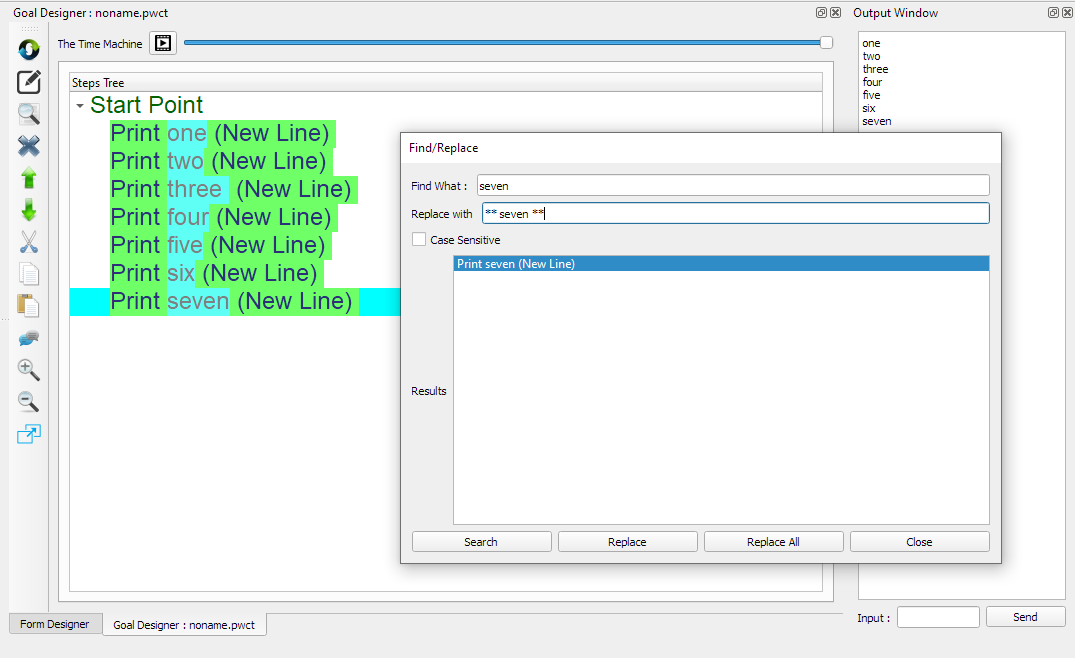
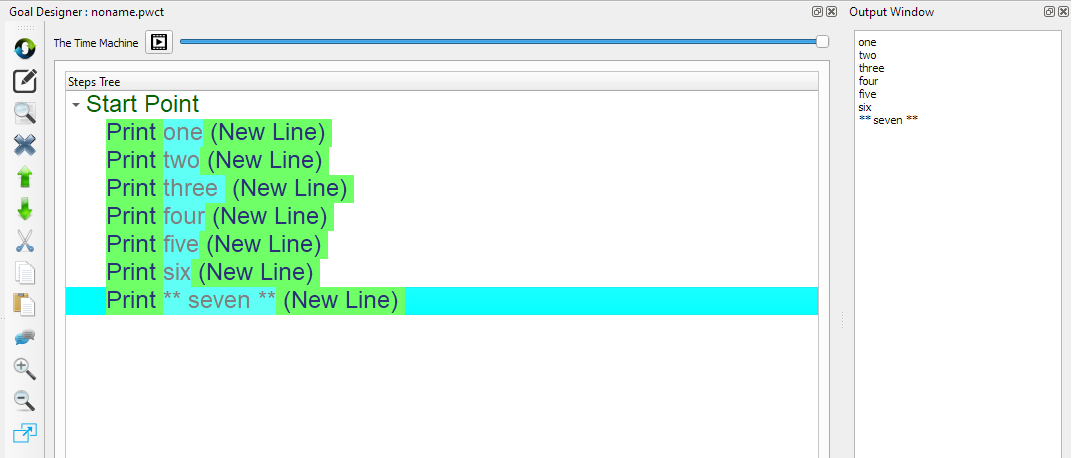
For example replace (seven) with ( ** seven ** ) then click the (Replace) button
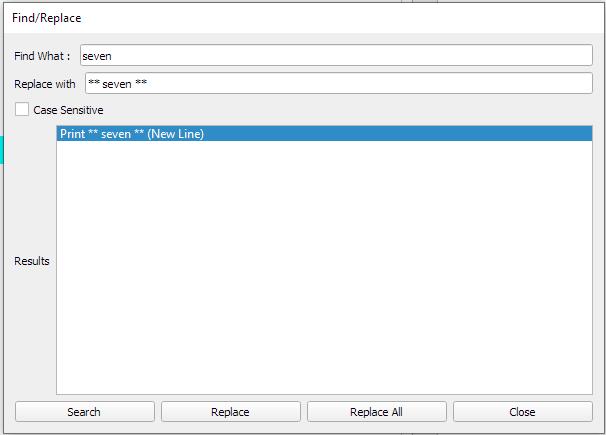
Then run the program using Ctrl+F5 to see the change in the output
Using the Again Button
We can use the same component many times using the (Again) button
For example, when we use the (Print Text) component, and after writing the text (eight) click (Again) instead of (Ok)
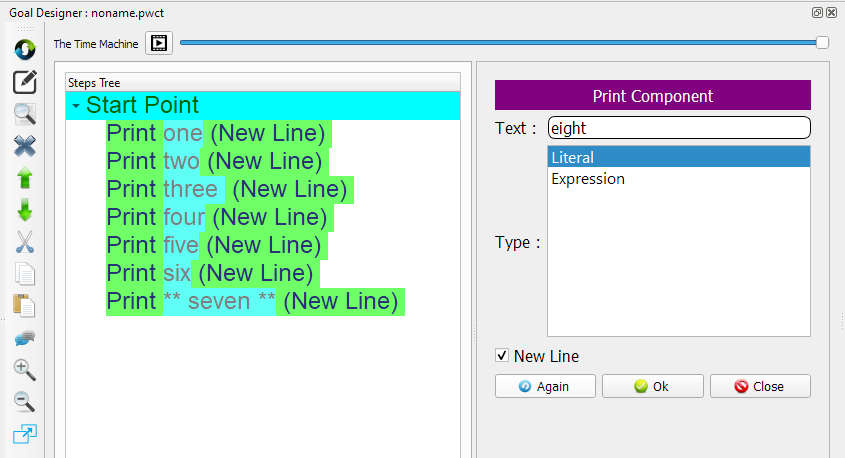
This will generate the step (Print eight) in the steps tree
Also we can use the interaction page to write another text like (nine)
Click (again)
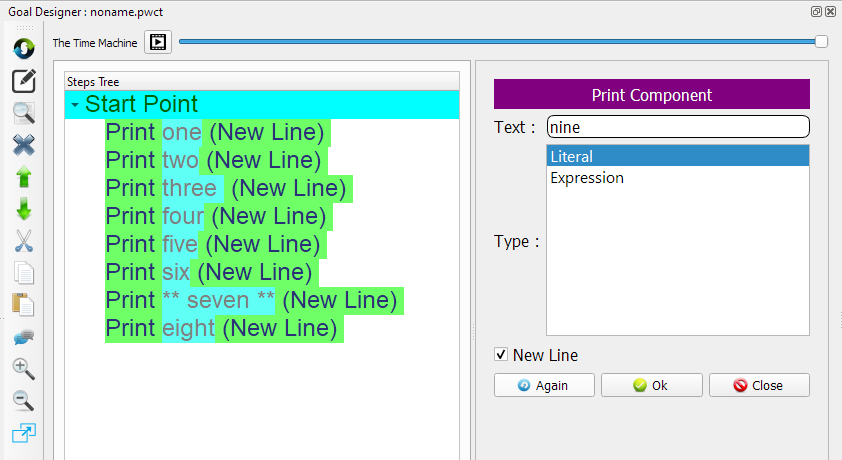
Now we have the step (Print nine) in the Steps Tree
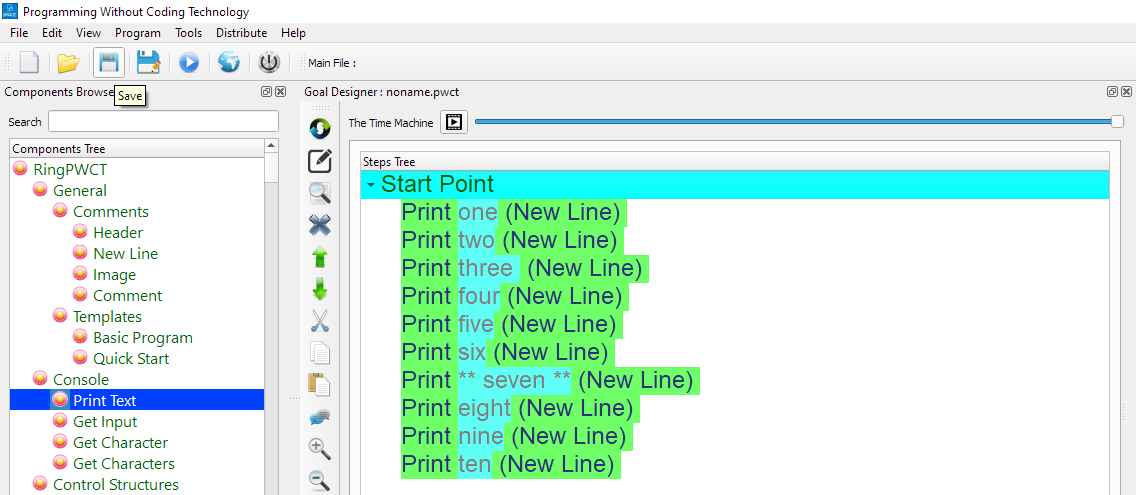
This time we will write (ten) then click (Ok) or press Ctrl+W

Run the program using Ctrl+F5 to see the output

Undo
If we did something wrong in the Steps Tree (Like deleting a step) we can cancel this using Ctrl+Z
Also we can select (Undo) from the (Edit) menu instead of pressing Ctrl+Z
Visual Source Files
In this section we will learn about the Visual Source Files ( *.pwct )
Section contents:
Saving the file
Opening the file
Starting new file
Saving the file
To save the file, Click on the (Save) button from the Main Toolbar or press Ctrl+S
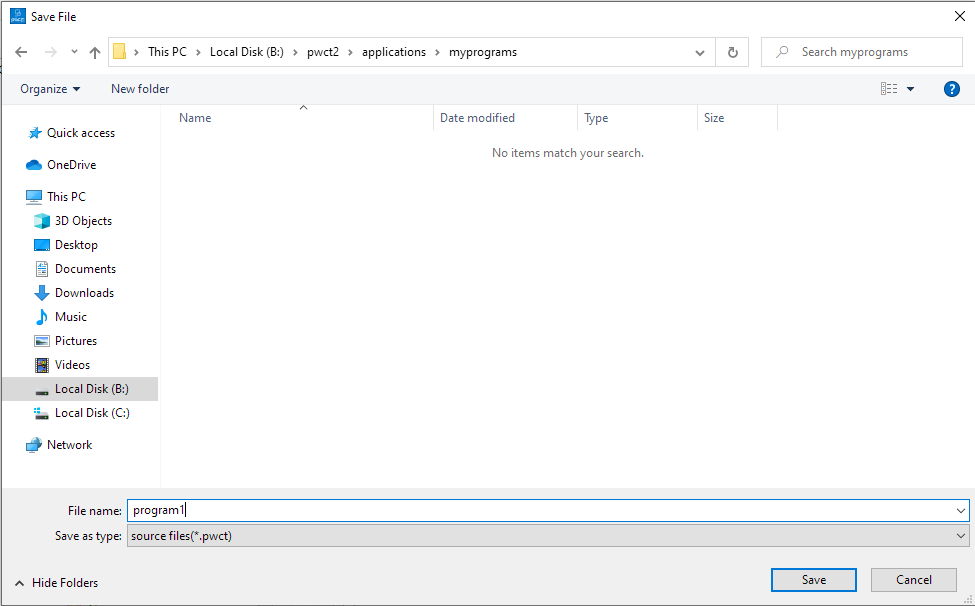
Select the folder, or create a new folder
For example : pwct2/applications/myprograms
Then type the file name : program1
The saved file will be progam1.pwct
After saving the file, the file name will be used as the window title in the Goal Designer
Opening the file
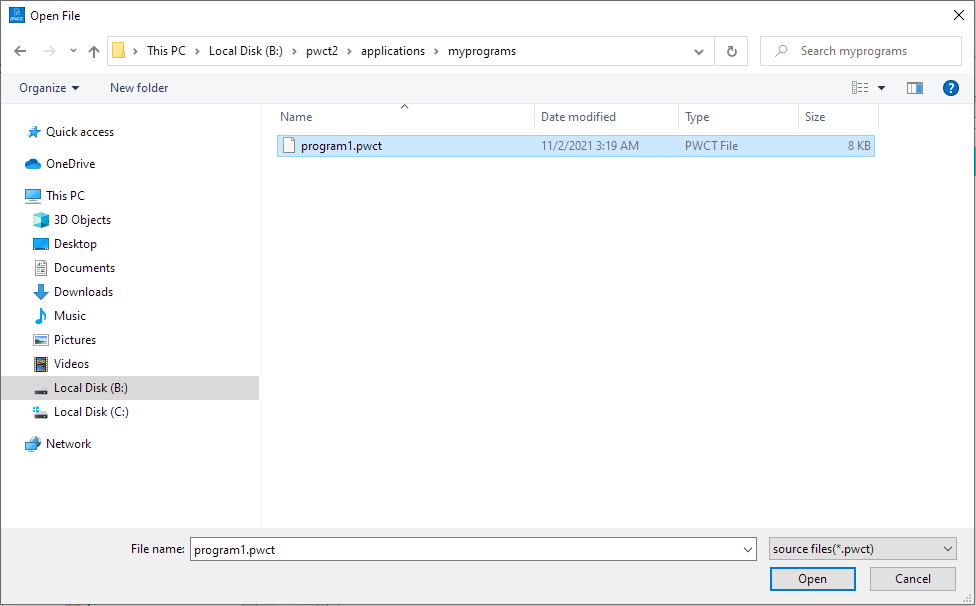
To open a file, click on the (Open) button from the Main Toolbar
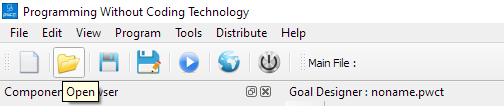
Select the file, for example: program1.pwct
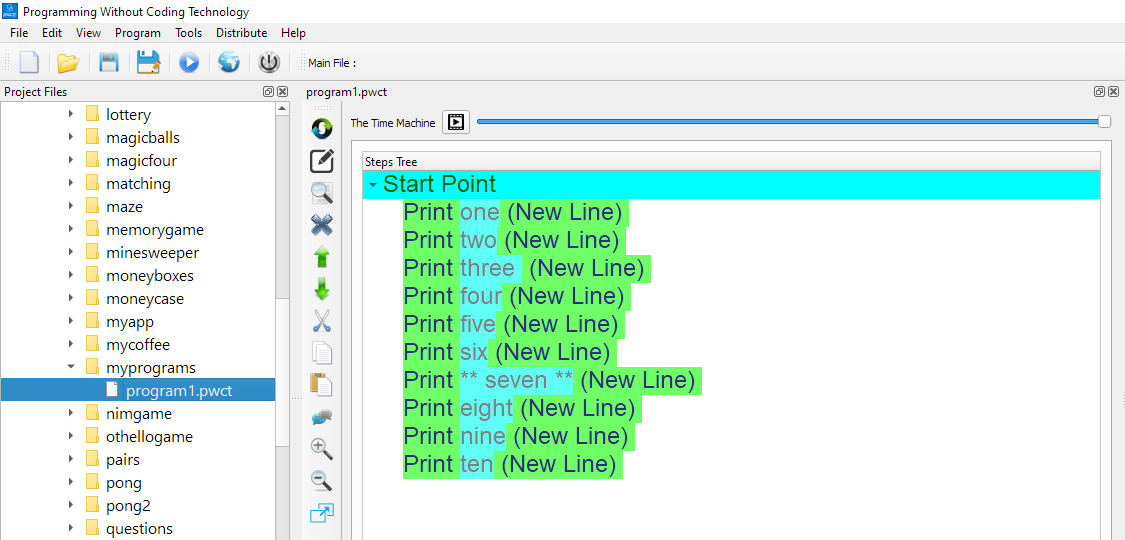
Also we can open the files using the Project Files window
Just go to the folder and select the file
Starting new file
To start a new file, From the (File) menu, select (New) or press Ctrl+Alt+N
Another way is to click on the (New) button from the Main toolbar
The new file name will be (noname.pwct)
To change the file name click (Save)
Save As
Using (Save As) we can save the file using another name

Printing the file
To print the file press Ctrl+P or select (Print to PDF) from the file menu
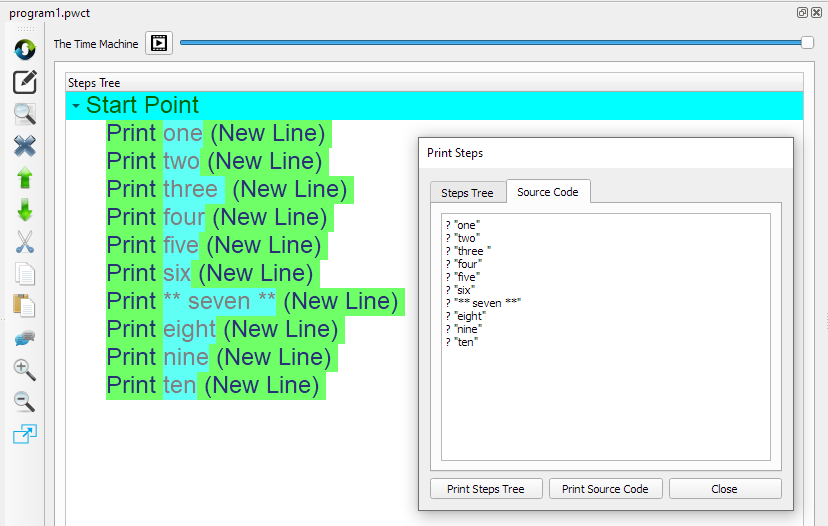
We can print the Steps Tree
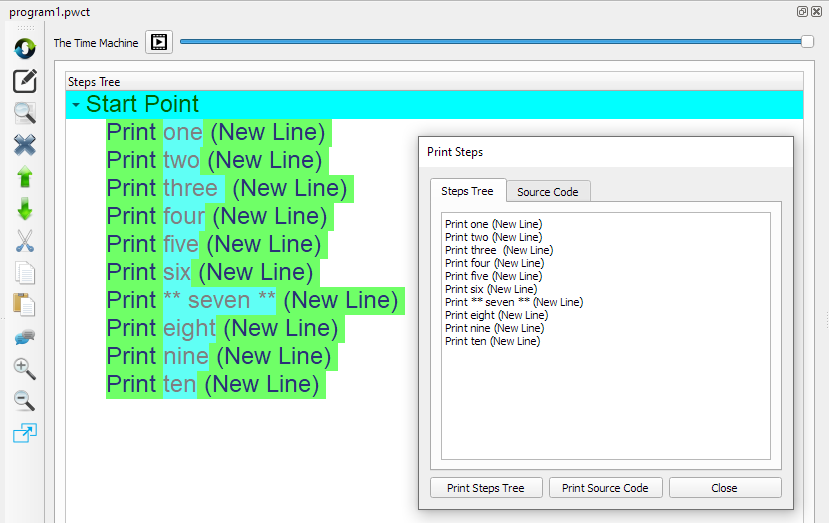
Also we can print the textual source code
Tip
We can copy the text that represent the Steps Tree or the Source Code and paste it in our discussions in Online Forums
Go to line
Each visual source file ( *.pwct ) represent a textural source code file
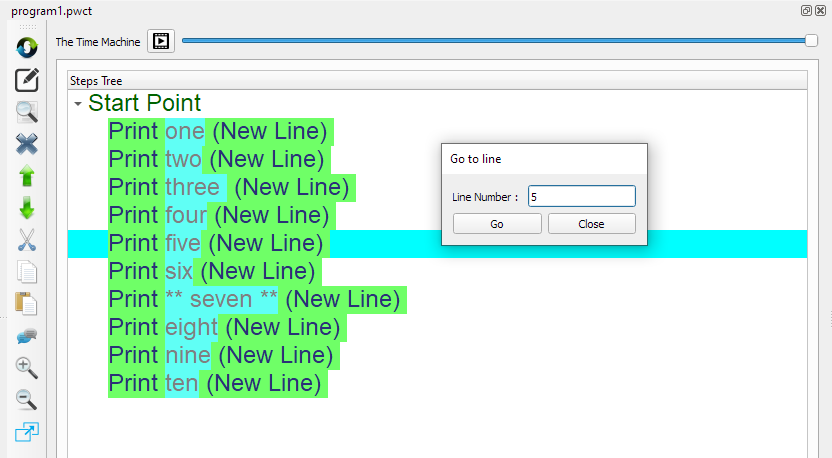
Sometimes we want to select a step inside the Steps Tree that represent a specific line in the textual source code
This is useful if we have a runtime error in a specific line of source code
Using (Go to line) from the (Edit) menu, we can do that
Tip
We can open the (Go to line) window using Ctrl+G
Note
Each step in the Step Tree could repsent one or many of textural source code lines
Customization
In this section we will learn about the customization of the PWCT Environment
Section contents:
View Menu
Customization Window
View Menu
From the View menu we can navigate quickly to the different dockable windows
Also we have keyboard shortcuts to do the navigation quickly
To activate the Project Files window press Alt+P
To activate the Goal Designer window press Alt+G
To activate the Output window press Alt+O
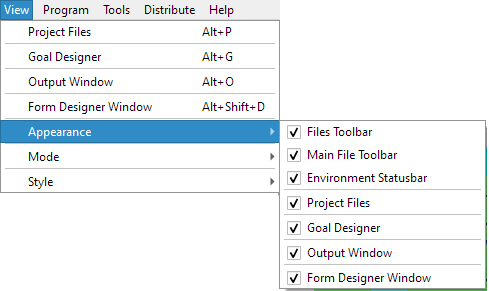
From the (Appearance) submenu we can show/hide the different windows and toolbars
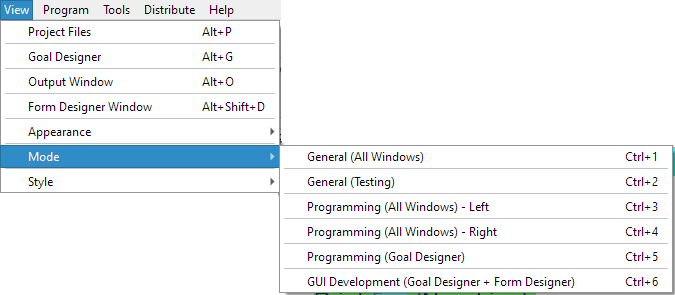
From the (Mode) submenu we can quickly arrange the dockable windows
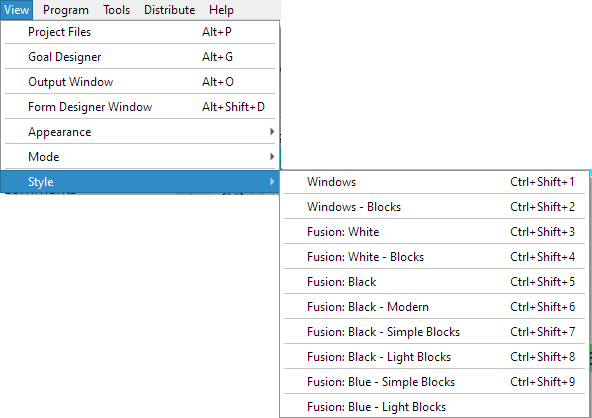
From the (Style) submenu we can change the theme
Customization Window
To open the Customization window, From the (Edit) menu select(Customization) or Press Alt+C
From this window we can change the Steps Tree colors
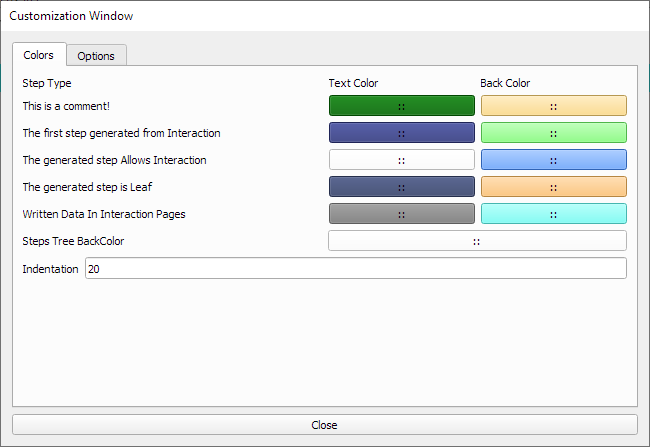
Also we have more options that control the behavior of the PWCT environment

Run Programs
We can run programs using the Program menu or using the Toolbars
Also we can use the Keyboard shortcuts
Program Menu
From the Program menu, we can run the current opened file using different options
Also we can run the Main file in the project
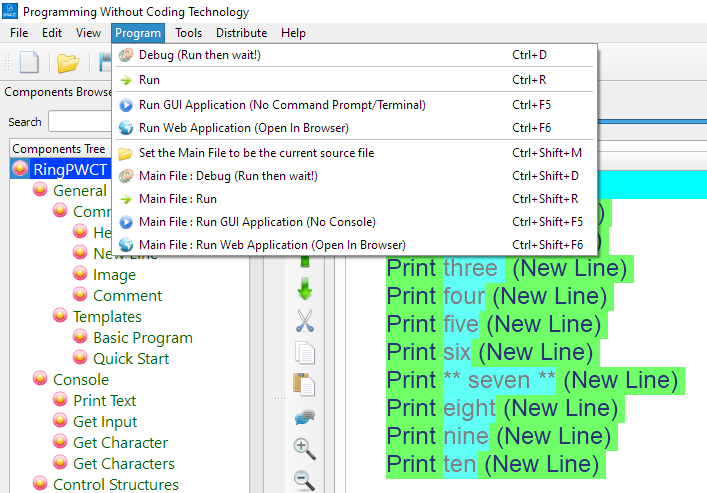
Selecting (Debug - Run then wait) will display the output in the command prompt window
After running the program, the pause command will be executed so we can see the output
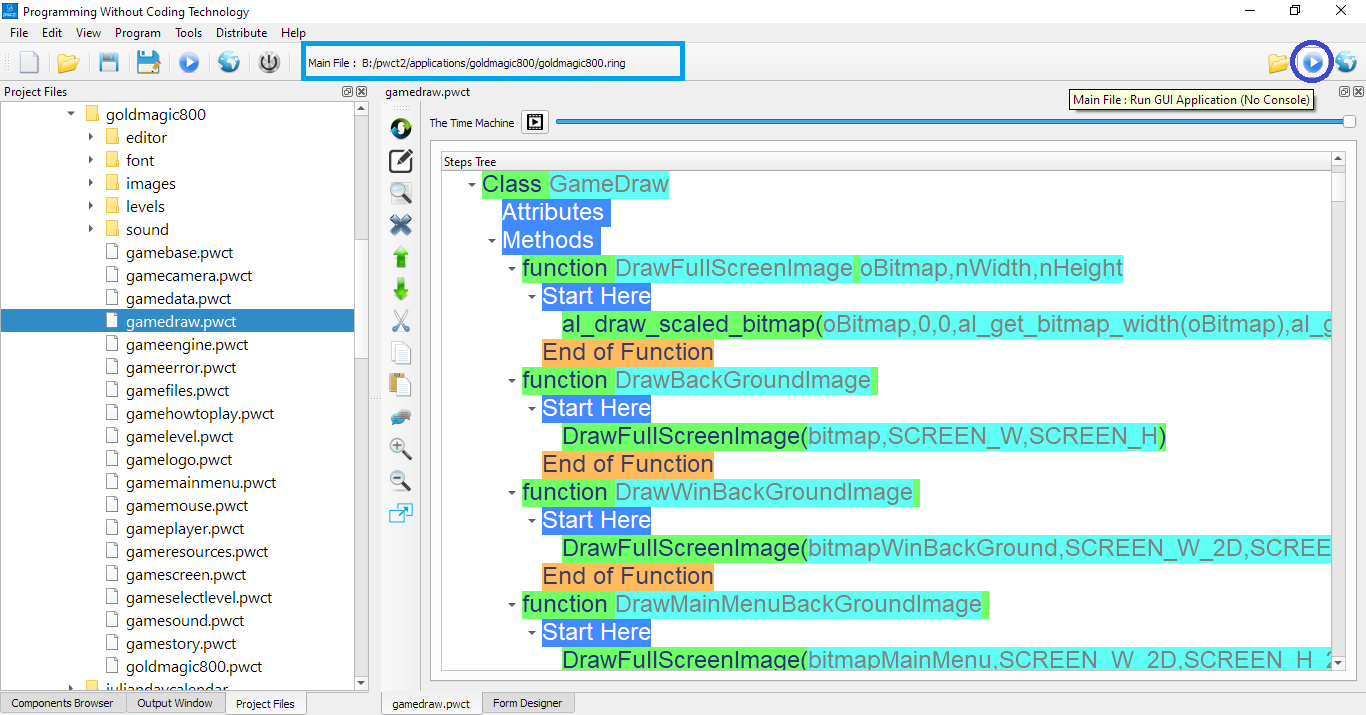
Also we have the (Run web application) option that we can use during web development
Also we have this option in the Main toolbar
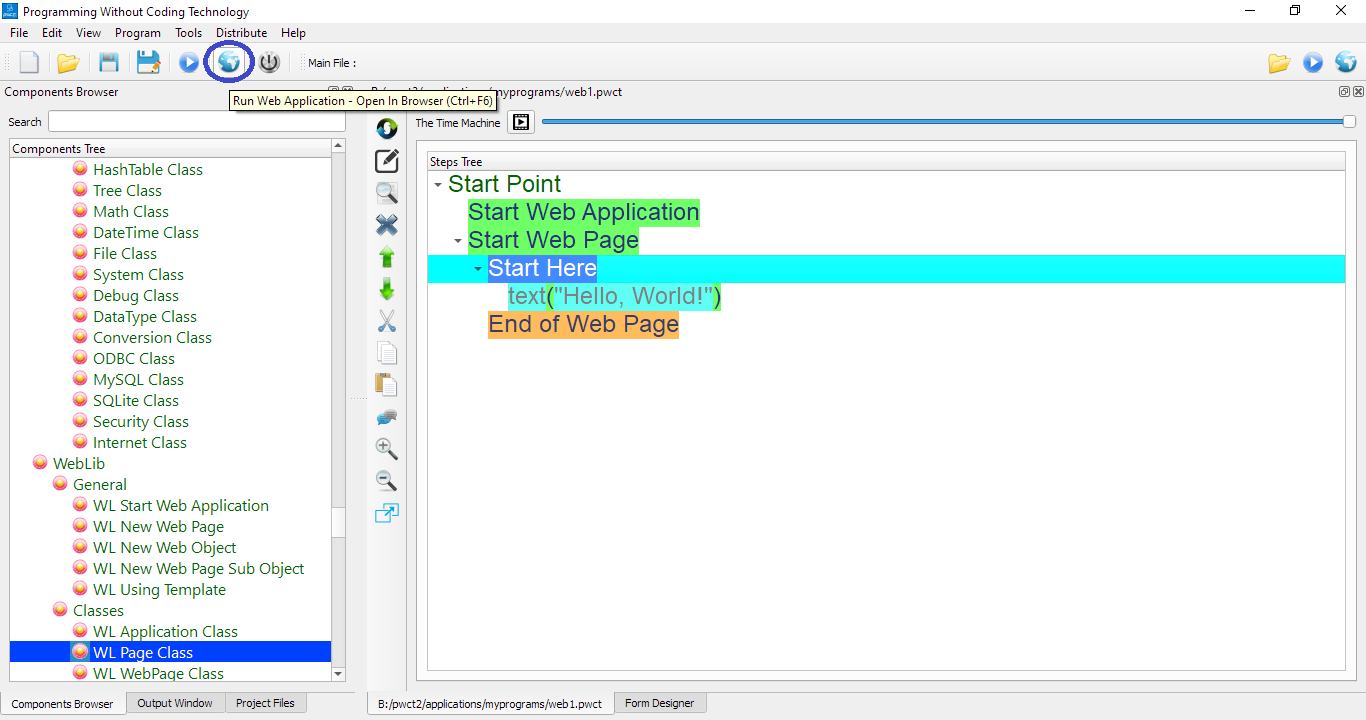
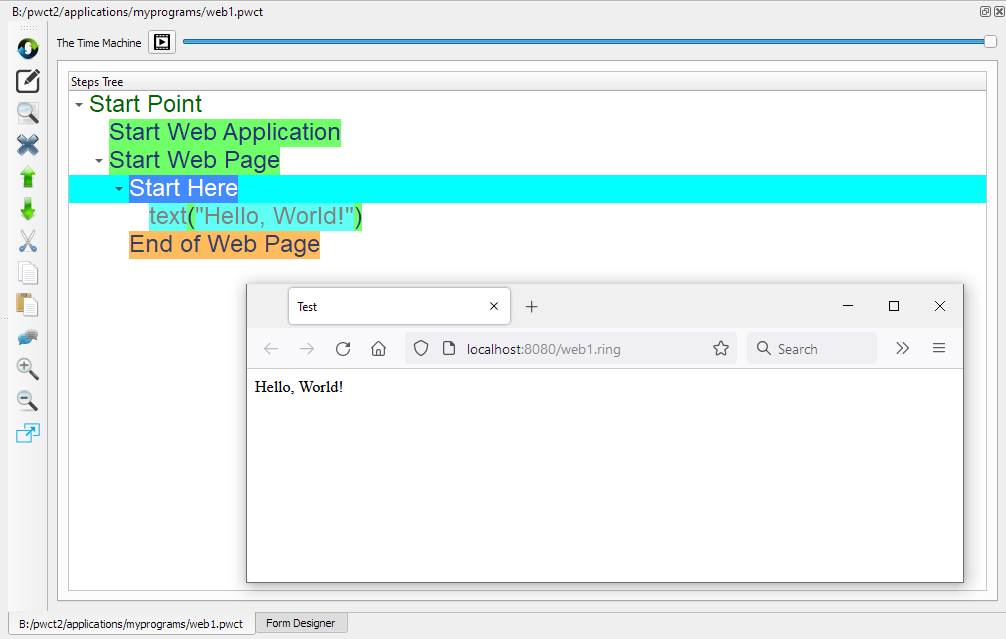
For example, the next program display (Hello, World) in the web browser
Main File toolbar
The program menu contains options for using the (Main File)
When we have a project that contains many visual source files, we can select one of these files as the Main file that we can use to run the project
For example we select (goldmagic800.pwct) as the main file, This file generate (goldmagic800.ring)
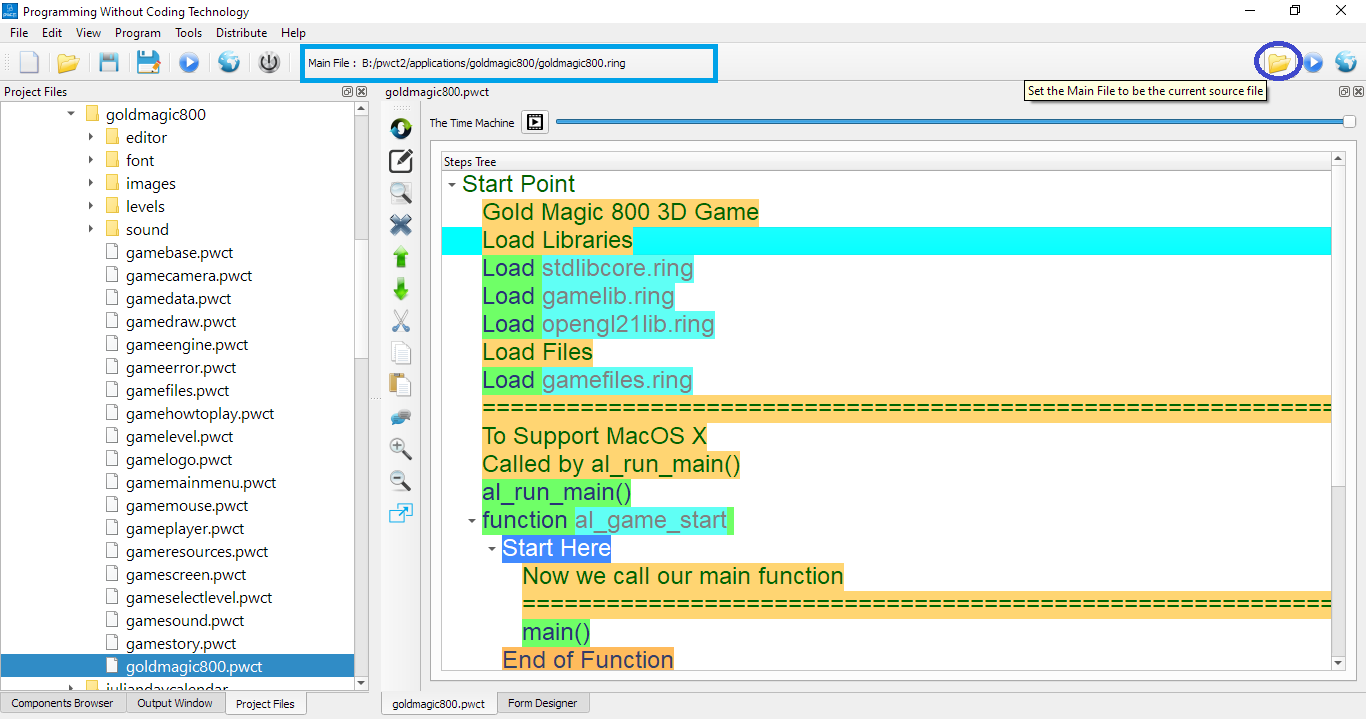
We can run the main file while opening other files in the project
More Options
In this section we will learn more about the features and resources provided by the PWCT Environment
Section contents:
Tools Menu
Distribute Menu
Help Menu
Tools Menu
From the tools menu we can run the Form Designer or the RingREPL (Read-Eval-Print-Loop)
Also we can open the Command Prompt or the Files Explorer
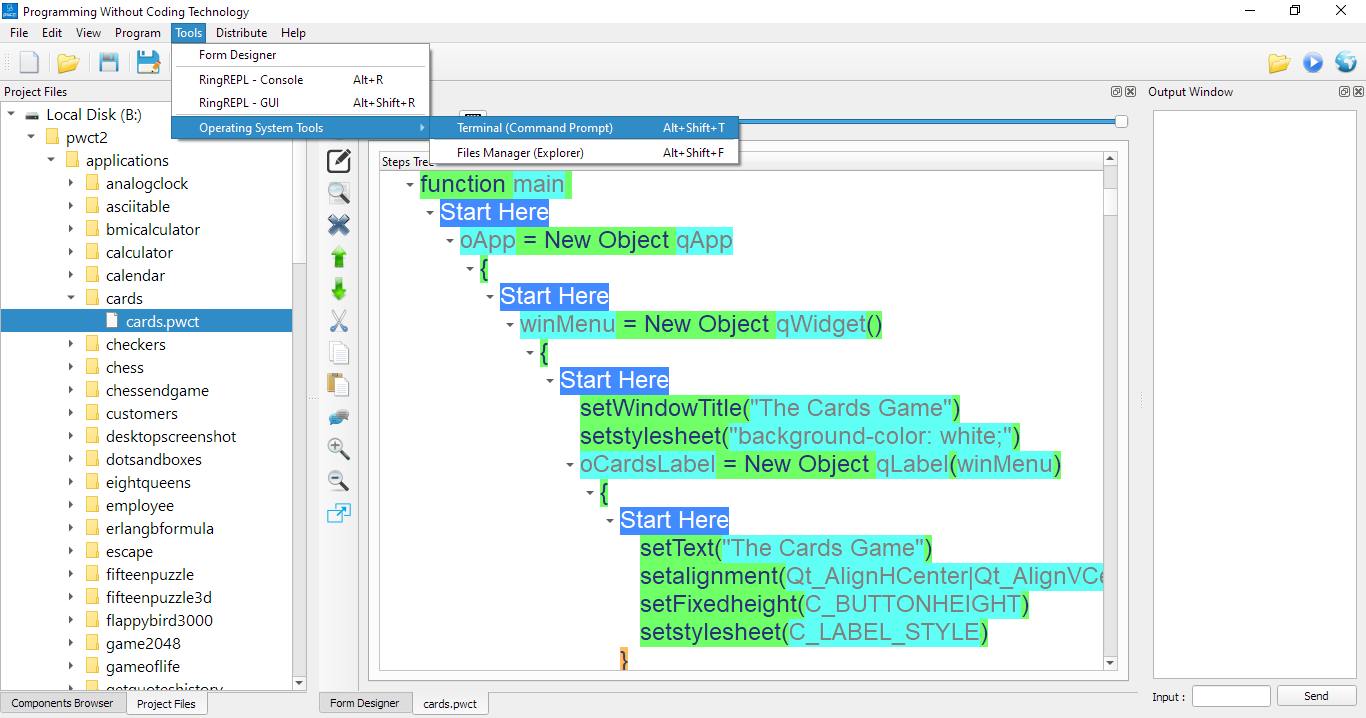
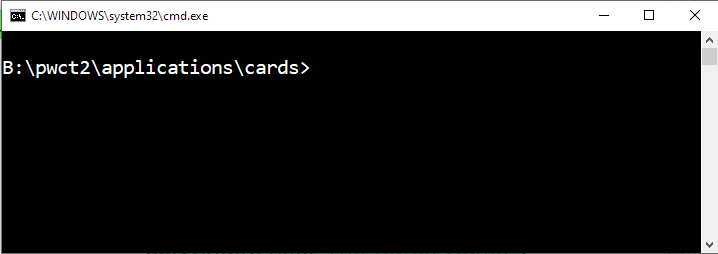
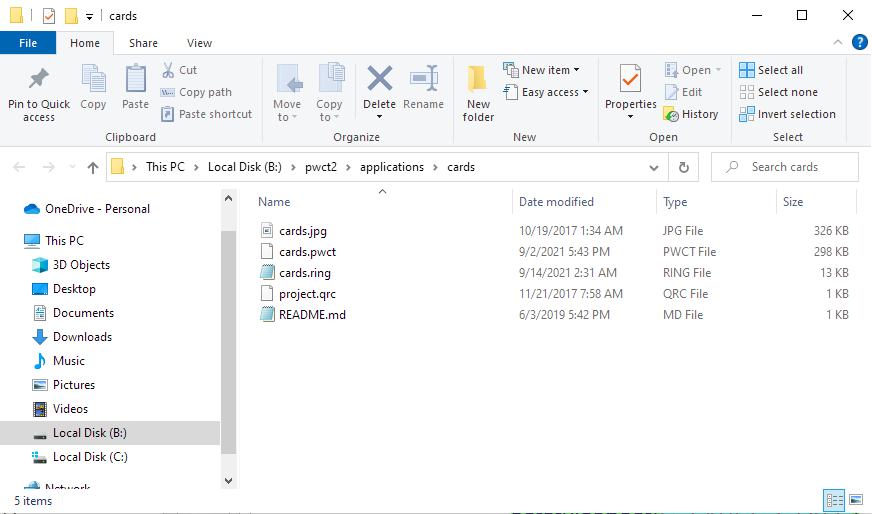
When we open the Command Prompt, the current directory will be the folder of the opened visual source file
Also when we open the Files Explorer, the current directory will be the folder of the opened file
When we run RingREPL we can write and execute Ring code directly
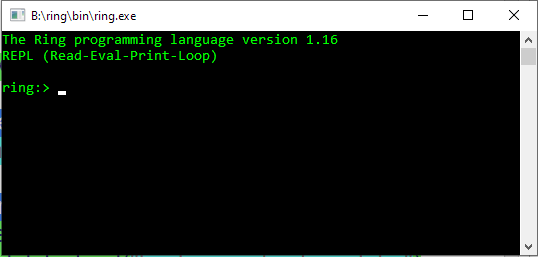
For example, We can write and execute the next program that print a message on the screen
? "Hello, World!"

We have also the GUI version of RingREPL
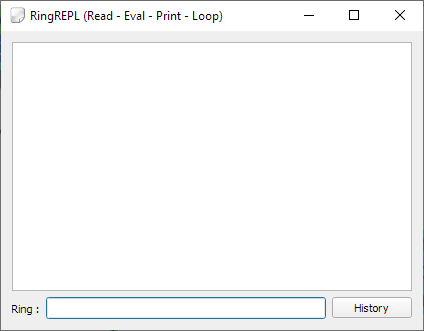
This version comes with the History option that contains the previous commands

Distribute Menu
Using the Distribute menu we can distribute or applications and build executable files
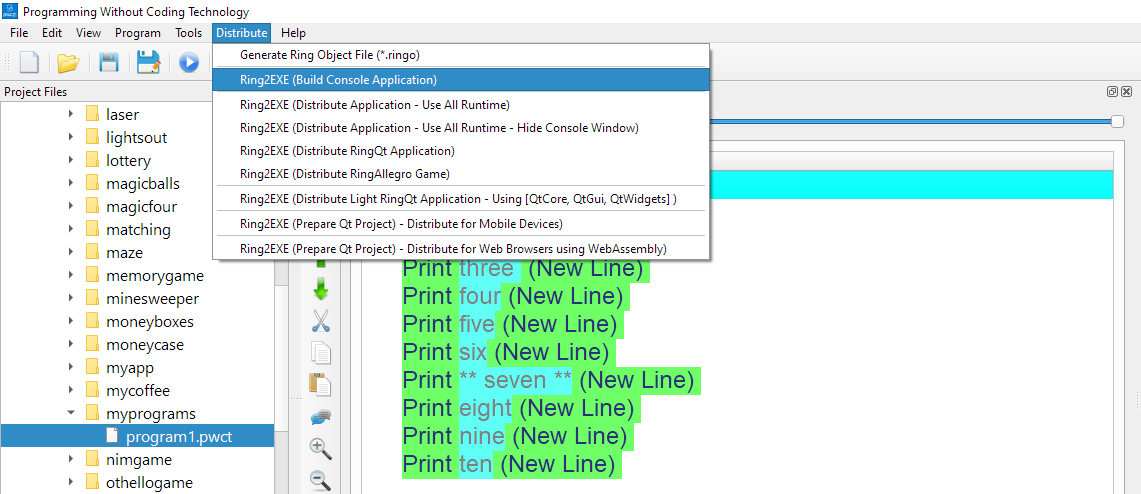
For example, we can build (program1.exe) for our program
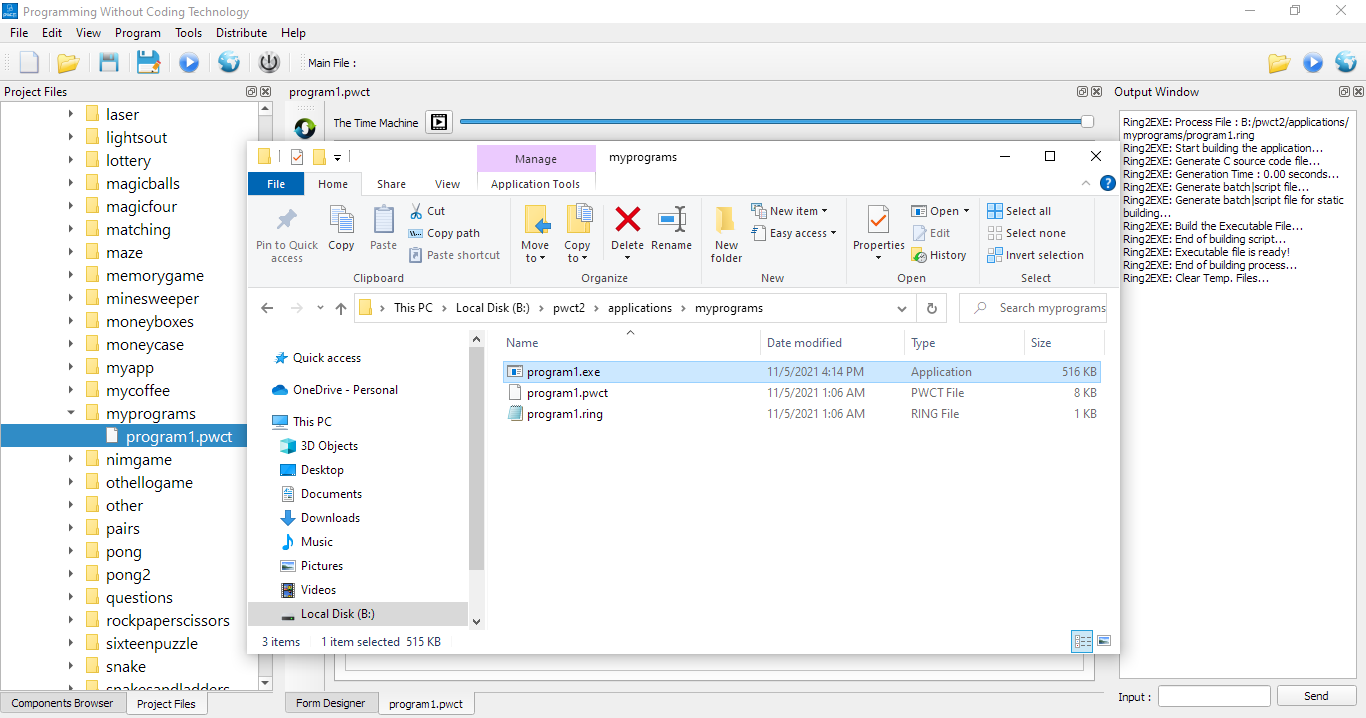
We can run (program1.exe) from the command prompt and see the output

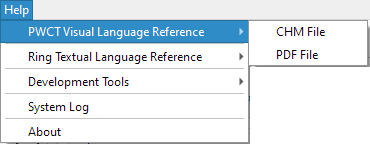
Help Menu
Using the Help menu we can open PWCT or Ring documentation
The documentation comes in different formats like CHM & PDF

Comment/Uncomment Steps
To comment a step, Select it first then click on the (Comment/Uncomment) button or press Ctrl+I
The commented step will not be executed when we run the program
To enable the step again (Uncomment), select it then click on the (Comment/Uncomment) button