Lesson 2 – The Time Machine
Learn how to navigate through your application’s construction history, play programs as movies, and generate documentation.
In this lesson we are going to learn how to use the Time Machine. The Time Machine provides the following features:
When we run PWCT we have the default project Start.SSF.

Fig. 1

Fig. 2

Fig. 3
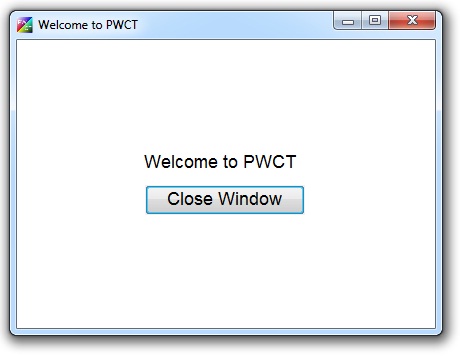
Fig. 4
Using the slider beside the Time Machine we can move backward/forward during the application construction process.

Fig. 5
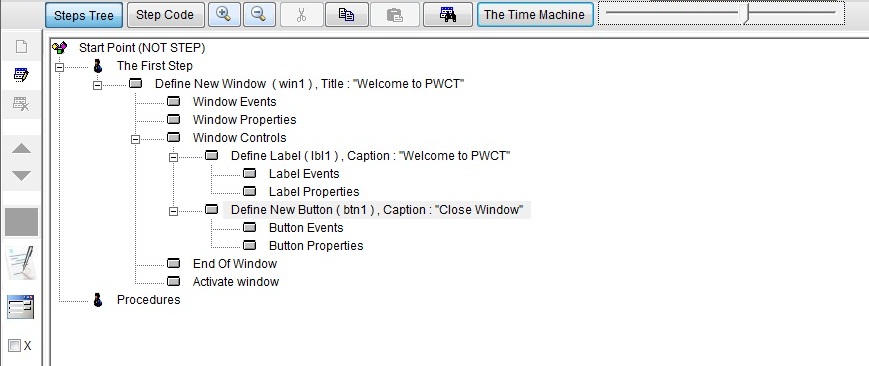
Fig. 6
We can run the program in the past (a point during the application construction process).
For example when we run the application at a point before creating the button event procedure, we see that clicking the button doesn’t close the application.

Fig. 7
Again we can go forward and return to the present. When we run the application in the present (the last time frame during the application construction process) clicking the button will close the window.

Fig. 8
When you open a project using PWCT you can play this project as a movie to know how to create the visual source step by step.
The playing process will start from the first step and you will see how to generate every step starting from selecting the component using the Components Browser window and moving to entering data to the interaction page.
You will see the result of every interaction process as new steps are generated to the steps tree after the end of the interaction process.
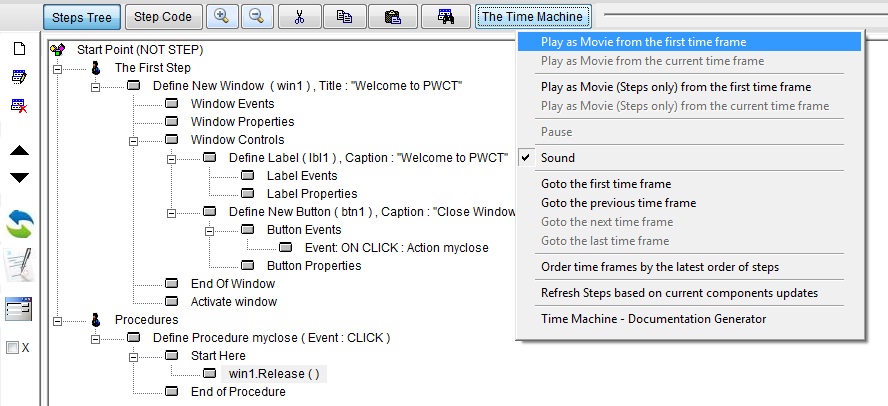
Fig. 9
Playing programs as movie (Steps Only) will hide the construction details from the playing process and will let you concentrate on the steps generation process. This is useful when you want to read programs instead of knowing how to create them.

Fig. 10
When we create programs we may generate steps in the top then in the bottom then in the middle for example. The order of step generation is random because we may find that we want to modify at any location inside our program.
After all of that, when we play programs as movies we may find that it’s better to see the construction process step by step from top to bottom. We don’t need to move our focus to random positions (top-middle-down, etc).
To avoid this we can order the time frames based on the latest order of steps inside the steps tree. By doing that the playing process will go always from top to bottom so we can focus better on getting the meaning behind the program according to the latest status.
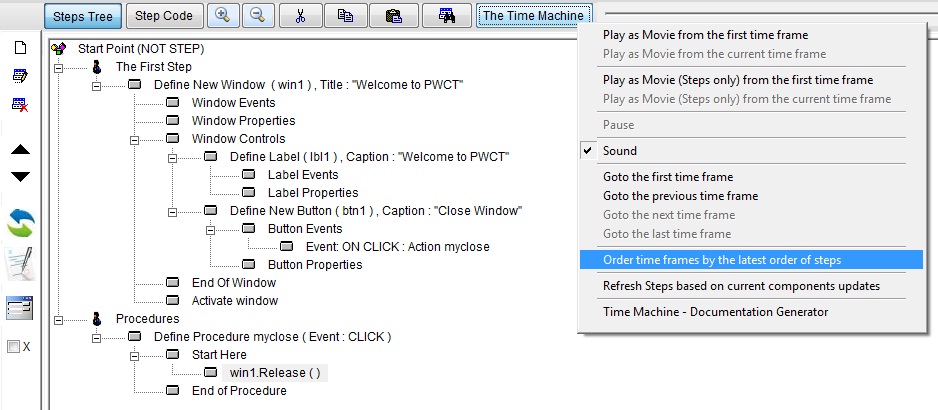
Fig. 11
This feature is very powerful and important in many ways:
The first point refers to visual source upgrade and this feature is very important for developers having old PWCT programs. The second point refers to two great features:
The step name is written using natural language (English/Arabic, etc) and the step name is generated as a result of interaction process. The generation process is controlled by a script behind the component and we can modify this script.
So you can modify the generated steps names and use the words that you would like to read using the human language (English/Arabic, etc) that you know. After doing that you will refresh your programs to be readable using your human language.
If you distribute your visual source based on components generating steps names using English language for example, this will not prevent the others from using the human language they know or like to read your programs — because all they need to do is open your visual source then do the refresh process based on the components they have (and these components may be in any human language different from the original).
The step code is written using a textual programming language and the step code is generated as a result of interaction process. The generation process is controlled by a script behind the component and we can modify this script.
So you can modify the generated code and use any textual programming language that you want (Harbour, Python, Ruby, etc). After doing that you will refresh your programs and the code in the background will be refreshed using the new code (written in another language).
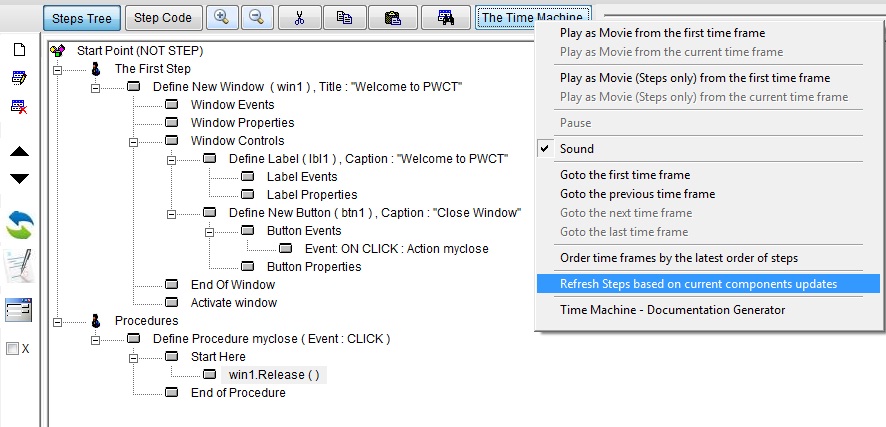
Fig. 12
To generate documentation that explains how to construct the program step by step:
The Code Extractor extracts the code and the steps tree from the visual source (program goals). To run the Code Extractor, select the popup (Goal) from the menu bar then select the item (Invoke Code Extractor).

Fig. 13
Select the goal (Main) by dragging it to the selected goals listbox.
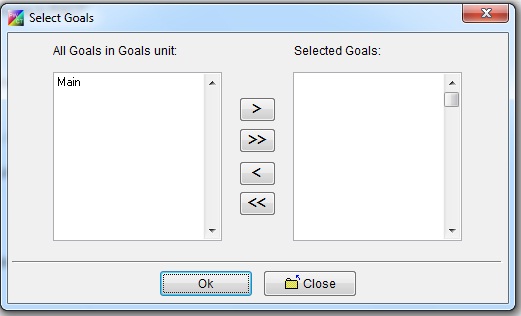
Fig. 14
Click Ok.

Fig. 15
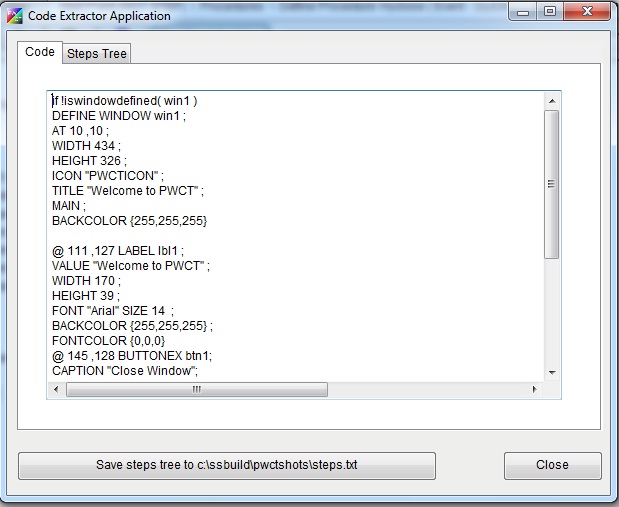
Fig. 16
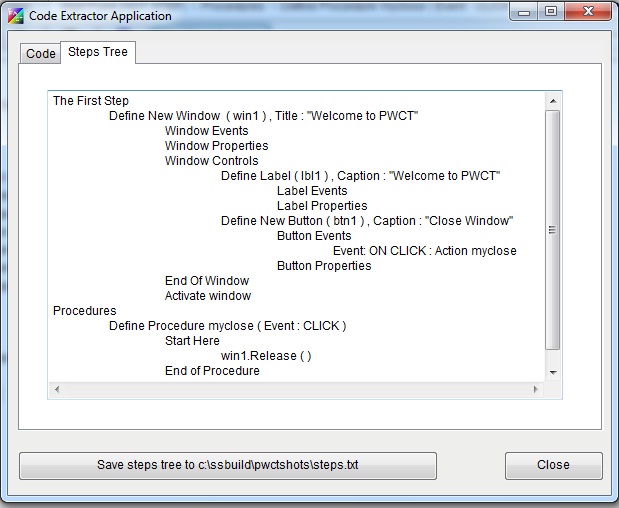
Fig. 17
Click the button (Save steps tree to c:\ssbuild\pwctshots\steps.txt).
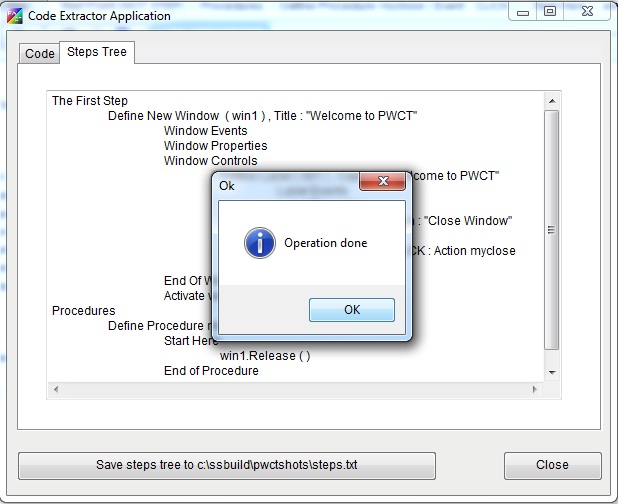
Fig. 18
Run the application using the Run button [!] in the toolbar or press Ctrl+R. Then press the PrtScr button to get a screenshot of the application during runtime. Then open Paint and save the screenshot to C:\SSBUILD\PWCTShots\runtime1.JPG.
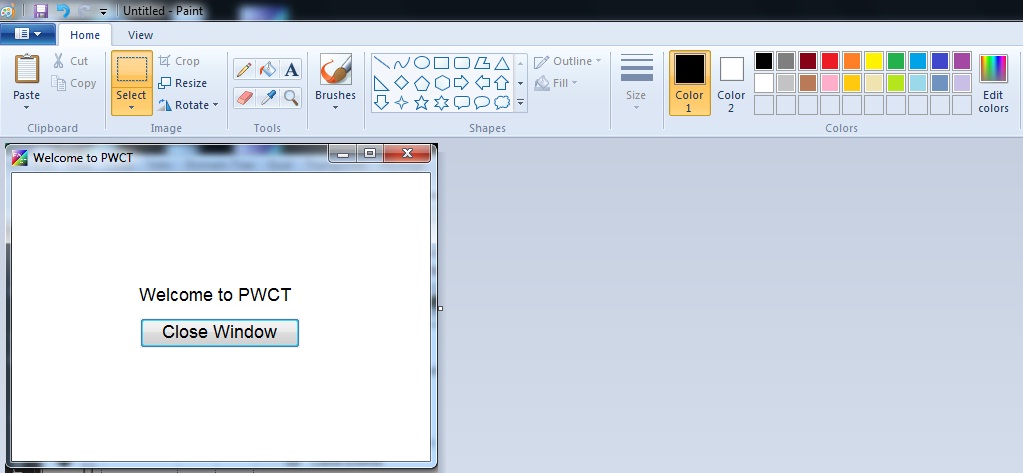
Fig. 19

Fig. 20

Fig. 21
Now we are going to run the Time Machine documentation generator.
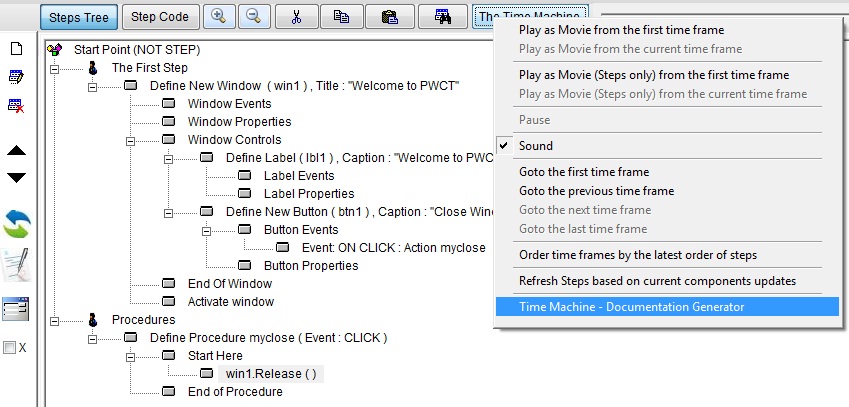
Fig. 22
Write the introduction then click the (Save) button to generate the file C:\SSBUILD\PWCTShots\about.txt.

Fig. 23
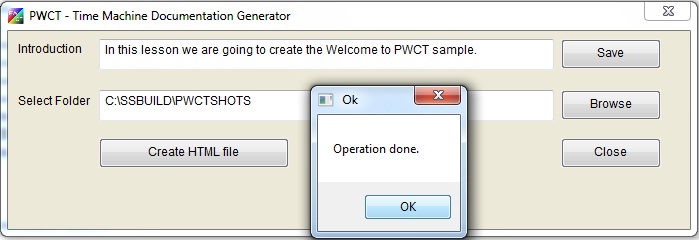
Fig. 24
Click the button (Create HTML file) to generate the documentation file.

Fig. 25
Now we have the documentation inside the folder c:\ssbuild\pwctshots.
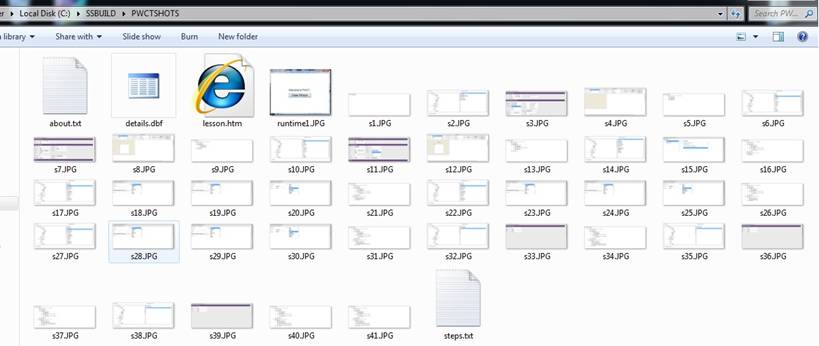
Fig. 26
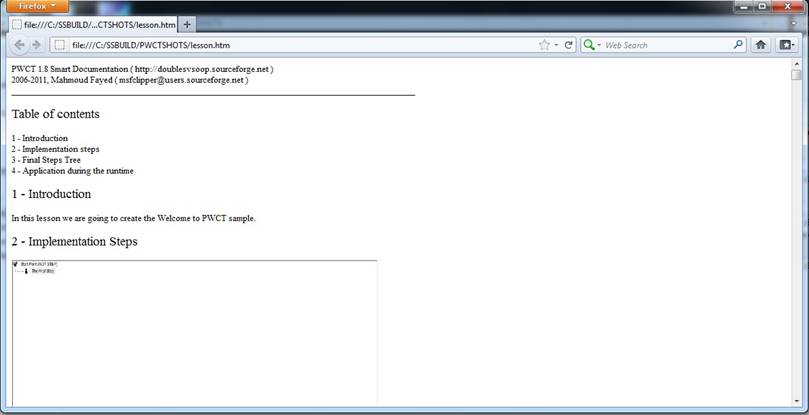
Fig. 27