|
PWCT 1.9 Art Documentation ( https://doublesvsoop.sourceforge.net ) Free and Open-Source Software ( GNU General Public License ) _____________________________________________________________________________________ Table of contents 1 - Introduction 2 - Implementation steps 3 - Final Steps Tree 1 - Introduction In this lesson we are going to learn how to create the template (Crystal Reports 10 - Print Preview) 2 - Implementation Steps
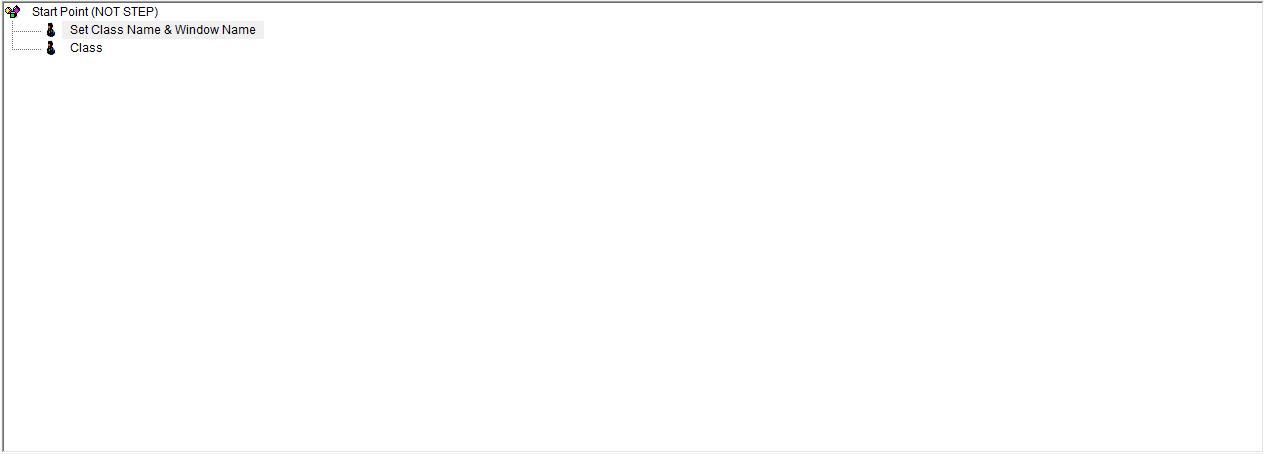
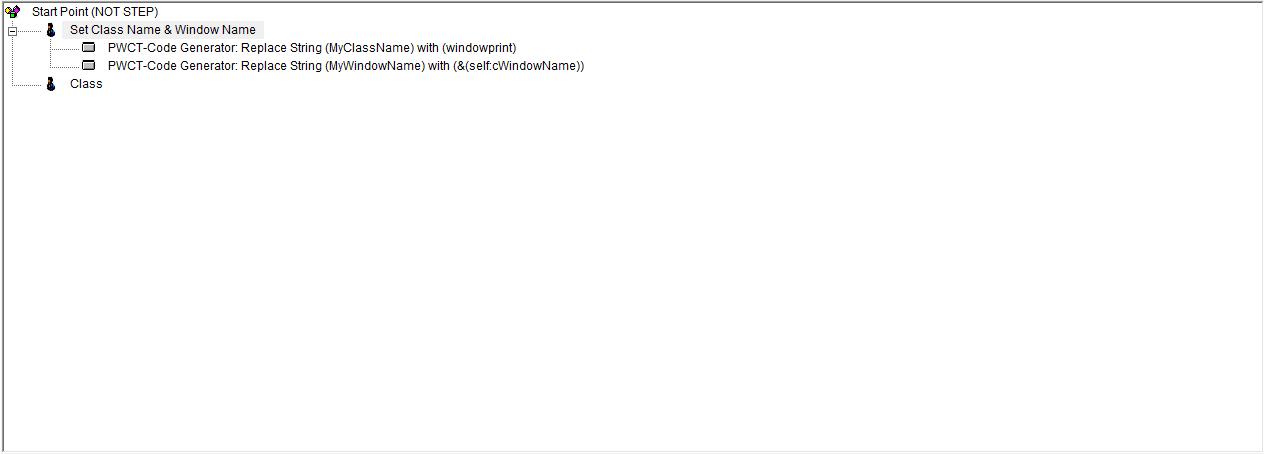
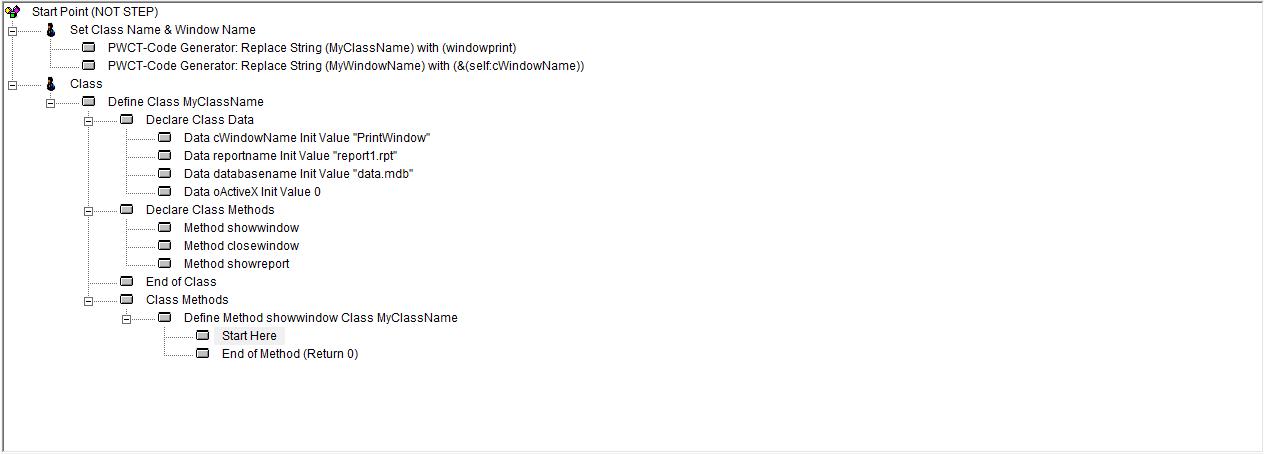
Fig. (1) Goal Desginer - Steps Tree Select the step (Set Class Name & Window Name) We will start now new interaction process to generate new steps to our steps tree. The slow way (Using Mouse): 1 - Click Interact to open the components browser 2 - Select the domain (PWCT - Code Generator) 3 - Select the component (CG Replace String) The fast way (Using Keyboard shortcuts): 1 - Get the component using its name by typing (CG Replace String) Note : Stop typing when you see the required component is selected
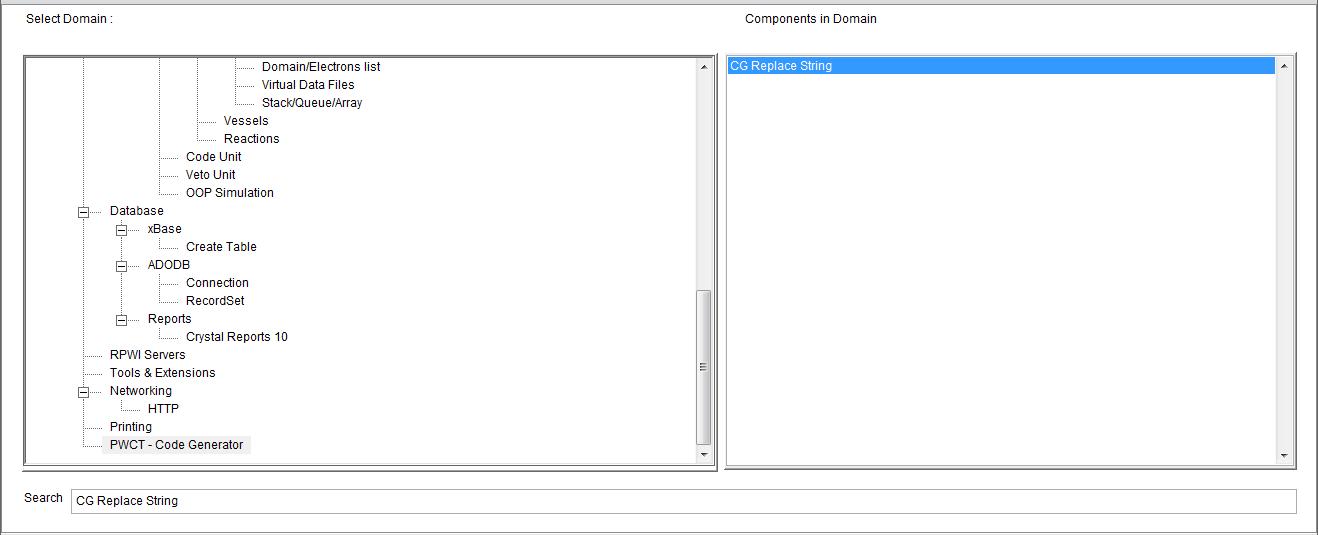
Fig. (2) Component Browser – Select the component (CG Replace String) After selecting the component click Ok or press ENTER
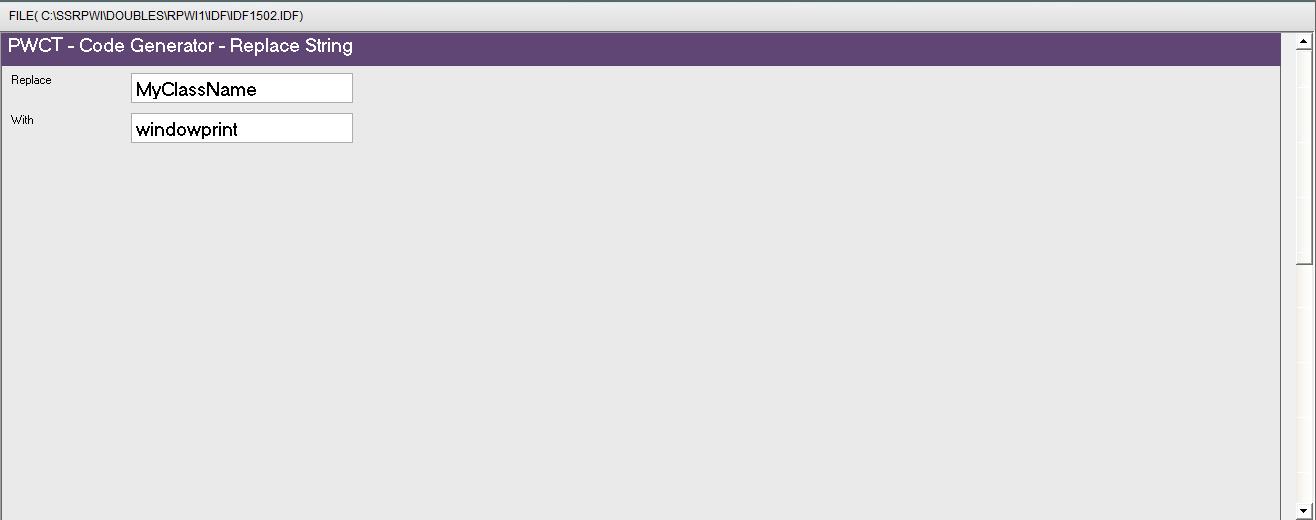
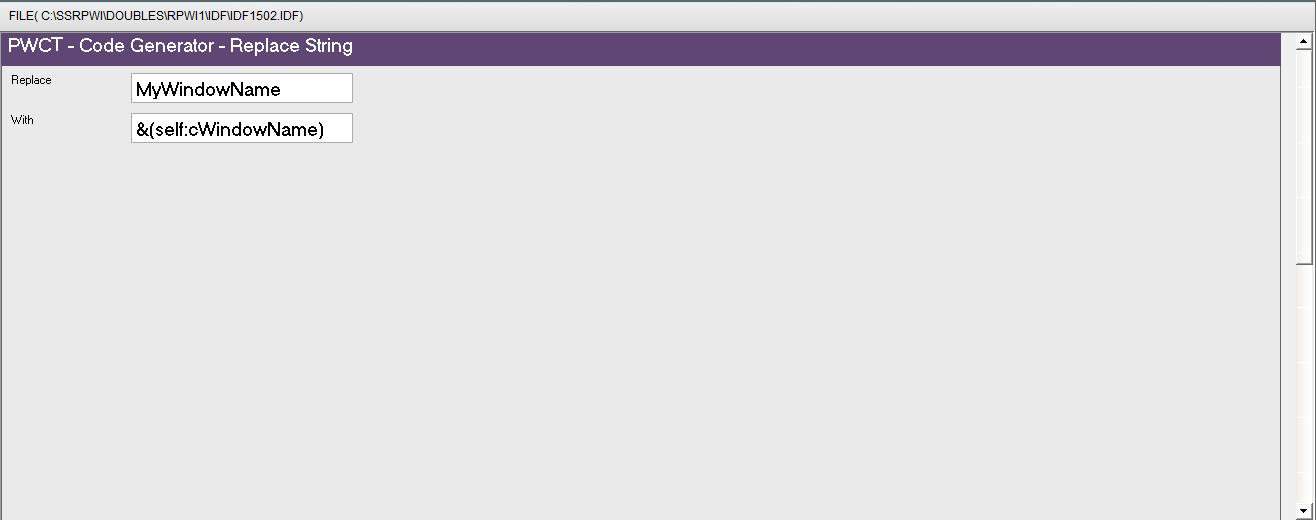
Fig. (3) Interaction page - Set the properties and enter the required data as in the image above
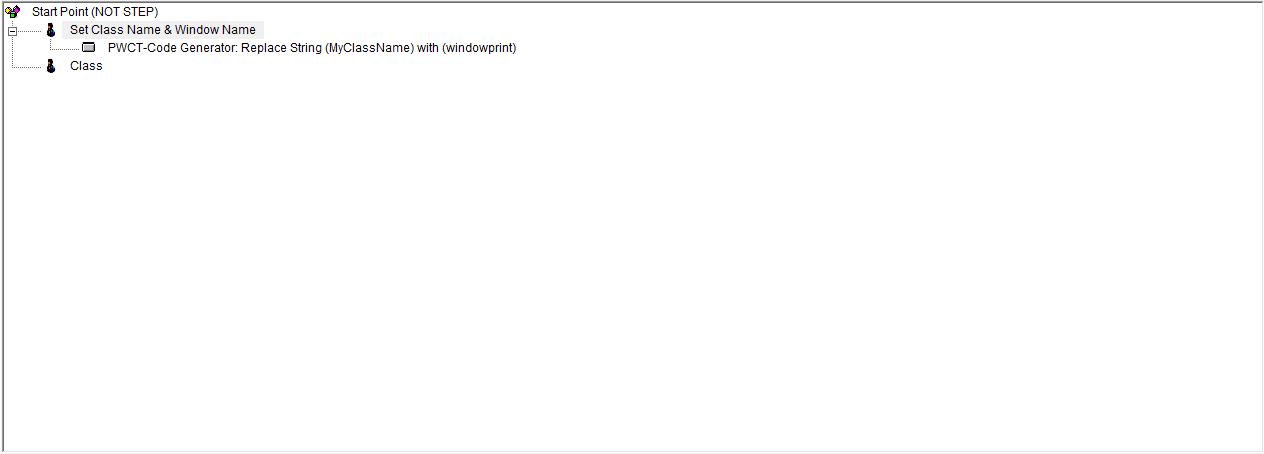
Fig. (4) Goal Desginer - Steps Tree Select the step (Set Class Name & Window Name) We will start now new interaction process to generate new steps to our steps tree. The slow way (Using Mouse): 1 - Click Interact to open the components browser 2 - Select the domain (PWCT - Code Generator) 3 - Select the component (CG Replace String) The fast way (Using Keyboard shortcuts): 1 - Get the component using its name by typing (CG Replace String) Note : Stop typing when you see the required component is selected
Fig. (5) Component Browser – Select the component (CG Replace String) After selecting the component click Ok or press ENTER
Fig. (6) Interaction page - Set the properties and enter the required data as in the image above
Fig. (7) Goal Desginer - Steps Tree Select the step (Class) We will start now new interaction process to generate new steps to our steps tree. The slow way (Using Mouse): 1 - Click Interact to open the components browser 2 - Select the domain (Object Oriented Programming (OOP)) 3 - Select the component (Define Class) The fast way (Using Keyboard shortcuts): 1 - Get the component using its name by typing (Define Class) Note : Stop typing when you see the required component is selected
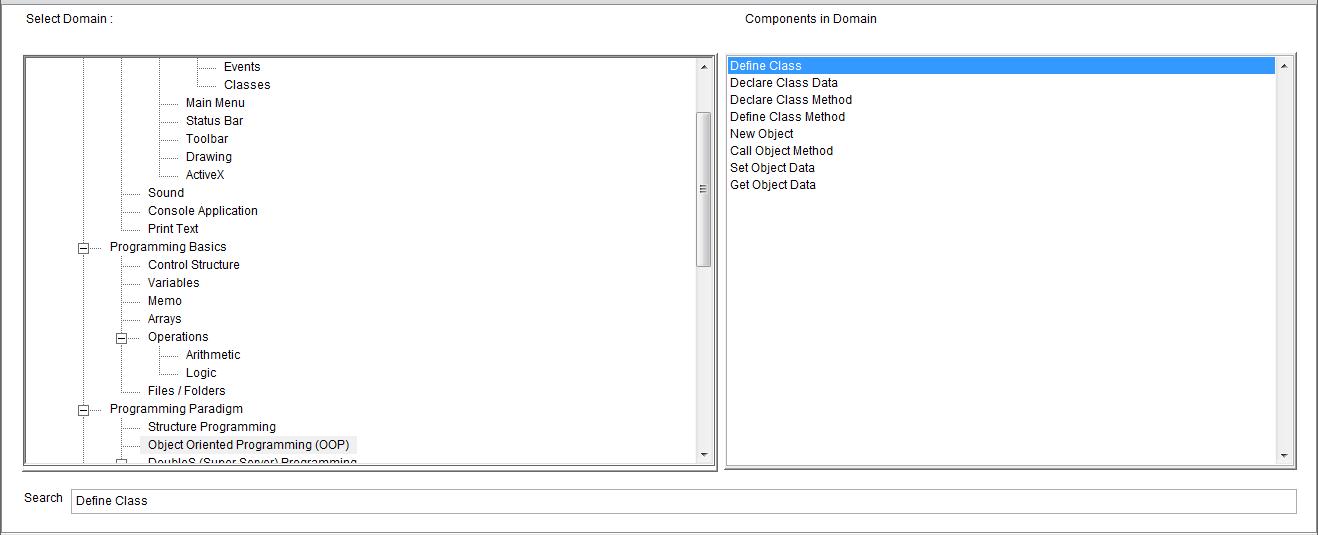
Fig. (8) Component Browser – Select the component (Define Class) After selecting the component click Ok or press ENTER
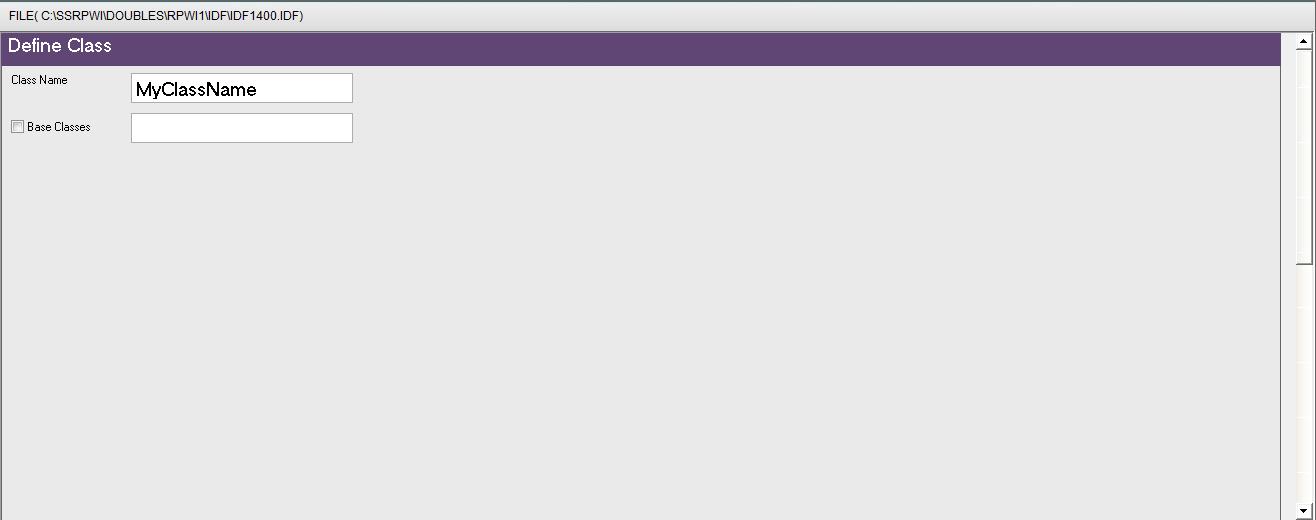
Fig. (9) Interaction page - Set the properties and enter the required data as in the image above
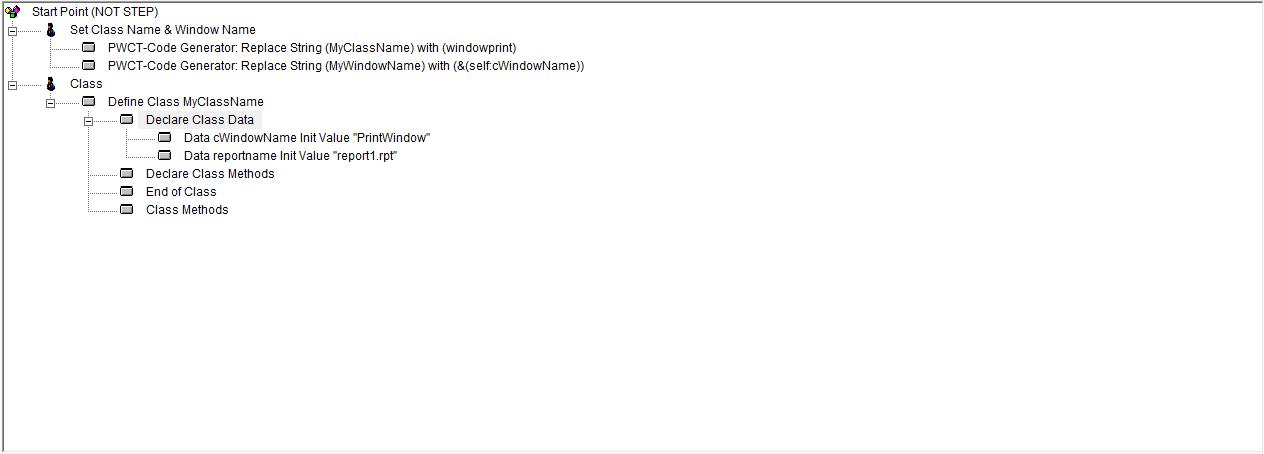
Fig. (10) Goal Desginer - Steps Tree Select the step (Declare Class Data) We will start now new interaction process to generate new steps to our steps tree. The slow way (Using Mouse): 1 - Click Interact to open the components browser 2 - Select the domain (Object Oriented Programming (OOP)) 3 - Select the component (Declare Class Data) The fast way (Using Keyboard shortcuts): 1 - Get the component using its name by typing (Declare Class Data) Note : Stop typing when you see the required component is selected
Fig. (11) Component Browser – Select the component (Declare Class Data) After selecting the component click Ok or press ENTER
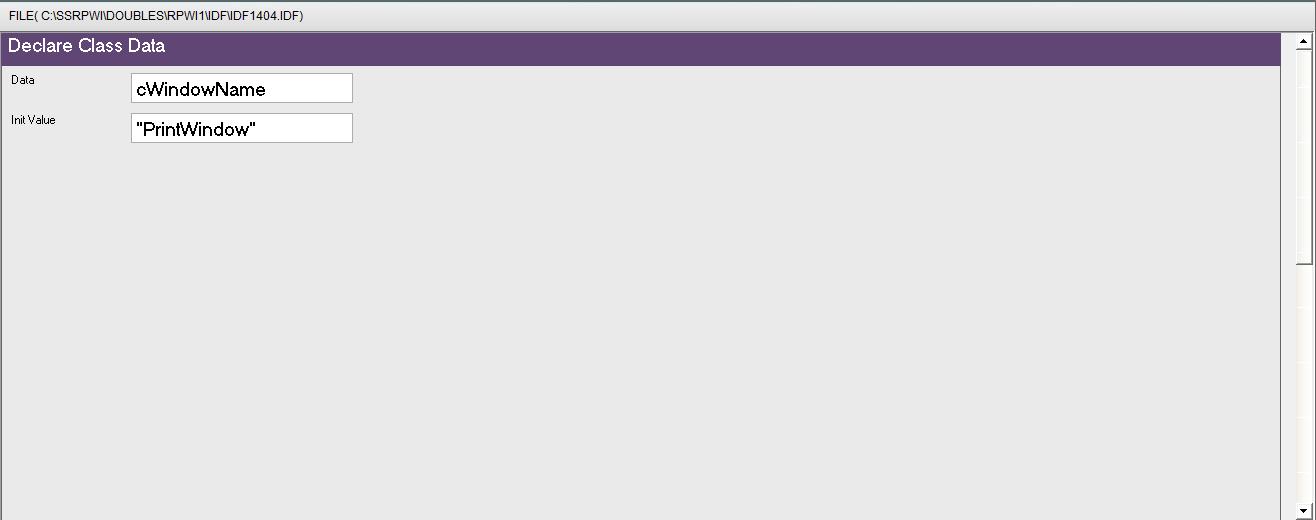
Fig. (12) Interaction page - Set the properties and enter the required data as in the image above
Fig. (13) Goal Desginer - Steps Tree Select the step (Declare Class Data) We will start now new interaction process to generate new steps to our steps tree. The slow way (Using Mouse): 1 - Click Interact to open the components browser 2 - Select the domain (Object Oriented Programming (OOP)) 3 - Select the component (Declare Class Data) The fast way (Using Keyboard shortcuts): 1 - Get the component using its name by typing (Declare Class Data) Note : Stop typing when you see the required component is selected
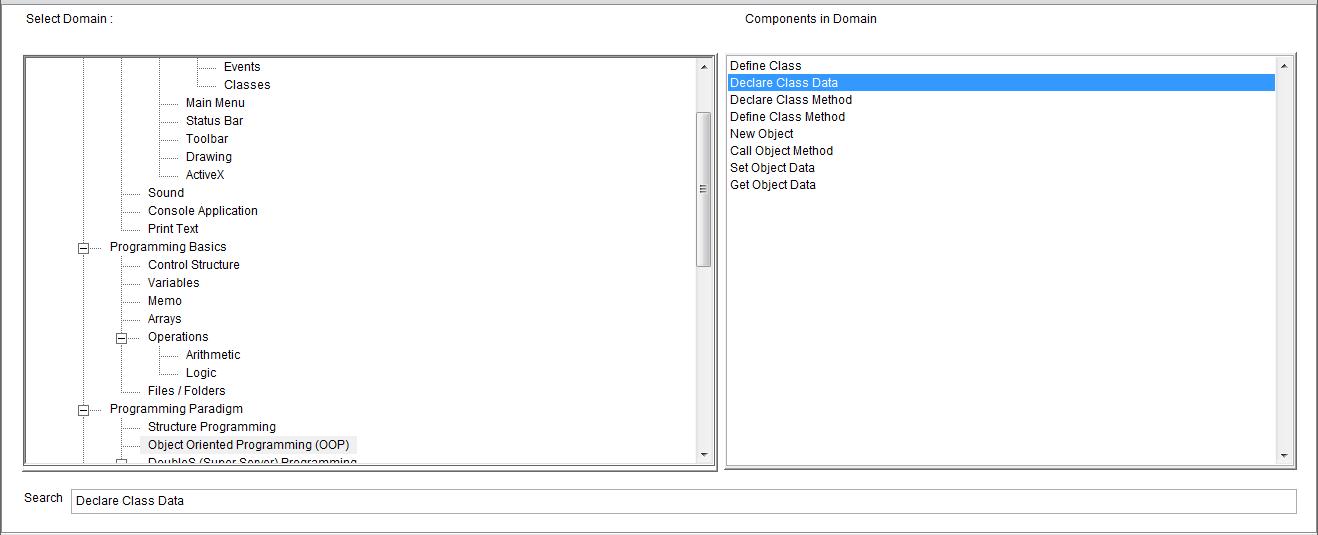
Fig. (14) Component Browser – Select the component (Declare Class Data) After selecting the component click Ok or press ENTER
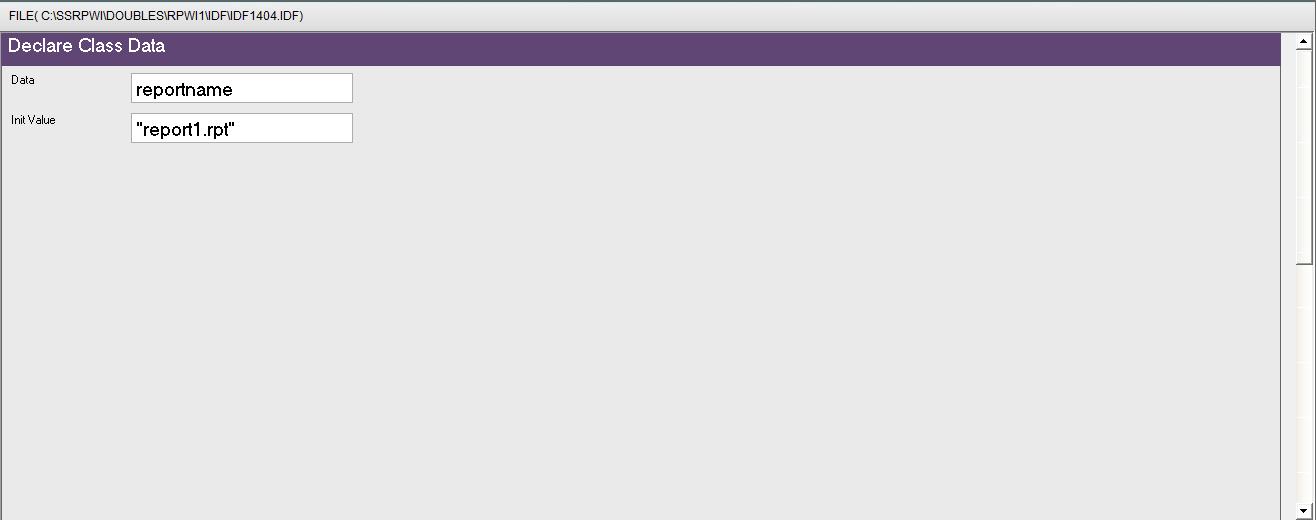
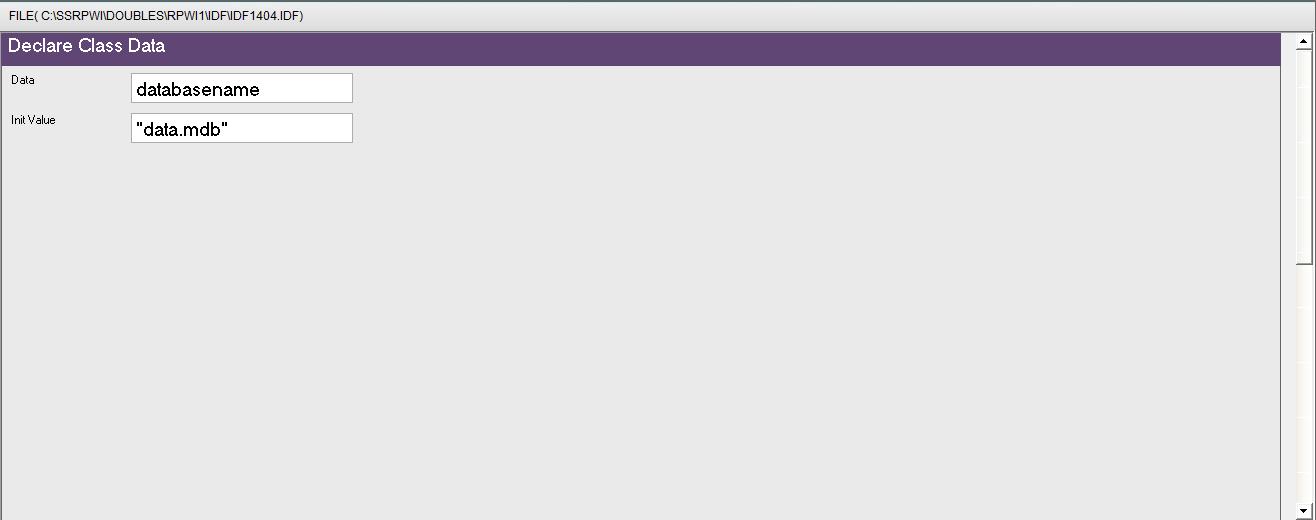
Fig. (15) Interaction page - Set the properties and enter the required data as in the image above
Fig. (16) Goal Desginer - Steps Tree Select the step (Declare Class Data) We will start now new interaction process to generate new steps to our steps tree. The slow way (Using Mouse): 1 - Click Interact to open the components browser 2 - Select the domain (Object Oriented Programming (OOP)) 3 - Select the component (Declare Class Data) The fast way (Using Keyboard shortcuts): 1 - Get the component using its name by typing (Declare Class Data) Note : Stop typing when you see the required component is selected
Fig. (17) Component Browser – Select the component (Declare Class Data) After selecting the component click Ok or press ENTER
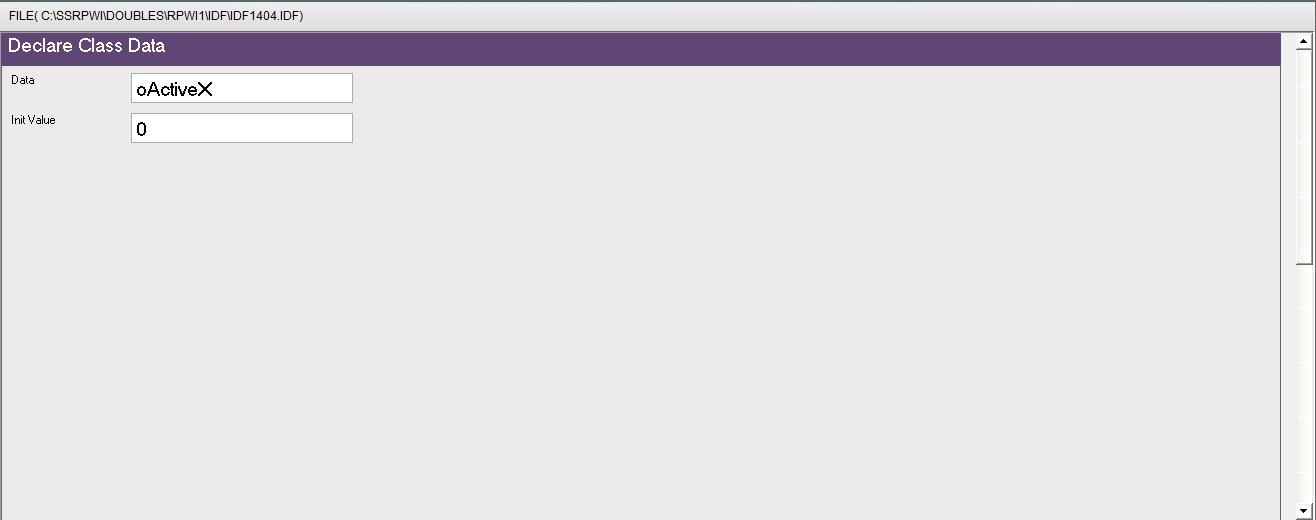
Fig. (18) Interaction page - Set the properties and enter the required data as in the image above
Fig. (19) Goal Desginer - Steps Tree Select the step (Declare Class Data) We will start now new interaction process to generate new steps to our steps tree. The slow way (Using Mouse): 1 - Click Interact to open the components browser 2 - Select the domain (Object Oriented Programming (OOP)) 3 - Select the component (Declare Class Data) The fast way (Using Keyboard shortcuts): 1 - Get the component using its name by typing (Declare Class Data) Note : Stop typing when you see the required component is selected
Fig. (20) Component Browser – Select the component (Declare Class Data) After selecting the component click Ok or press ENTER
Fig. (21) Interaction page - Set the properties and enter the required data as in the image above
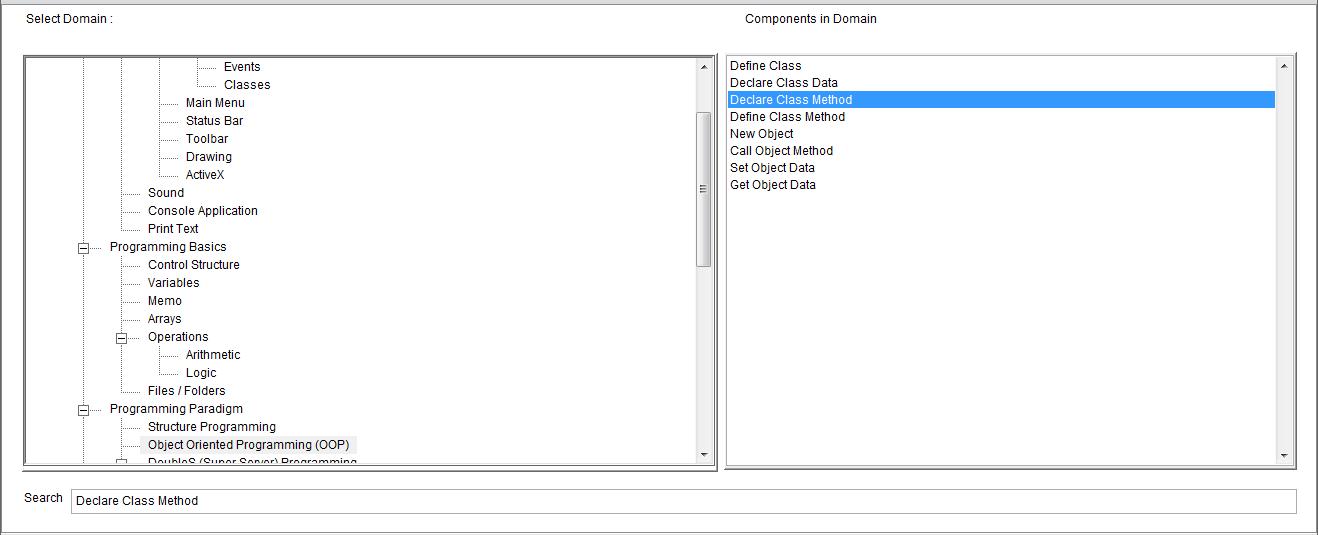
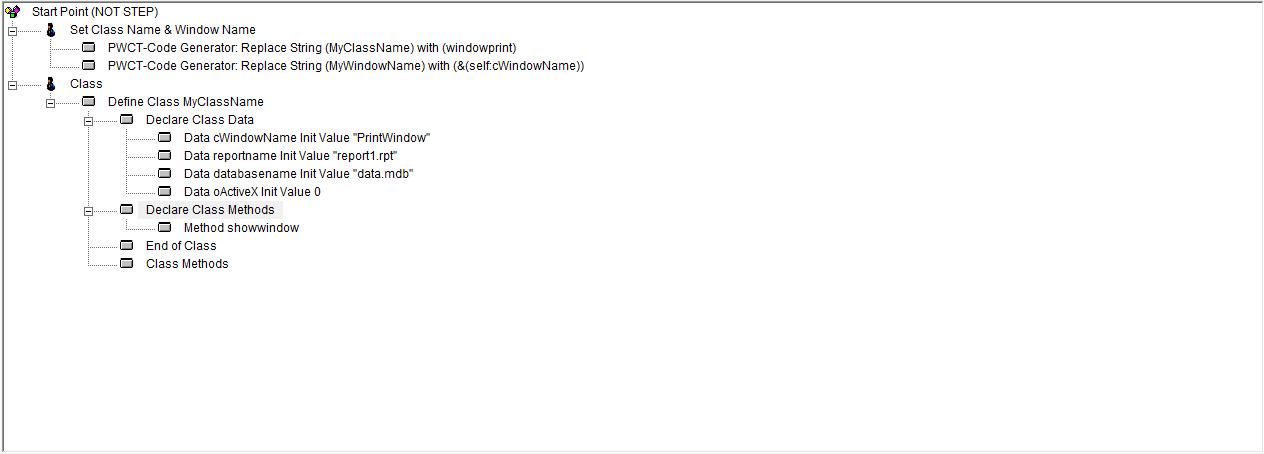
Fig. (22) Goal Desginer - Steps Tree Select the step (Declare Class Methods) We will start now new interaction process to generate new steps to our steps tree. The slow way (Using Mouse): 1 - Click Interact to open the components browser 2 - Select the domain (Object Oriented Programming (OOP)) 3 - Select the component (Declare Class Method) The fast way (Using Keyboard shortcuts): 1 - Get the component using its name by typing (Declare Class Method) Note : Stop typing when you see the required component is selected
Fig. (23) Component Browser – Select the component (Declare Class Method) After selecting the component click Ok or press ENTER
Fig. (24) Interaction page - Set the properties and enter the required data as in the image above
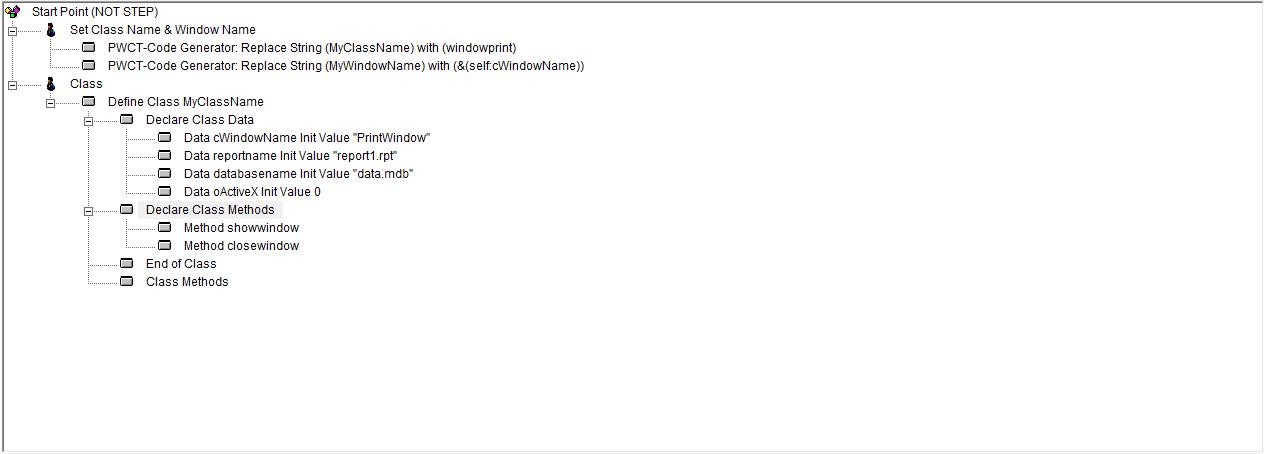
Fig. (25) Goal Desginer - Steps Tree Select the step (Declare Class Methods) We will start now new interaction process to generate new steps to our steps tree. The slow way (Using Mouse): 1 - Click Interact to open the components browser 2 - Select the domain (Object Oriented Programming (OOP)) 3 - Select the component (Declare Class Method) The fast way (Using Keyboard shortcuts): 1 - Get the component using its name by typing (Declare Class Method) Note : Stop typing when you see the required component is selected
Fig. (26) Component Browser – Select the component (Declare Class Method) After selecting the component click Ok or press ENTER
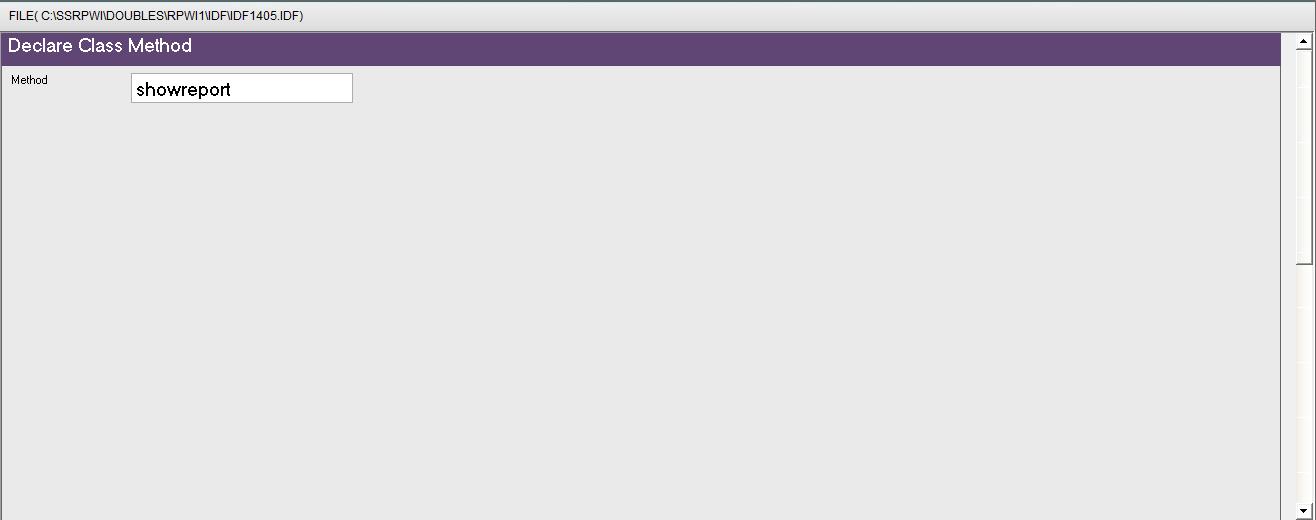
Fig. (27) Interaction page - Set the properties and enter the required data as in the image above
Fig. (28) Goal Desginer - Steps Tree Select the step (Declare Class Methods) We will start now new interaction process to generate new steps to our steps tree. The slow way (Using Mouse): 1 - Click Interact to open the components browser 2 - Select the domain (Object Oriented Programming (OOP)) 3 - Select the component (Declare Class Method) The fast way (Using Keyboard shortcuts): 1 - Get the component using its name by typing (Declare Class Method) Note : Stop typing when you see the required component is selected
Fig. (29) Component Browser – Select the component (Declare Class Method) After selecting the component click Ok or press ENTER
Fig. (30) Interaction page - Set the properties and enter the required data as in the image above
Fig. (31) Goal Desginer - Steps Tree Select the step (Class Methods) We will start now new interaction process to generate new steps to our steps tree. The slow way (Using Mouse): 1 - Click Interact to open the components browser 2 - Select the domain (Object Oriented Programming (OOP)) 3 - Select the component (Define Class Method) The fast way (Using Keyboard shortcuts): 1 - Get the component using its name by typing (Define Class Method) Note : Stop typing when you see the required component is selected
Fig. (32) Component Browser – Select the component (Define Class Method) After selecting the component click Ok or press ENTER
Fig. (33) Interaction page - Set the properties and enter the required data as in the image above
Fig. (34) Goal Desginer - Steps Tree Select the step (Start Here) We will start now new interaction process to generate new steps to our steps tree. The slow way (Using Mouse): 1 - Click Interact to open the components browser 2 - Select the domain (Windows) 3 - Select the component (Define New Window) The fast way (Using Keyboard shortcuts): 1 - Get the component using its name by typing (Define New Window) Note : Stop typing when you see the required component is selected
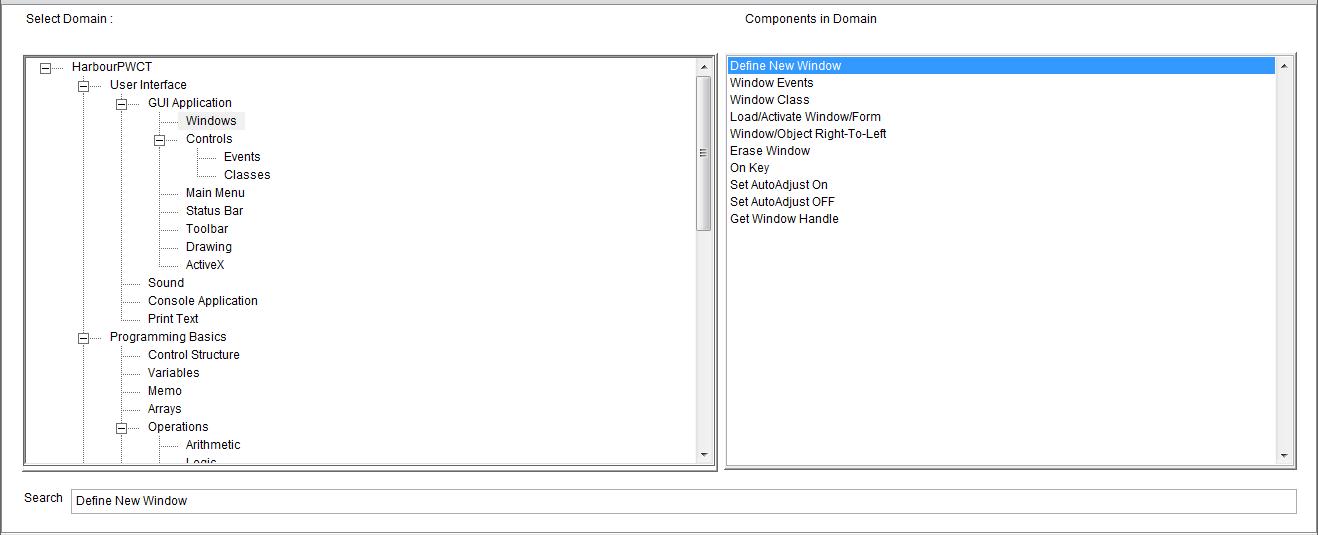
Fig. (35) Component Browser – Select the component (Define New Window) After selecting the component click Ok or press ENTER
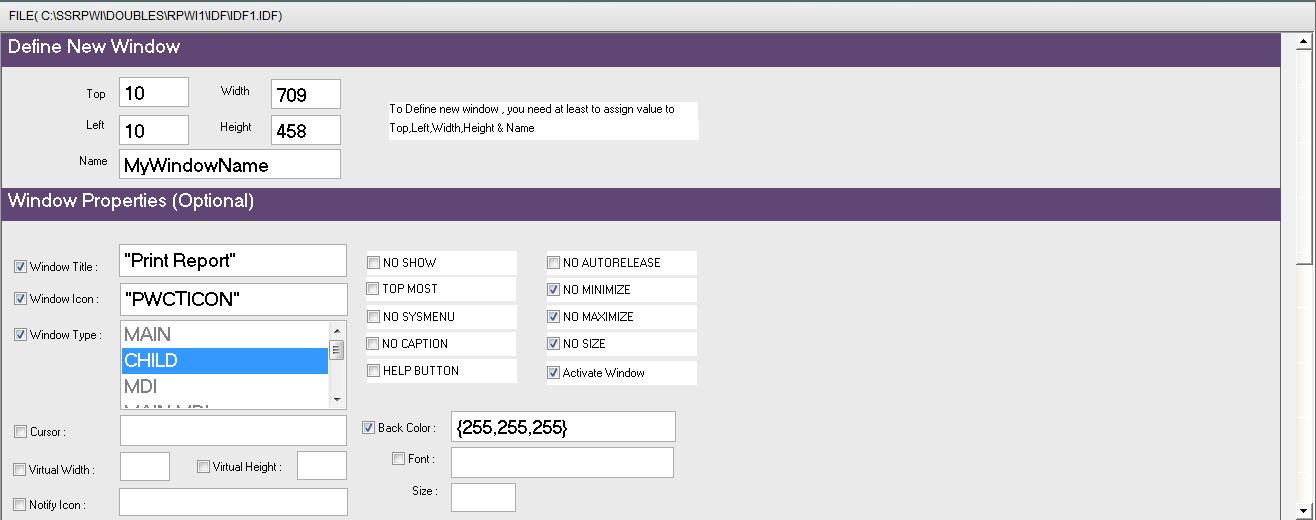
Fig. (36) Interaction page - Set the properties and enter the required data as in the image above
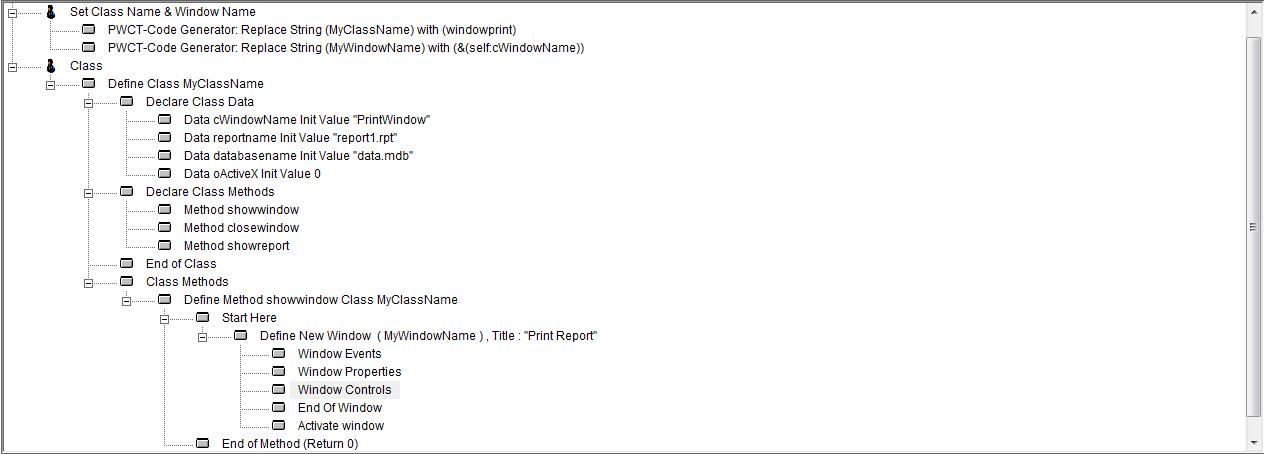
Fig. (37) Form Designer
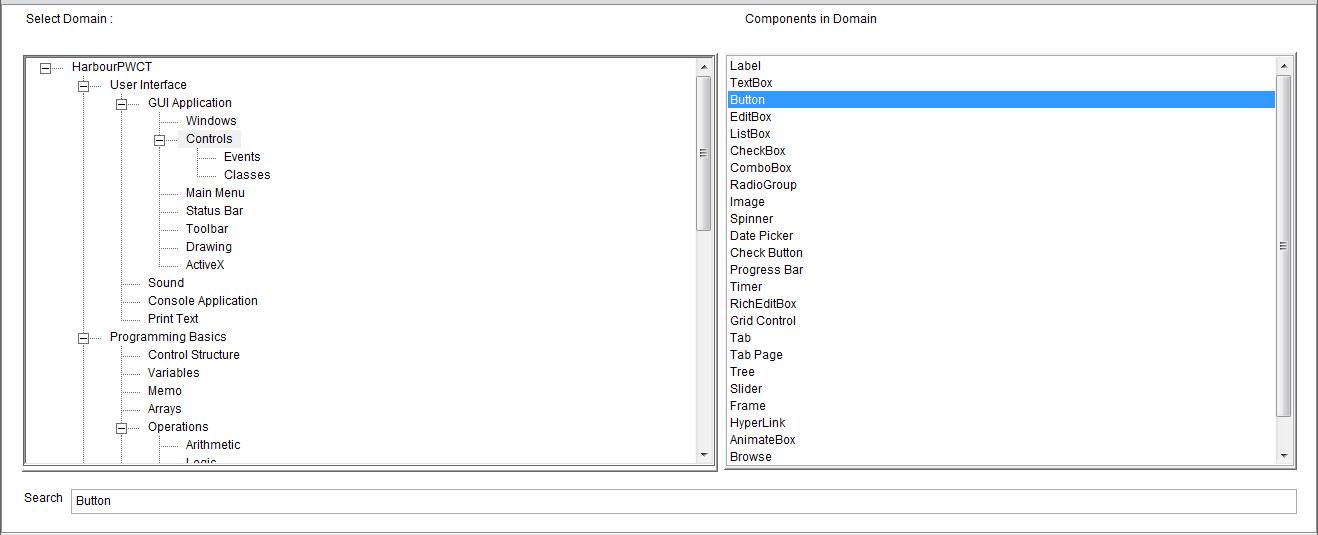
Fig. (38) Goal Desginer - Steps Tree Select the step (Window Controls) We will start now new interaction process to generate new steps to our steps tree. The slow way (Using Mouse): 1 - Click Interact to open the components browser 2 - Select the domain (Controls) 3 - Select the component (Button) The fast way (Using Keyboard shortcuts): 1 - Get the component using its name by typing (Button) Note : Stop typing when you see the required component is selected
Fig. (39) Component Browser – Select the component (Button) After selecting the component click Ok or press ENTER
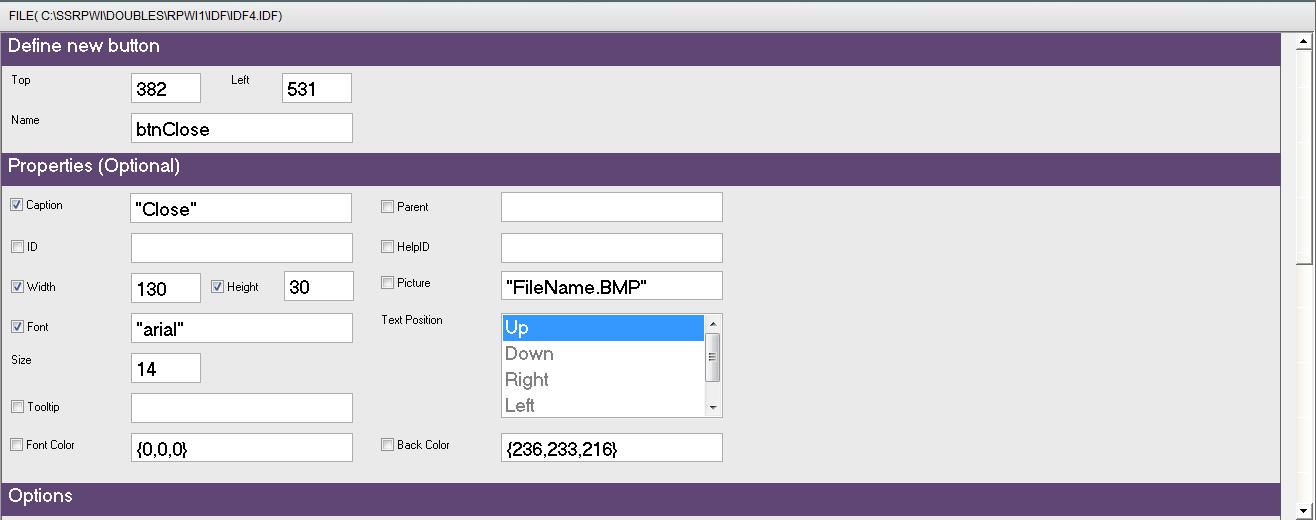
Fig. (40) Interaction page - Set the properties and enter the required data as in the image above
Fig. (41) Form Designer
Fig. (42) Goal Desginer - Steps Tree Select the step (Button Events) We will start now new interaction process to generate new steps to our steps tree. The slow way (Using Mouse): 1 - Click Interact to open the components browser 2 - Select the domain (Events) 3 - Select the component (Button Events) The fast way (Using Keyboard shortcuts): 1 - Get the component using its name by typing (Button Events) Note : Stop typing when you see the required component is selected
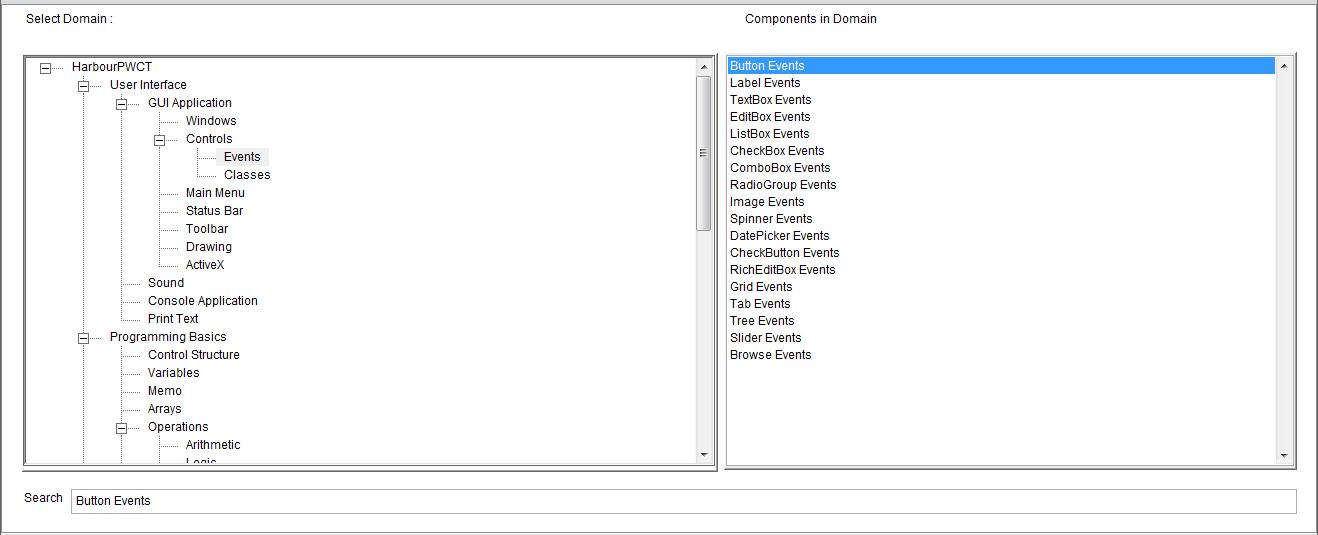
Fig. (43) Component Browser – Select the component (Button Events) After selecting the component click Ok or press ENTER
Fig. (44) Interaction page - Set the properties and enter the required data as in the image above
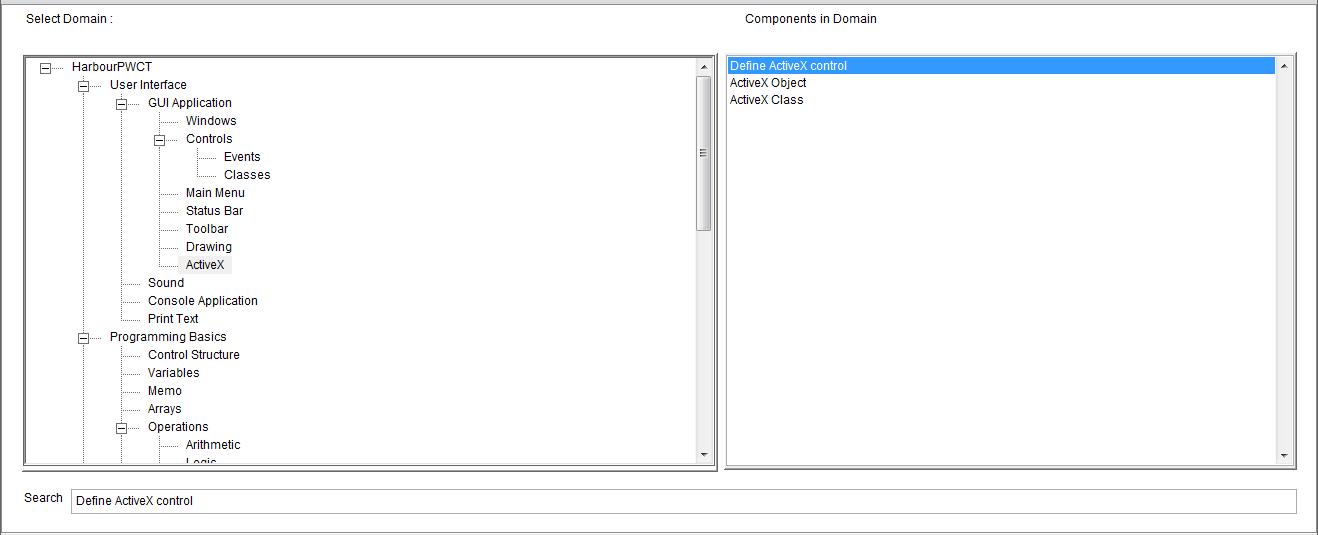
Fig. (45) Goal Desginer - Steps Tree Select the step (Window Controls) We will start now new interaction process to generate new steps to our steps tree. The slow way (Using Mouse): 1 - Click Interact to open the components browser 2 - Select the domain (ActiveX) 3 - Select the component (Define ActiveX control) The fast way (Using Keyboard shortcuts): 1 - Get the component using its name by typing (Define ActiveX control) Note : Stop typing when you see the required component is selected
Fig. (46) Component Browser – Select the component (Define ActiveX control) After selecting the component click Ok or press ENTER
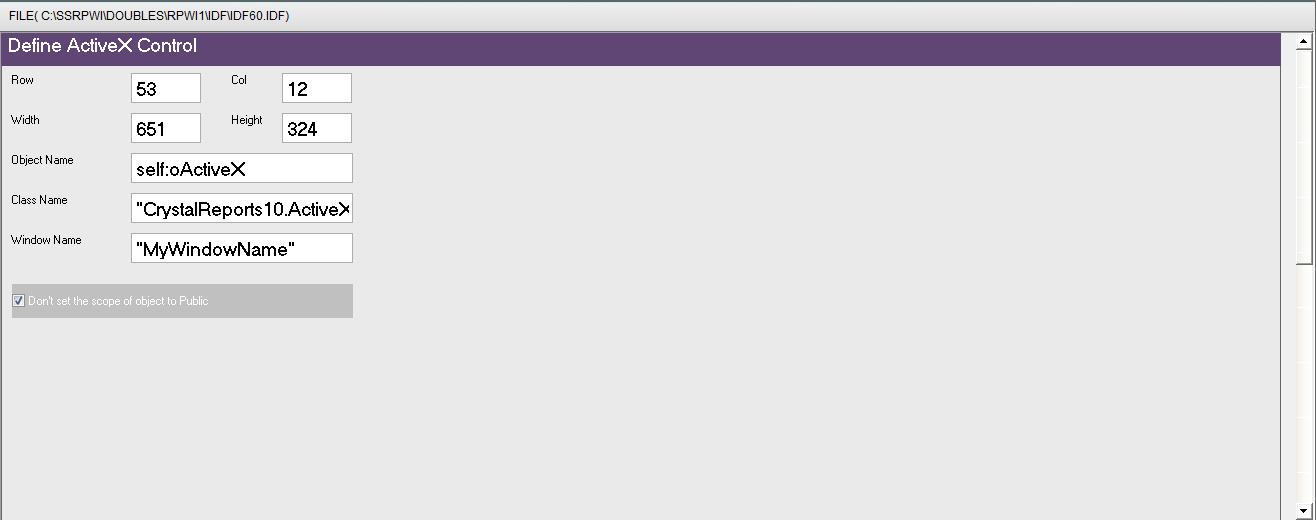
Fig. (47) Interaction page - Set the properties and enter the required data as in the image above
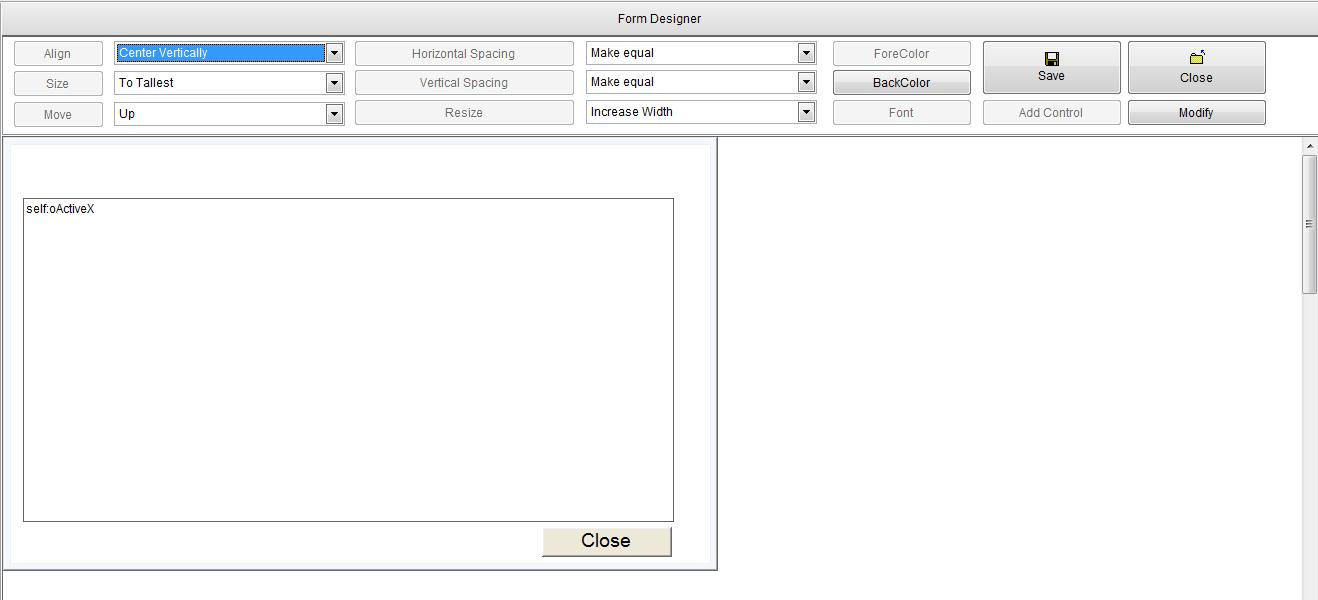
Fig. (48) Form Designer
Fig. (49) Goal Desginer - Steps Tree Select the step (Window Controls) We will start now new interaction process to generate new steps to our steps tree. The slow way (Using Mouse): 1 - Click Interact to open the components browser 2 - Select the domain (Controls) 3 - Select the component (Button) The fast way (Using Keyboard shortcuts): 1 - Get the component using its name by typing (Button) Note : Stop typing when you see the required component is selected
Fig. (50) Component Browser – Select the component (Button) After selecting the component click Ok or press ENTER
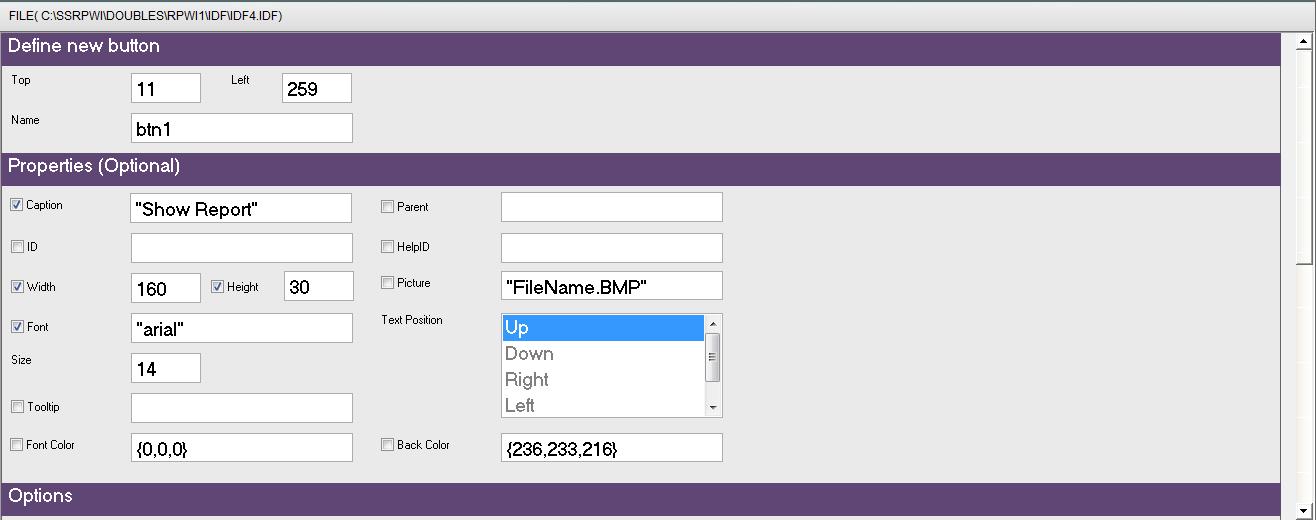
Fig. (51) Interaction page - Set the properties and enter the required data as in the image above
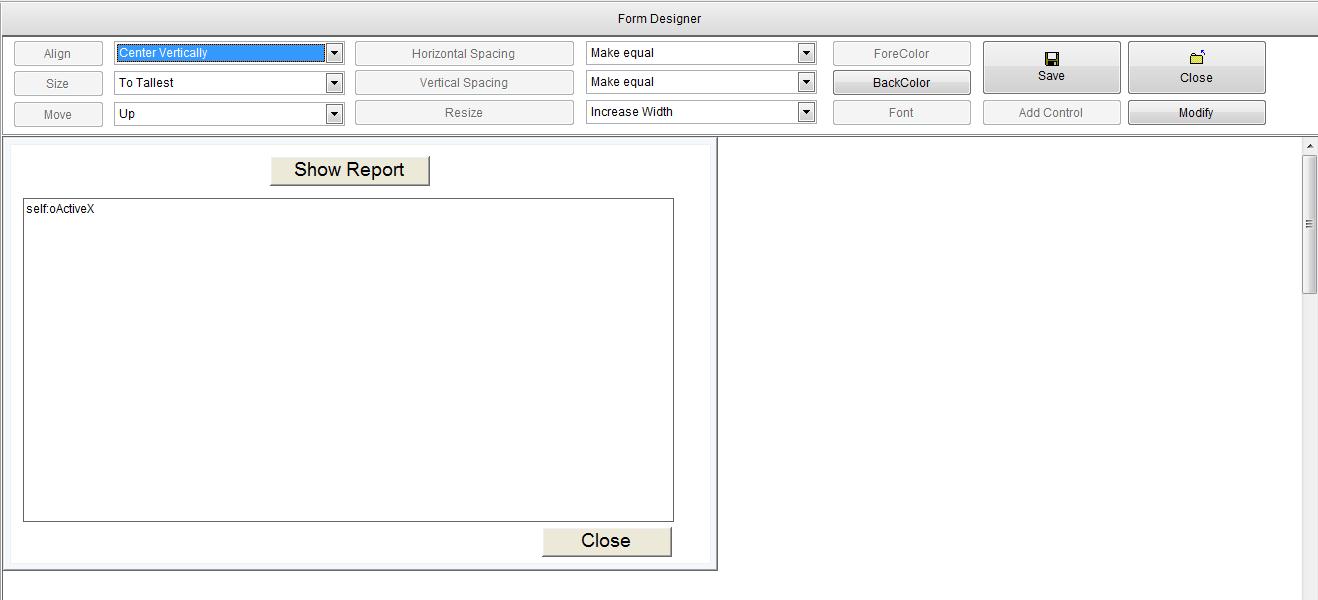
Fig. (52) Form Designer
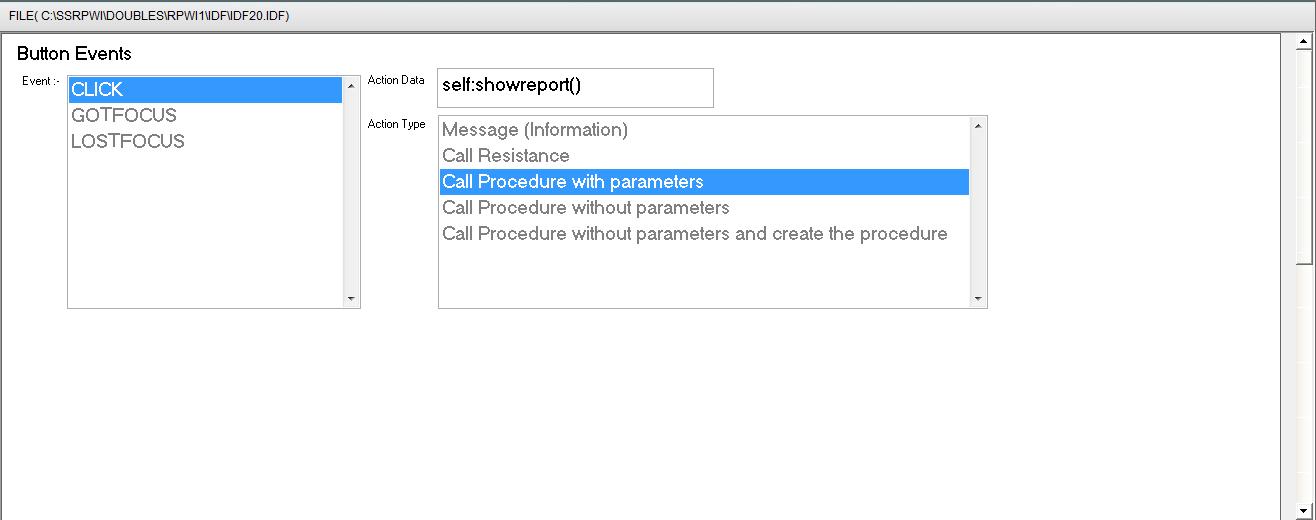
Fig. (53) Goal Desginer - Steps Tree Select the step (Button Events) We will start now new interaction process to generate new steps to our steps tree. The slow way (Using Mouse): 1 - Click Interact to open the components browser 2 - Select the domain (Events) 3 - Select the component (Button Events) The fast way (Using Keyboard shortcuts): 1 - Get the component using its name by typing (Button Events) Note : Stop typing when you see the required component is selected
Fig. (54) Component Browser – Select the component (Button Events) After selecting the component click Ok or press ENTER
Fig. (55) Interaction page - Set the properties and enter the required data as in the image above
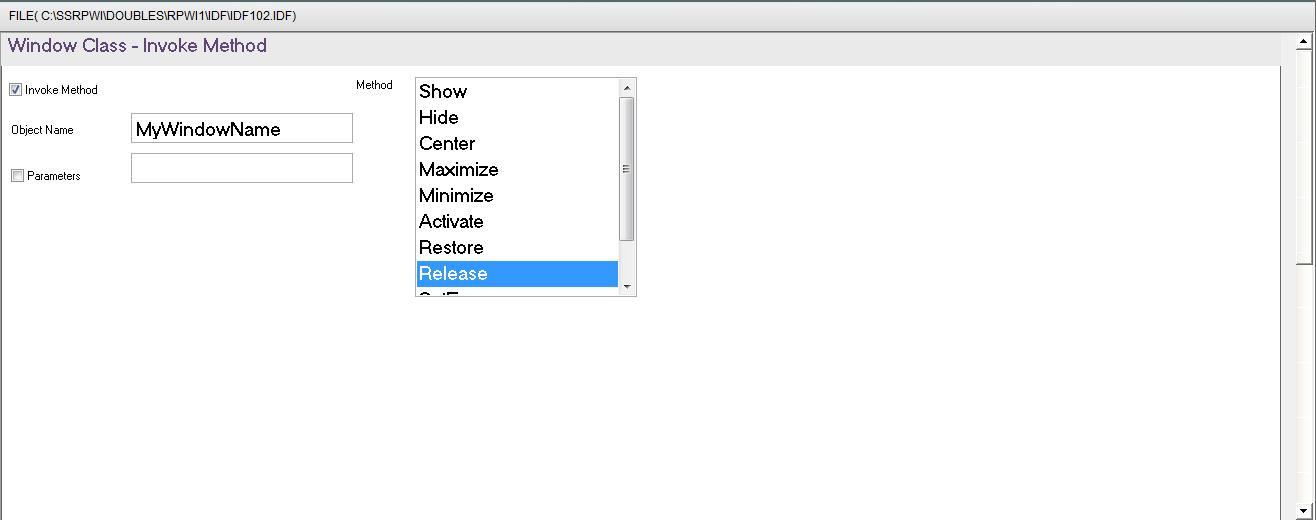
Fig. (56) Goal Desginer - Steps Tree Select the step (Define New Window ( MyWindowName ) , Title : "Print Report") We will start now new interaction process to generate new steps to our steps tree. The slow way (Using Mouse): 1 - Click Interact to open the components browser 2 - Select the domain (Windows) 3 - Select the component (Window Class) The fast way (Using Keyboard shortcuts): 1 - Get the component using its name by typing (Window Class) Note : Stop typing when you see the required component is selected
Fig. (57) Component Browser – Select the component (Window Class) After selecting the component click Ok or press ENTER
Fig. (58) Interaction page - Set the properties and enter the required data as in the image above
Fig. (59) Interaction page - Set the properties and enter the required data as in the image above
Fig. (60) Interaction page - Set the properties and enter the required data as in the image above
Fig. (61) Form Designer
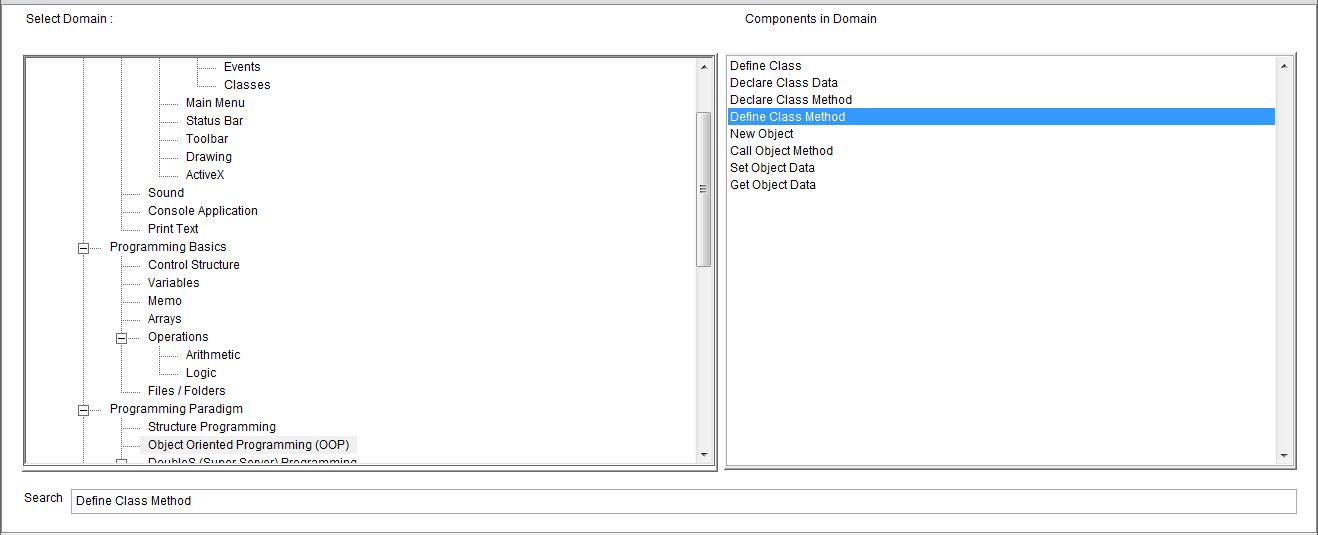
Fig. (62) Goal Desginer - Steps Tree Select the step (Class Methods) We will start now new interaction process to generate new steps to our steps tree. The slow way (Using Mouse): 1 - Click Interact to open the components browser 2 - Select the domain (Object Oriented Programming (OOP)) 3 - Select the component (Define Class Method) The fast way (Using Keyboard shortcuts): 1 - Get the component using its name by typing (Define Class Method) Note : Stop typing when you see the required component is selected
Fig. (63) Component Browser – Select the component (Define Class Method) After selecting the component click Ok or press ENTER
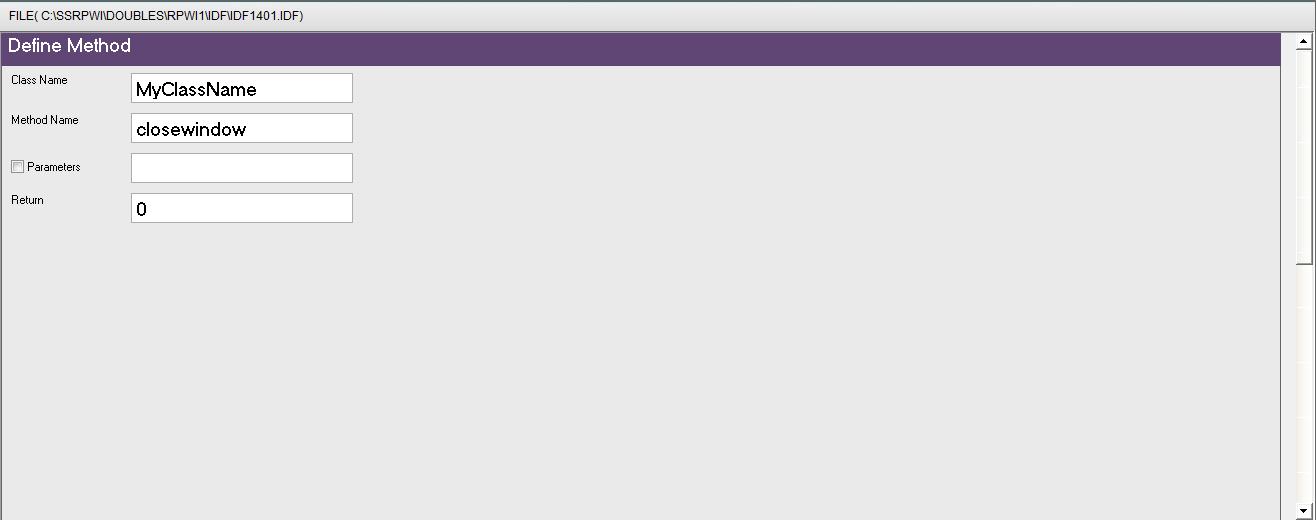
Fig. (64) Interaction page - Set the properties and enter the required data as in the image above
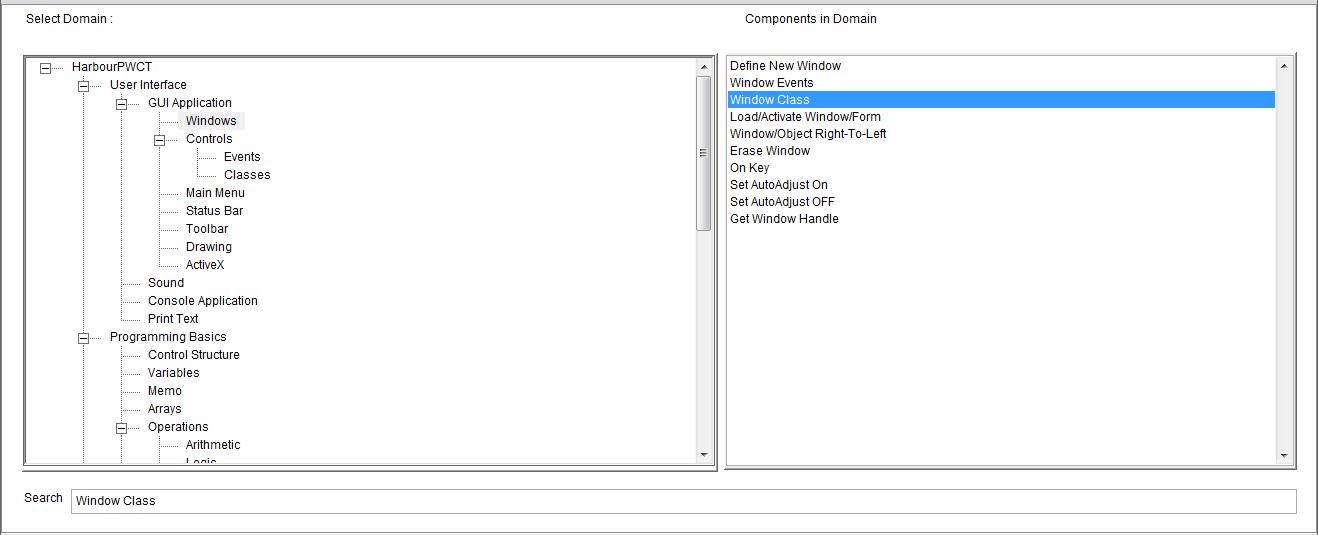
Fig. (65) Goal Desginer - Steps Tree Select the step (Start Here) We will start now new interaction process to generate new steps to our steps tree. The slow way (Using Mouse): 1 - Click Interact to open the components browser 2 - Select the domain (Windows) 3 - Select the component (Window Class) The fast way (Using Keyboard shortcuts): 1 - Get the component using its name by typing (Window Class) Note : Stop typing when you see the required component is selected
Fig. (66) Component Browser – Select the component (Window Class) After selecting the component click Ok or press ENTER
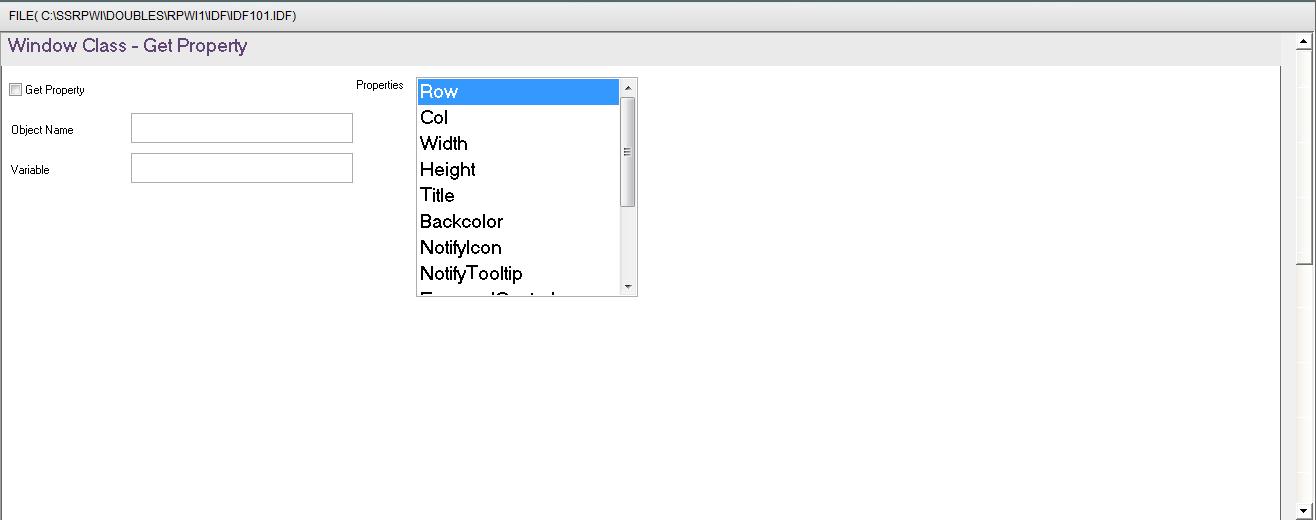
Fig. (67) Interaction page - Set the properties and enter the required data as in the image above
Fig. (68) Interaction page - Set the properties and enter the required data as in the image above
Fig. (69) Interaction page - Set the properties and enter the required data as in the image above
Fig. (70) Goal Desginer - Steps Tree Select the step (Class Methods) We will start now new interaction process to generate new steps to our steps tree. The slow way (Using Mouse): 1 - Click Interact to open the components browser 2 - Select the domain (Object Oriented Programming (OOP)) 3 - Select the component (Define Class Method) The fast way (Using Keyboard shortcuts): 1 - Get the component using its name by typing (Define Class Method) Note : Stop typing when you see the required component is selected
Fig. (71) Component Browser – Select the component (Define Class Method) After selecting the component click Ok or press ENTER
Fig. (72) Interaction page - Set the properties and enter the required data as in the image above
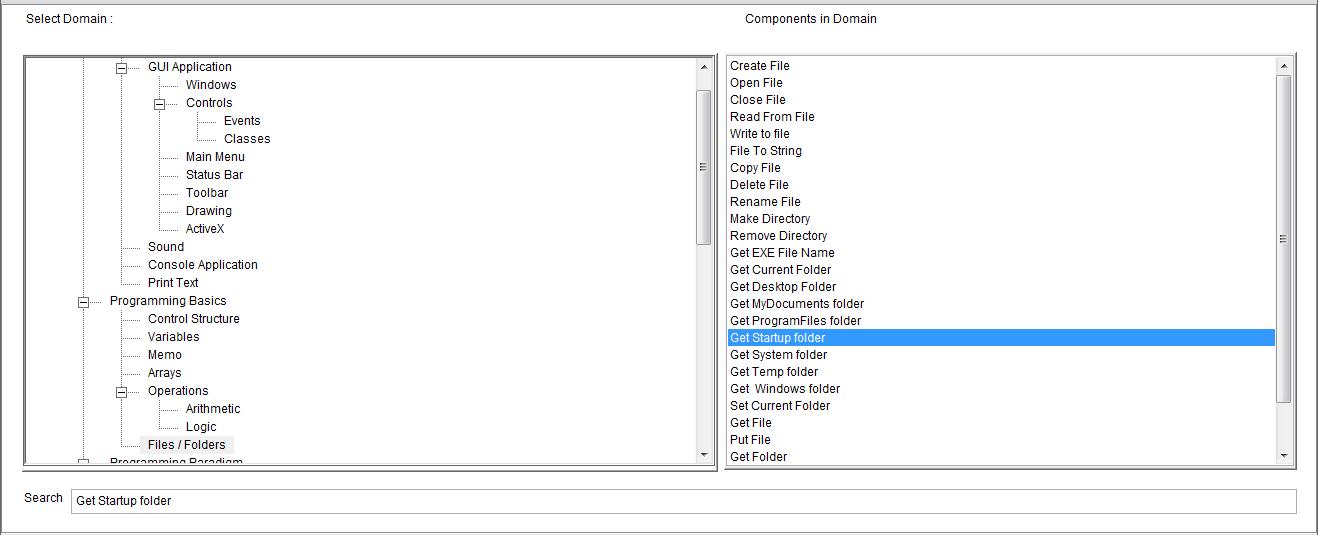
Fig. (73) Goal Desginer - Steps Tree Select the step (Start Here) We will start now new interaction process to generate new steps to our steps tree. The slow way (Using Mouse): 1 - Click Interact to open the components browser 2 - Select the domain (Files / Folders) 3 - Select the component (Get Startup folder) The fast way (Using Keyboard shortcuts): 1 - Get the component using its name by typing (Get Startup folder) Note : Stop typing when you see the required component is selected
Fig. (74) Component Browser – Select the component (Get Startup folder) After selecting the component click Ok or press ENTER
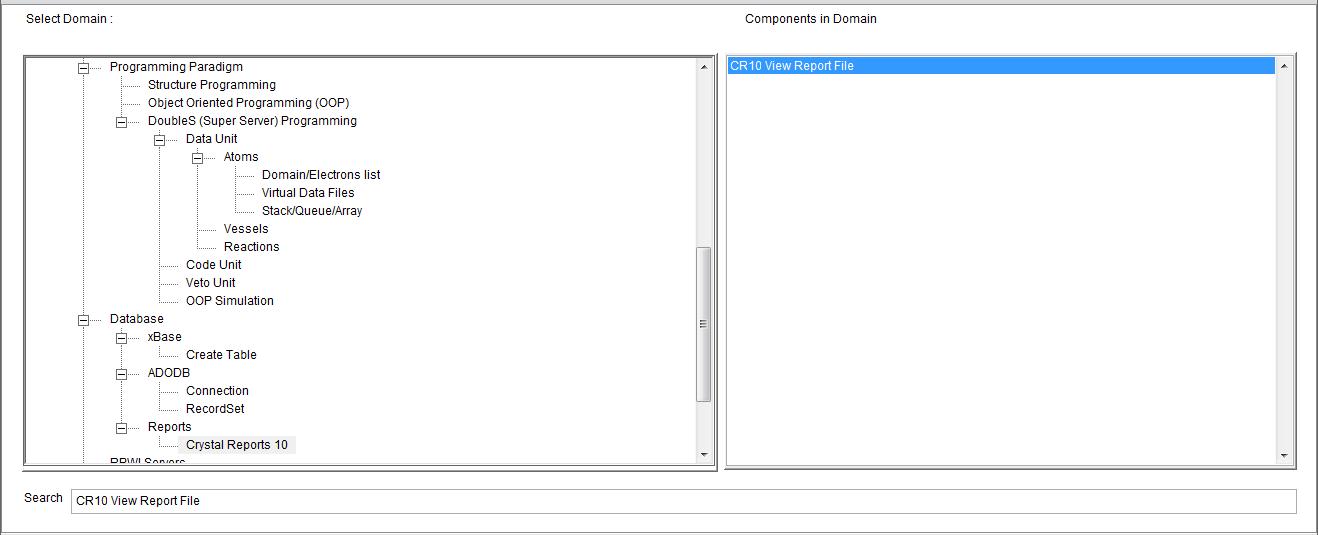
Fig. (75) Goal Desginer - Steps Tree Select the step (Start Here) We will start now new interaction process to generate new steps to our steps tree. The slow way (Using Mouse): 1 - Click Interact to open the components browser 2 - Select the domain (Crystal Reports 10) 3 - Select the component (CR10 View Report File) The fast way (Using Keyboard shortcuts): 1 - Get the component using its name by typing (CR10 View Report File) Note : Stop typing when you see the required component is selected
Fig. (76) Component Browser – Select the component (CR10 View Report File) After selecting the component click Ok or press ENTER
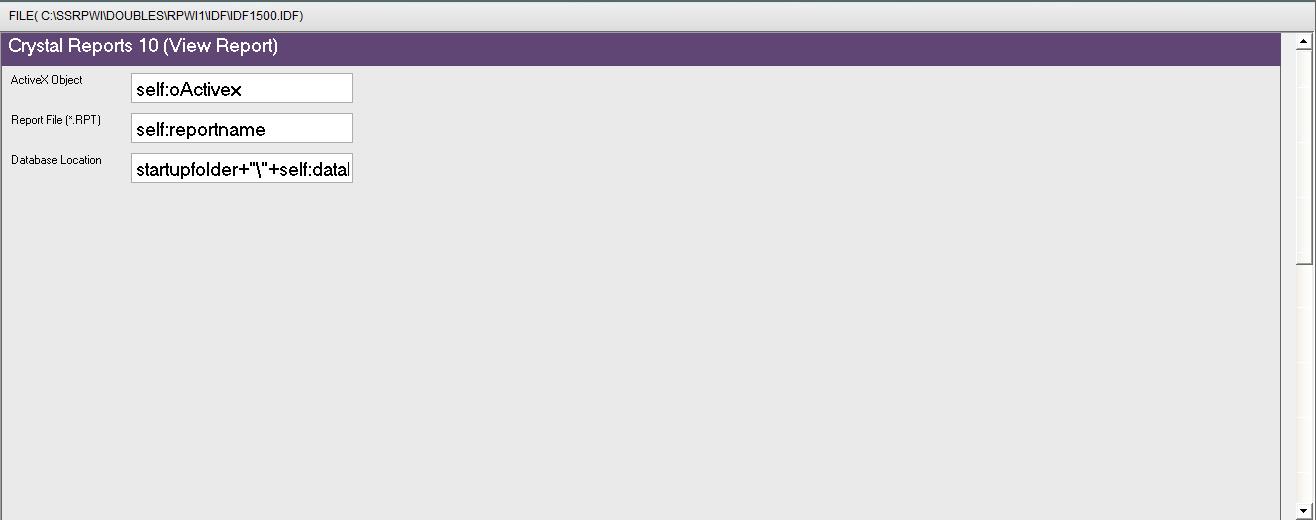
Fig. (77) Interaction page - Set the properties and enter the required data as in the image above
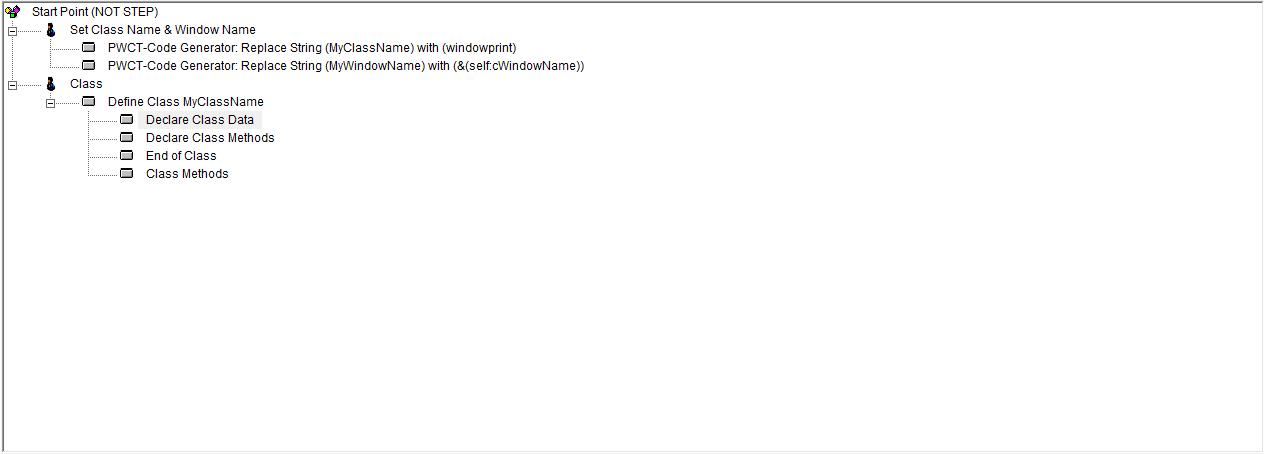
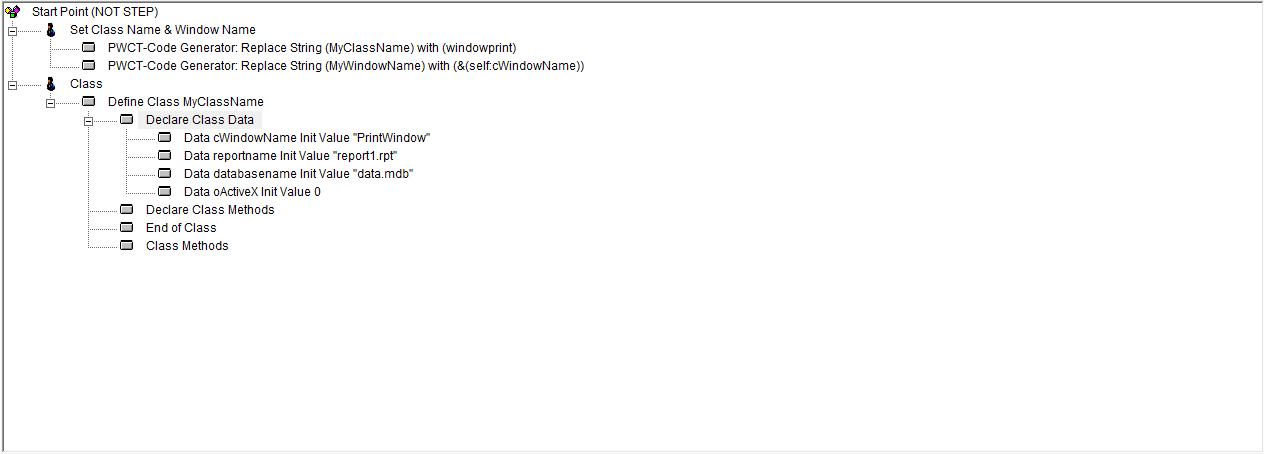
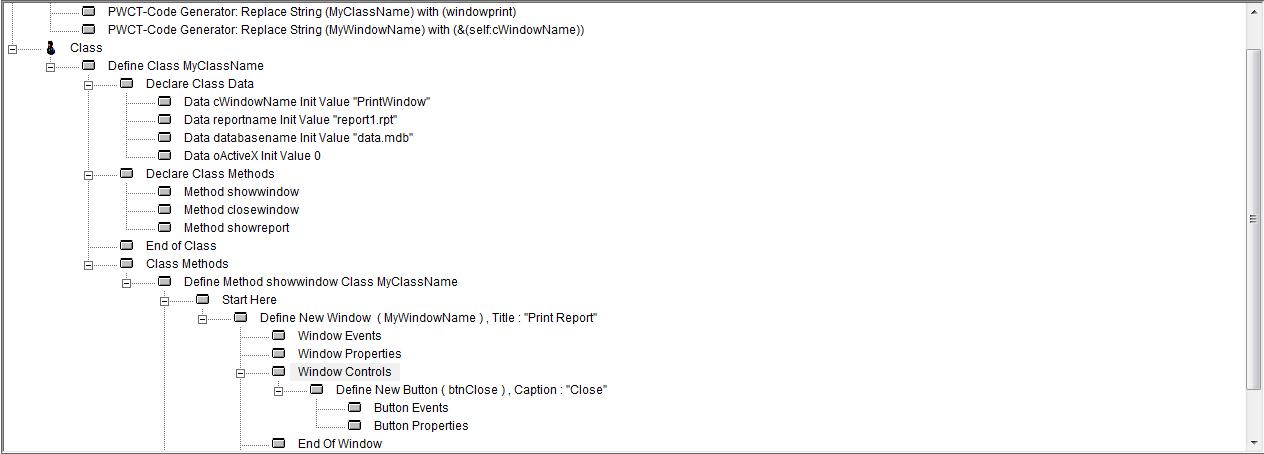
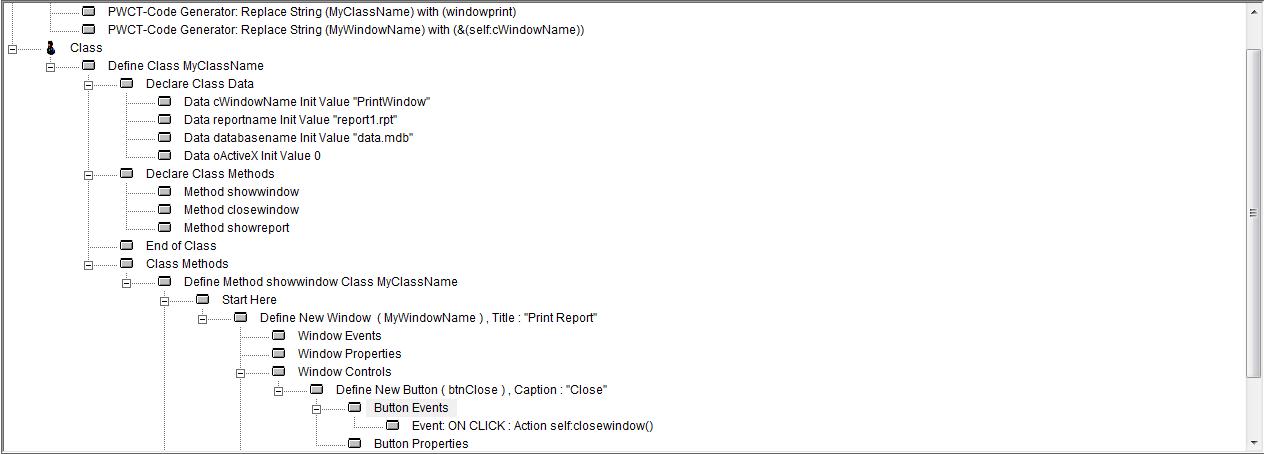
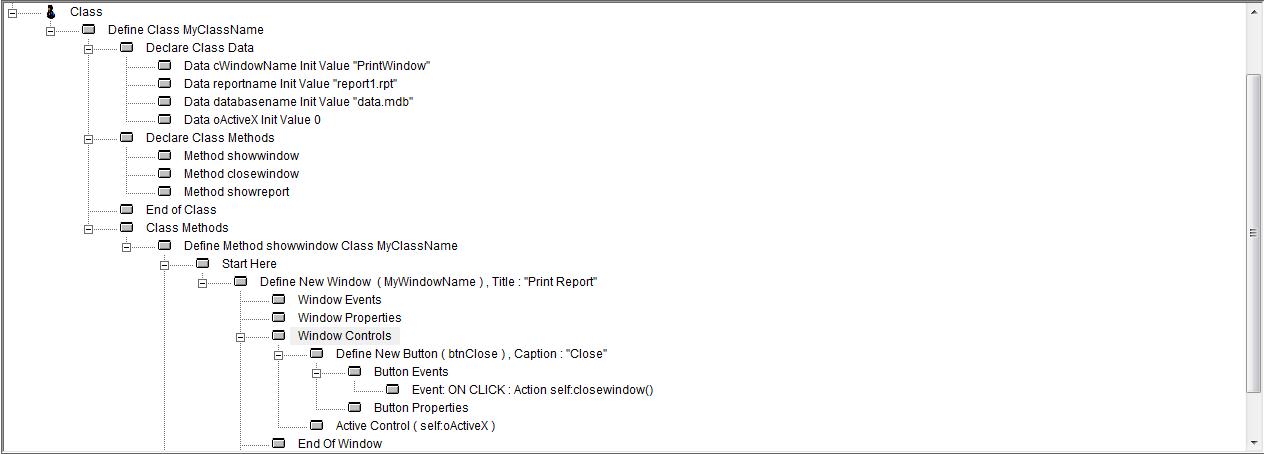
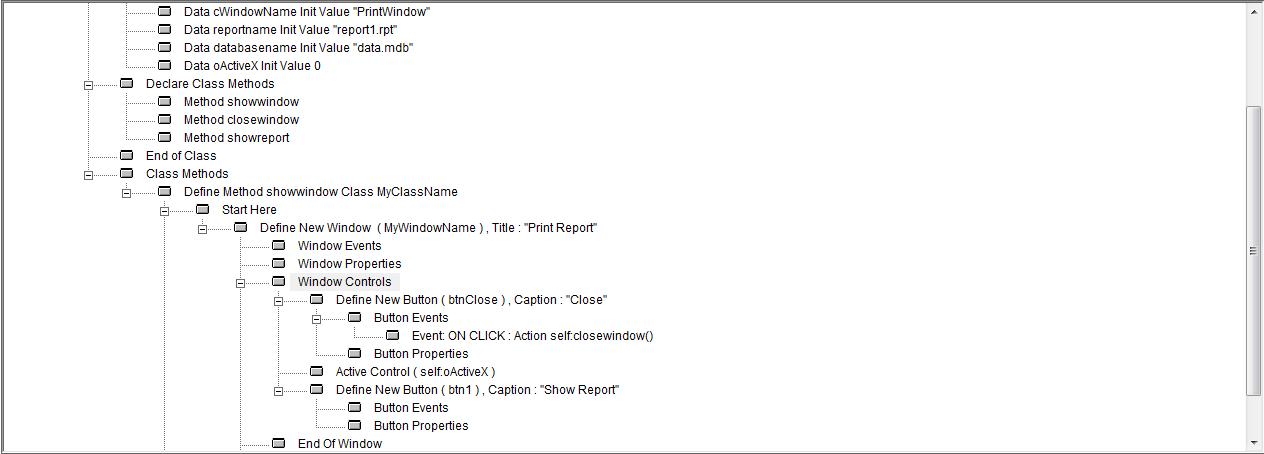
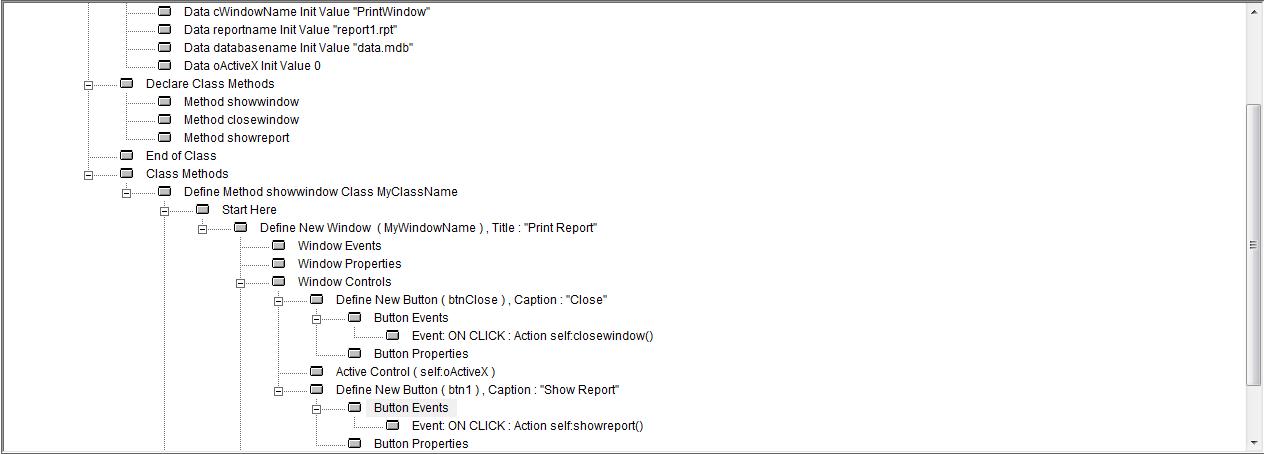
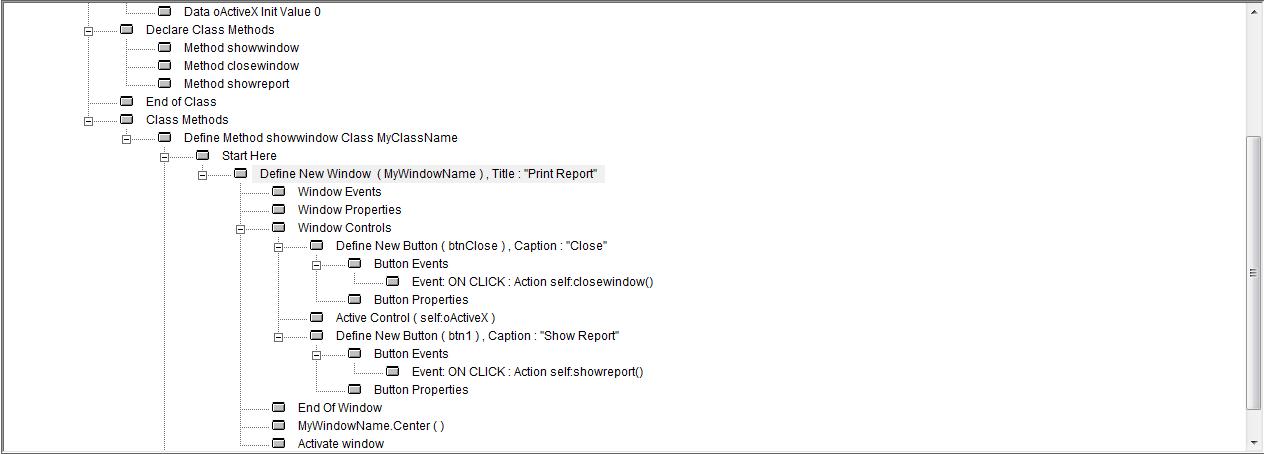
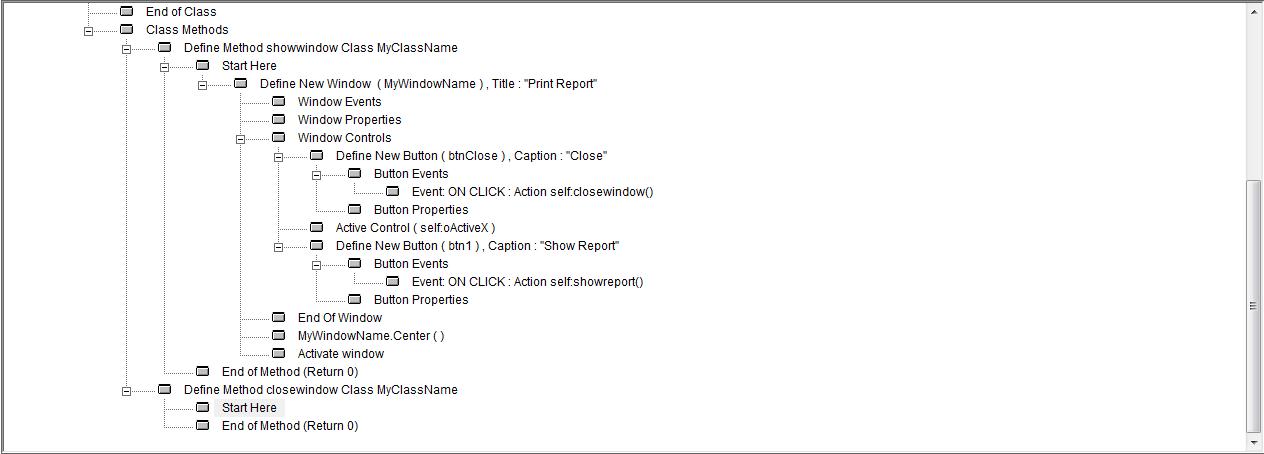
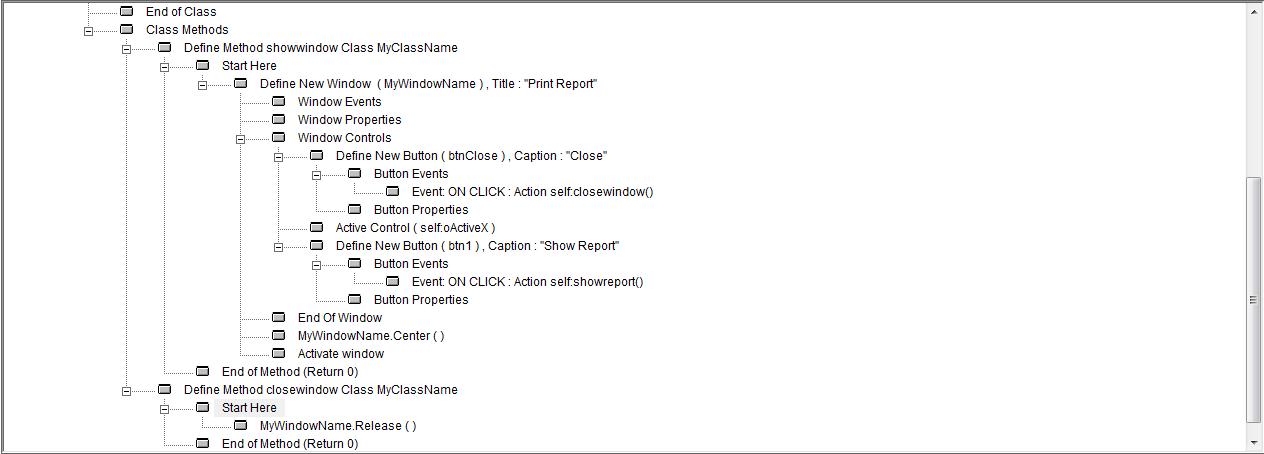
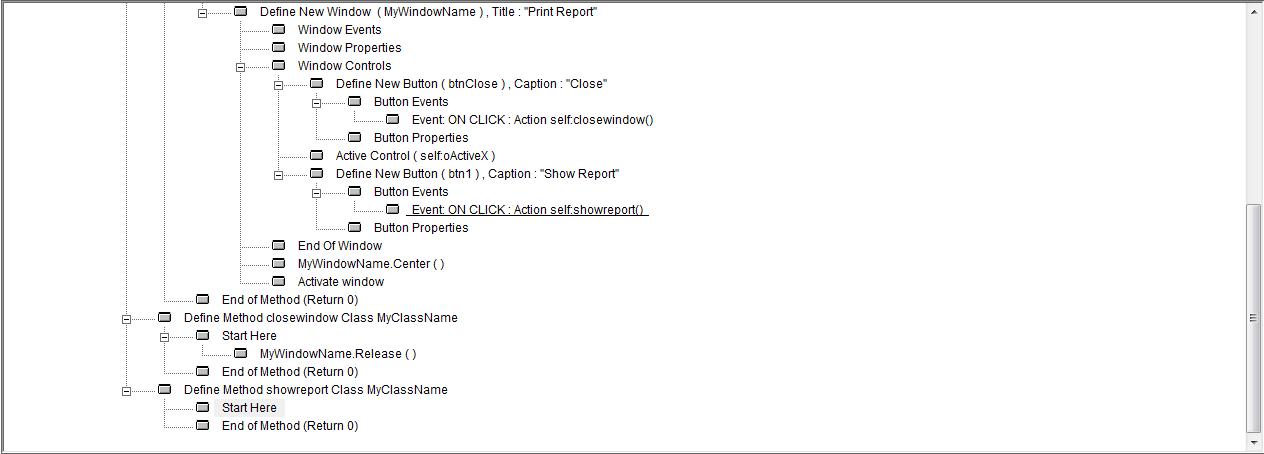
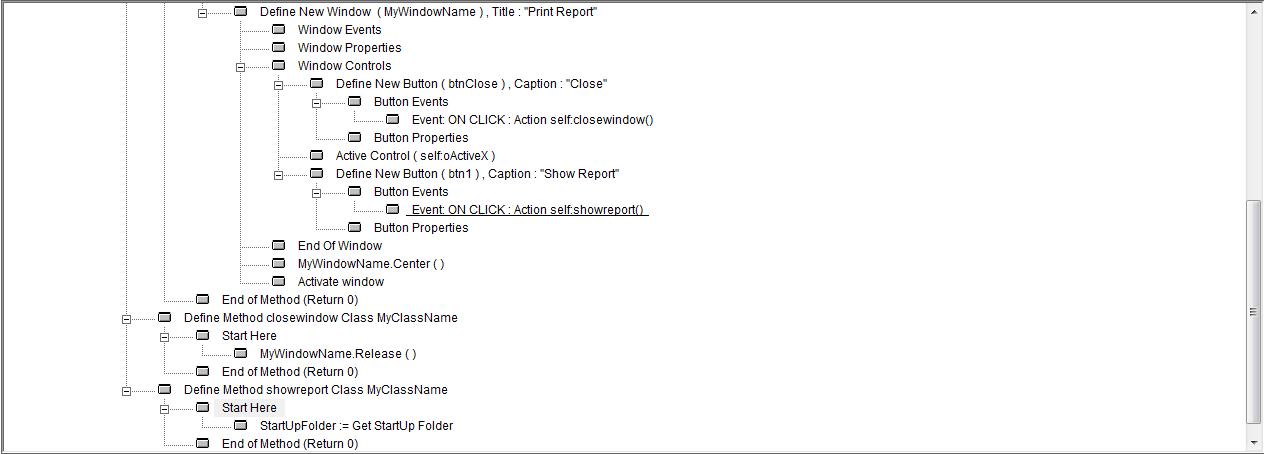
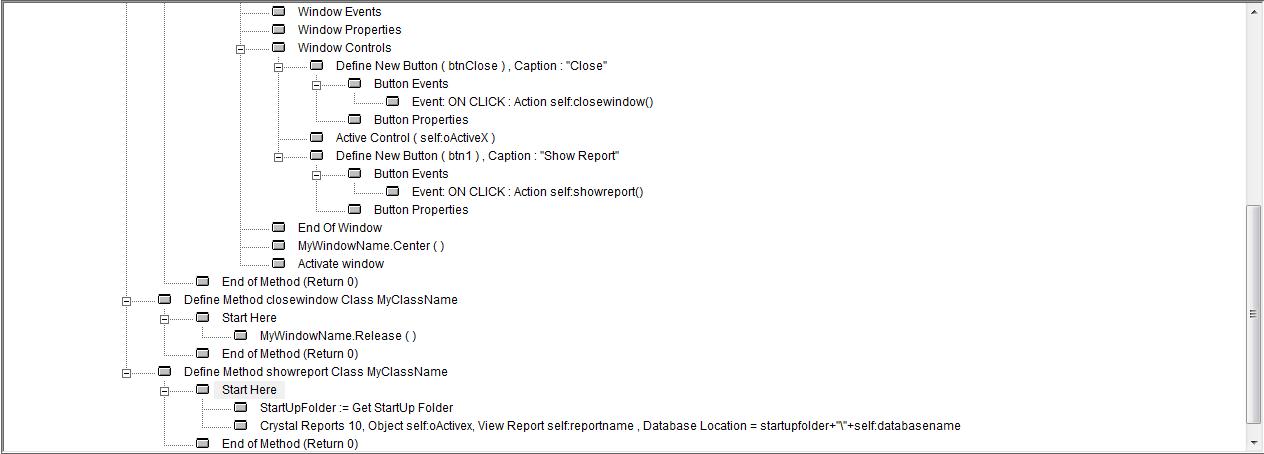
Fig. (78) Goal Desginer - Final Steps Tree 3 - Final Steps Tree Set Class Name & Window Name PWCT-Code Generator: Replace String (MyClassName) with (windowprint) PWCT-Code Generator: Replace String (MyWindowName) with (&(self:cWindowName)) Class Define Class MyClassName Declare Class Data Data cWindowName Init Value "PrintWindow" Data reportname Init Value "report1.rpt" Data databasename Init Value "data.mdb" Data oActiveX Init Value 0 Declare Class Methods Method showwindow Method closewindow Method showreport End of Class Class Methods Define Method showwindow Class MyClassName Start Here Define New Window ( MyWindowName ) , Title : "Print Report" Window Events Window Properties Window Controls Define New Button ( btnClose ) , Caption : "Close" Button Events Event: ON CLICK : Action self:closewindow() Button Properties Active Control ( self:oActiveX ) Define New Button ( btn1 ) , Caption : "Show Report" Button Events Event: ON CLICK : Action self:showreport() Button Properties End Of Window MyWindowName.Center ( ) Activate window End of Method (Return 0) Define Method closewindow Class MyClassName Start Here MyWindowName.Release ( ) End of Method (Return 0) Define Method showreport Class MyClassName Start Here StartUpFolder := Get StartUp Folder Crystal Reports 10, Object self:oActivex, View Report self:reportname , Database Location = startupfolder+"\"+self:databasename End of Method (Return 0)
|